

Restaurant Health Inspection Checklist | Ensure Compliance
A solid restaurant health inspection checklist isn't just another piece of paper. Think of it as your daily playbook—a tool that weaves compliance into the very fabric of your operations, turning a major source of stress into one of your biggest strengths. It’s your roadmap to keeping food safety standards sky-high, which protects your customers and, just as importantly, your hard-earned reputation.
Why Your Health Inspection Checklist Is Your Best Friend
We all know that heart-stopping moment when a health inspector walks in unannounced. But what if it didn't have to be that way?
The trick is to stop thinking of an inspection as a pop quiz you have to cram for. Instead, see it as a chance to show off your commitment to doing things the right way. When you build a culture of being "inspection-ready" every single day, you're not just dodging violations. You're protecting your brand, boosting your team's confidence, and earning a level of customer trust that you can't buy.
The stakes are higher than most people realize. The World Health Organization estimates a staggering 600 million people get sick from contaminated food each year. That's nearly 1 in 10 people on the planet. Here in the U.S., the CDC tracks around 800 foodborne outbreaks annually, with a huge number tracing back to restaurants. It's worth a look at the latest food safety statistics to really understand why this diligence matters so much.
From Panicked Scrambling to Proactive Confidence
Far too many kitchens live in a state of reaction, kicking off a frantic cleaning spree only when they hear an inspector is in the area. That's a stressful and incredibly risky way to operate.
A well-thought-out checklist that’s part of your team's daily muscle memory completely flips that script. It creates a proactive culture where food safety is just how things are done, no questions asked.
I’ve seen restaurants get dinged for the smallest things—a scoop left in a sugar bin instead of in its proper holder, an unlabeled spray bottle under a sink. These tiny, preventable slip-ups are exactly what a daily checklist catches. They might seem minor, but they add up fast and can really shake an inspector's confidence in your whole operation.
This isn't just about avoiding a bad grade or a temporary shutdown. A proactive system delivers some serious wins for your business:
- Less Food Waste: When temperature logs are consistently monitored and storage is done by the book, you stop throwing money in the trash from spoilage.
- A Smoother Operation: Standardized procedures mean everyone is on the same page, which helps your kitchen run like a well-oiled machine.
- A Stellar Reputation: That "A" grade in the window is one of the most powerful marketing tools you have. It tells every potential customer that you take their well-being seriously.
Ultimately, your checklist stops being a list of chores and becomes the backbone of your restaurant's integrity. It transforms a source of anxiety into a genuine competitive edge, proving to both customers and inspectors that their safety is always your number one priority.
Mastering Temperature Control and Food Storage
When an inspector walks into your kitchen, the first thing they're likely to do is pull out their thermometer. It’s no surprise—improper temperature control is behind some of the most common and serious health code violations. Getting this right goes beyond just memorizing numbers; it's about making food safety an instinct for your entire team.
We all know the temperature danger zone: 41°F to 135°F (5°C to 57°C). This is the range where bacteria thrive. Your job is to keep high-risk foods (what the health department calls Time/Temperature Control for Safety, or TCS foods) out of this zone as much as humanly possible, from delivery to plating.

Foolproof Labeling and FIFO
Nothing screams "disorganized" to an inspector like an unlabeled walk-in cooler. The fix is a labeling system that’s simple, mandatory, and consistent. Every single container, whether it's prepped veggies or a big batch of sauce, needs a clear label.
Each label should have three essential pieces of information:
- Item Name: No mysteries—what's in the container?
- Prep Date: When was it made or opened?
- Use-By Date: This is typically seven days from the prep date (counting the day it was prepped as day one).
This isn't just busywork. It's the foundation of a real First-In, First-Out (FIFO) system. When new deliveries arrive, they go behind the older items. It's a simple, powerful habit that ensures you're using older food first, cutting down on waste and taking all the guesswork out of it for your cooks.
Proper Food Storage Hierarchy
Cross-contamination is one of those invisible dangers that inspectors are trained to spot from a mile away. The most obvious giveaway is how you've organized your coolers. The golden rule is simple: raw meat, poultry, and fish must always be stored below ready-to-eat (RTE) foods.
Think of your walk-in shelving like a building, organized by cooking temperature. The foods that get cooked the least (or not at all) live on the top floor, while the ones that need the highest cooking temperature live on the bottom floor. This prevents any raw juices from dripping down and contaminating something that won't be cooked.
Here’s how a perfectly organized storage rack should look, from top to bottom:
- Top Shelf: Ready-to-eat foods (salads, cooked leftovers, desserts)
- Second Shelf: Seafood
- Third Shelf: Whole cuts of beef and pork
- Fourth Shelf: Ground meat and ground fish
- Bottom Shelf: All poultry (whole and ground chicken, turkey)
The Two-Hour/Four-Hour Rule Explained
What about food that has to be in the danger zone during prep or service? For that, you need to know the two-hour/four-hour rule. It’s a lifesaver for managing buffets, salad bars, and busy service lines.
If a TCS food has been sitting between 41°F and 135°F:
- For 2 hours or less: You can safely pop it back in the cooler to use later.
- Between 2 and 4 hours: It's safe to use immediately, but it cannot be re-chilled.
- After 4 hours: It has to be thrown out. No exceptions.
Mastering these temperature and storage protocols is a non-negotiable part of any restaurant health inspection checklist. It's how you show an inspector you’re serious about food safety before they even have to ask.
Building Sanitation Protocols That Impress Inspectors
An inspector can spot a surface-level cleaning job from a mile away. Let's be honest, they've seen it all. True sanitation isn't about a frantic, last-minute wipe-down before they walk in the door; it's about building deep, consistent cleaning protocols into your daily, weekly, and monthly routines. This systematic approach is what shows an inspector you’re serious about safety, not just appearances.
First things first, everyone on your team needs to understand the difference between cleaning and sanitizing. It's one of the most fundamental concepts in kitchen safety, yet it's often confused.
Cleaning is just about what you can see—removing food particles, grease, and grime. Sanitizing is what you can't see—it’s the chemical process that kills pathogens and reduces them to a safe level. You absolutely must clean a surface before you sanitize it. If you don't, the sanitizer can't do its job properly, and you're just wasting time and product.
Getting this wrong is a huge red flag for inspectors. In fact, a comprehensive analysis of two million inspections found that 20% of them had violations related to improperly sanitized contact surfaces. That’s a massive number. This issue, along with poor handwashing and temperature control, accounts for the lion's share of foodborne illness risks.
Mastering the Three-Compartment Sink
The three-compartment sink is ground zero for manual warewashing, and you can bet your inspector will be checking it meticulously. Each compartment has a critical role, and the process has to be followed to the letter, every single time.
- Wash: The first sink is for hot water—at least 110°F (43°C)—and a good detergent. This is where you get in there with a brush and scrub every bit of food debris off. No shortcuts.
- Rinse: The second sink is simply for rinsing away all the soap suds with clean, warm water. Any leftover detergent can neutralize the sanitizer in the next step, so a thorough rinse is key.
- Sanitize: The third sink holds your chemical sanitizer, mixed precisely to the correct concentration and with water at the right temperature (check the manufacturer's instructions, as it's often lukewarm). Items have to be fully submerged for the required contact time, which is usually 30 to 60 seconds.
You also need to be constantly checking your sanitizer levels. For a typical chlorine-based sanitizer, the concentration should be between 50 and 100 parts per million (ppm). For quat sanitizers, it’s usually around 200 ppm. Keep test strips right by the sink and use them often.
Pro Tip: After sanitizing, everything must be air-dried. Never, ever use a towel to dry dishes. Towels are a breeding ground for bacteria and can instantly re-contaminate a perfectly clean dish. A well-organized, clean drying rack isn't a suggestion; it's a necessity.
The Deep-Cleaning Hit List
Inspectors are trained to look in the places you hope they won't. While your daily wipe-downs are important, it's the weekly and monthly deep-cleaning schedule that really demonstrates a commitment to a safe kitchen. Create a checklist and make these tasks non-negotiable.
Weekly Deep-Cleaning Tasks:
- Get Behind the Big Stuff: Pull fryers, ovens, and prep tables away from the wall. You need to clean the floors and walls behind them, where grease and grime love to hide.
- Attack the Floor Drains: Don't just pour cleaner down them. Remove the grates and give the drains a thorough scrubbing to prevent dangerous buildup and discourage pests.
- Wipe Down Refrigerator Gaskets: The rubber seals on cooler doors are a prime spot for mold and mildew. Wipe them down carefully.
Monthly Deep-Cleaning Tasks:
- Sanitize the Ice Machine: This is a big one. The entire machine needs to be emptied, cleaned, and sanitized according to the manufacturer's directions.
- Degrease the Exhaust Hoods: Clean the filters to prevent a serious fire hazard and make sure your ventilation system is working efficiently.
- Empty and Clean Storage Shelving: Take everything off your dry storage shelves and give them a full sanitizing wipe-down before restocking.
A structured cleaning schedule takes the guesswork out of the equation and ensures your kitchen is always in top shape. For a more exhaustive breakdown, take a look at our complete guide on food safety and sanitation guidelines to keep your operation pristine.
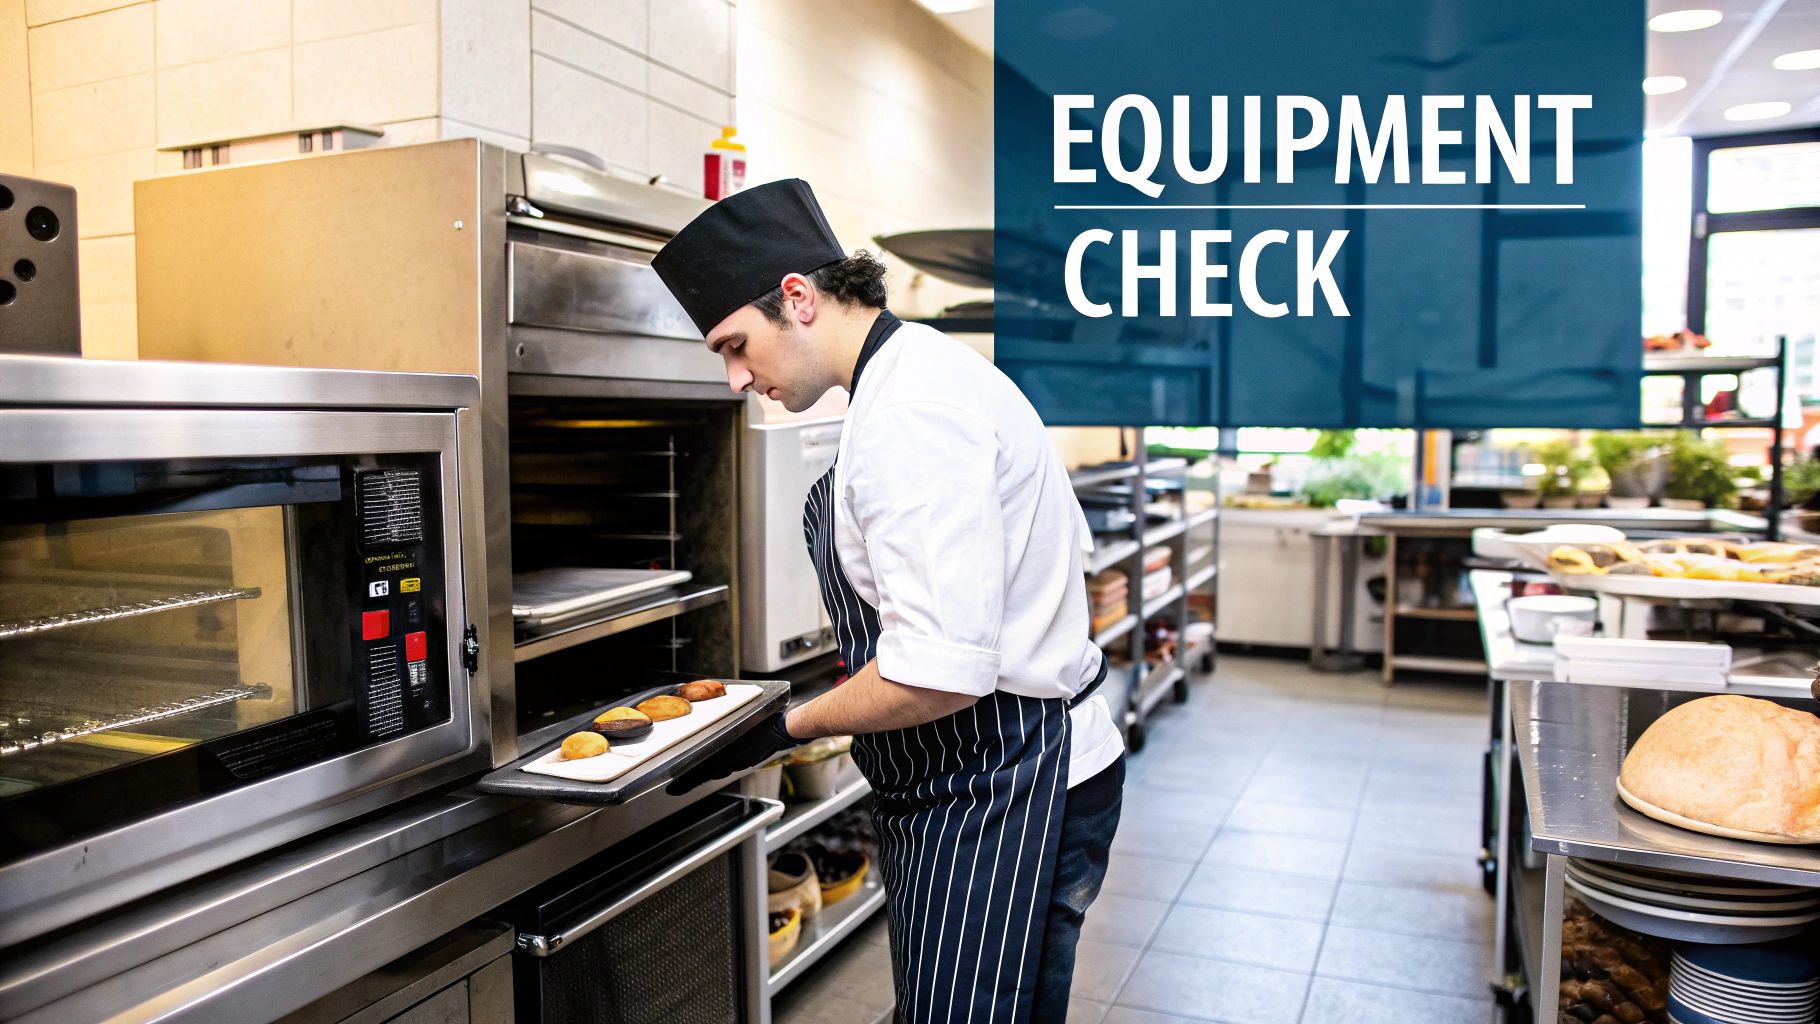
Choosing and Maintaining Inspection-Ready Equipment
When a health inspector walks into your kitchen, your equipment can be your best friend or your worst enemy. Picking the right gear and keeping it in top shape isn't just a good idea—it's a critical part of passing with flying colors. And it all starts with the workhorse of your kitchen: the prep table.
The surface you work on matters more than you might think. Inspectors are trained to look for materials that are smooth, non-porous, and a breeze to sanitize. This is exactly why stainless steel reigns supreme in any commercial kitchen.
But here’s something a lot of new owners don't realize: not all stainless steel is the same. You'll generally run into two types:
- 304-Grade Stainless Steel: This is the gold standard for any surface that touches food. It has more chromium and nickel, making it incredibly tough against rust and corrosion from all the salts, acids, and sanitizers you throw at it. It costs more upfront, but believe me, it’s a smart investment that pays for itself.
- 430-Grade Stainless Steel: This is the more budget-friendly choice. It’s still strong, but it's not as resistant to corrosion. You'll often see it used for things like table legs, undershelves, or equipment stands—places that don't have constant contact with acidic foods like tomatoes or citrus.
Here's my advice: for any surface where food is actually being prepped, chopped, or mixed, splurge on the 304-grade. An inspector will spot pitting or rust on a cheaper table in a heartbeat. Those little imperfections are perfect hiding spots for bacteria.
Specialized Prep Tables That Work for You
Beyond standard worktables, a variety of specialized prep tables are designed to solve specific workflow and food safety challenges. Choosing the right one can dramatically improve efficiency and impress an inspector.
A sandwich prep table, for instance, is a game-changer for delis, cafes, and restaurants with a heavy lunch service. These units feature a refrigerated base with cooled wells on top, keeping sliced meats, cheeses, and veggies consistently at or below the critical 41°F (5°C) mark. This design is crucial for safety, especially when lids are constantly opened during a rush, as it prevents staff from repeatedly accessing the main walk-in cooler, which helps maintain stable temperatures.
Similarly, a pizza prep table utilizes a raised, refrigerated rail to keep toppings chilled and organized. This setup ensures that from pepperoni to mushrooms, every ingredient stays safely out of the temperature danger zone, even during the busiest dinner service. It’s a perfect fusion of high-speed efficiency and uncompromising food safety.
Comparison of Common Prep Table Types
To better understand the options, let's compare some of the most common prep tables you'll find in a professional kitchen. Each one serves a specific purpose and offers unique benefits for keeping your food safe and your operation smooth.
| Table Type | Key Features | Primary Use | Food Safety Advantage |
|---|---|---|---|
| Standard Stainless Steel | Flat, durable, non-porous surface (ideally 304-grade). Often includes an undershelf. | General prep: chopping vegetables, portioning ingredients, assembling dishes. | Easy to clean and sanitize, preventing bacterial growth and cross-contamination. |
| Refrigerated Sandwich Prep | Refrigerated base with top-mounted, cooled wells for ingredient pans. Cutting board included. | Assembling sandwiches, salads, and subs. | Keeps perishable ingredients consistently below 41°F during active service. |
| Refrigerated Pizza Prep | Raised, refrigerated rail for holding toppings. Often has a wider surface for dough. | Building pizzas and flatbreads. | Ensures toppings stay out of the temperature danger zone, even with lids open. |
| Baker's Table | Typically features a wood or marble top, ideal for working with dough. | Kneading, rolling, and shaping bread and pastry dough. | Provides a non-stick, cool surface that prevents dough from warming too quickly. |
Choosing the right table for the job not only makes your kitchen run more efficiently but also builds a strong foundation for your food safety program, something any inspector will appreciate.
Maintenance That Meets Inspector Standards
Okay, you've got the right equipment. That’s step one. Now comes the hard part: keeping it meticulously maintained. An inspector can spot signs of neglect from a mile away, and those small issues often point to bigger problems.
Inspectors don't just look at the clean surfaces; they check the hidden spots. A dirty gasket on a refrigerator door, a clogged drain line in a dishwasher, or a buildup of grime inside an ice machine are all common—and easily preventable—violations that show a lack of attention to detail.
This is a great visual reminder of how often different areas of your kitchen need attention.
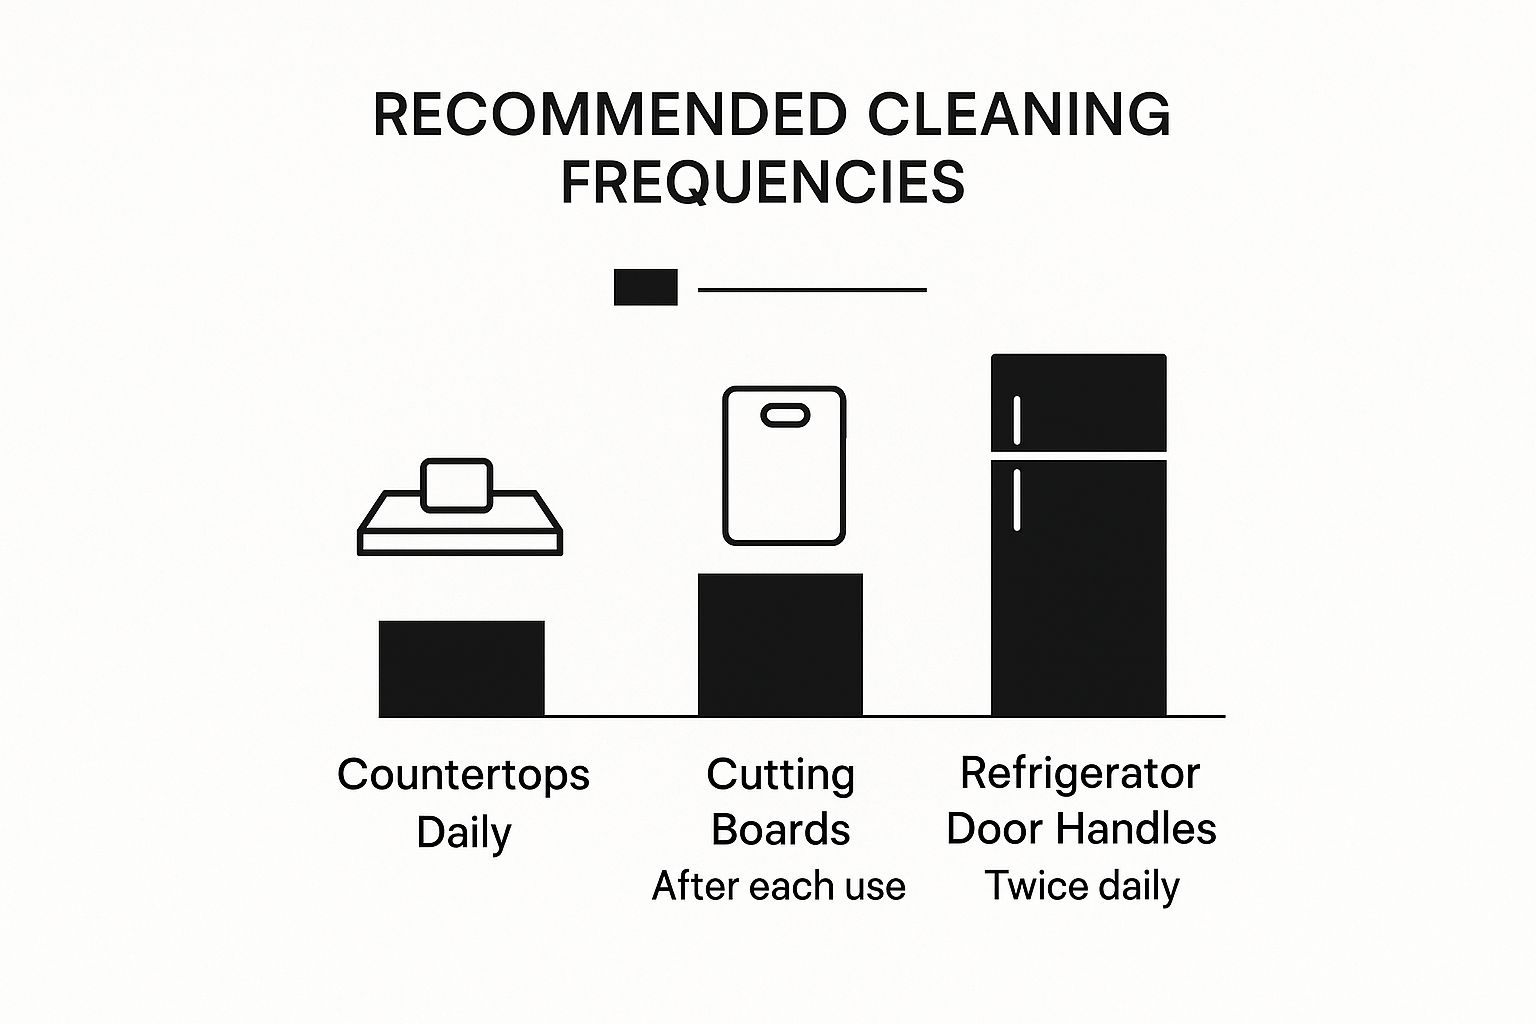
As you can see, high-touch spots like refrigerator handles need cleaning far more often than countertops. And items like cutting boards? They need to be sanitized after every single use to stop cross-contamination in its tracks.
Let’s get specific with a couple of other crucial pieces of equipment:
-
Refrigerators/Freezers:
- Daily: Wipe down door handles. Glance at the internal thermometers to make sure they're holding temp.
- Weekly: Pull everything out and clean the interior shelves and walls. Check the door gaskets for any cracks or mold.
-
Dishwashers:
- Daily: Clean out the filter screens and make sure the spray nozzles are clear.
- Weekly: Delime the machine based on the manufacturer’s guide. This is key to making sure it’s actually getting hot enough to sanitize.
Proper sanitation is a full-kitchen job, and your warewashing station is the heart of it. If you want to dive deeper, it's worth learning more about the proper setup and use of a 3-bay commercial sink, which is fundamental to any solid manual cleaning process.
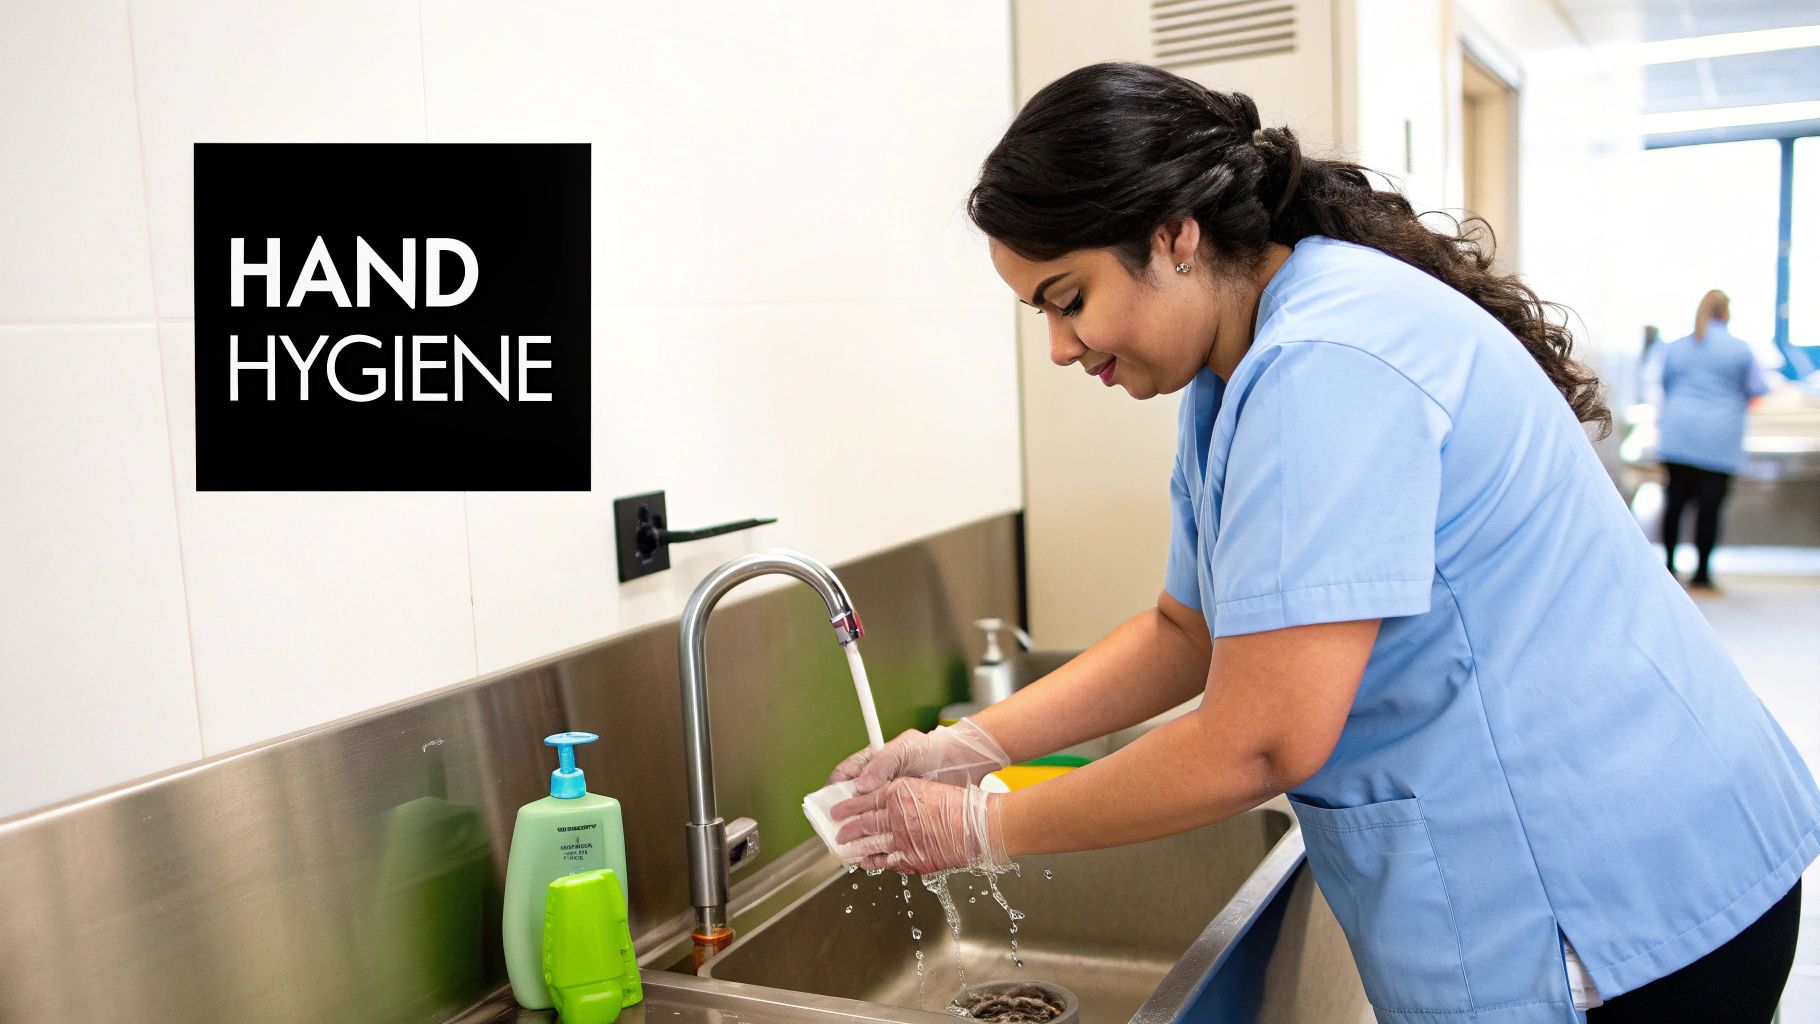
Making Staff Hygiene an Unbreakable Habit
At the end of the day, your team is the last line of defense in food safety. You can have the cleanest coolers and the most organized walk-in in the city, but one simple mistake by a team member can put everything at risk. The real goal isn't just to pass an inspection; it's to build a culture where top-notch hygiene is just how things are done, automatically.
This is about more than just hanging a sign in the breakroom. It's about getting everyone to understand why these rules exist. When your staff understands their personal role in keeping customers safe, the rules stick. And it all starts with the absolute foundation: handwashing.
Nailing the Handwashing Protocol
Proper handwashing has to be a constant, almost reflexive, action in your kitchen. And where it happens matters just as much as how. Hands must only be washed in a dedicated handwashing sink. Using a prep sink or the three-compartment sink is a major red flag for any inspector, as it's a surefire way to spread germs to food and clean dishes.
The technique needs to be perfect every single time:
- Start with warm, running water.
- Lather up with soap for a solid 20 seconds. The old "sing Happy Birthday twice" trick still works wonders.
- Make sure to scrub everything—wrists, between the fingers, and especially under the nails.
- Rinse completely, then dry with a single-use paper towel.
Knowing when to wash is just as important. This isn't a once-a-shift activity. For a complete breakdown on setting up the perfect spot for this, check out our guide to designing a proper hand washing station. It has everything you need.
Smart Glove Use and Cross-Contamination
Gloves are a great tool, but they can give a dangerous false sense of security. If they aren't changed constantly, they're no better than dirty hands.
A good way to think about it is that gloves are like a second skin. They need to be "washed"—or, in this case, changed—just as often as you'd wash your hands.
If a cook touches their face, grabs cash from a register, or moves from handling raw meat to chopping lettuce, the routine has to be automatic: old gloves off, wash hands thoroughly, new gloves on. This discipline is the key to stopping cross-contamination in its tracks, which is how most foodborne illnesses get their start.
A No-Nonsense Employee Illness Policy
Nothing gets an inspector more concerned than seeing a sick employee in the kitchen. You need a rock-solid, written policy that leaves no room for interpretation about when an employee must stay home. This isn't optional; it needs to be communicated on day one and enforced strictly.
An employee must be sent home if they show any of these symptoms:
- Vomiting
- Diarrhea
- Jaundice (a yellow tint to the skin or eyes)
- Sore throat accompanied by a fever
- Any infected cut or boil that can't be completely covered
Finally, a quick daily check-in by the manager before a shift can work wonders. A simple once-over for clean uniforms, hair properly restrained, and neatly trimmed fingernails sends a powerful message. It reinforces that everyone, every single day, is responsible for food safety. This turns your hygiene plan from a list of rules into a shared commitment.
Keeping Your Paperwork and Pest Control on Point
What an inspector can’t see with their own eyes, they'll want to see on paper. Think of it this way: your pristine kitchen shows what you're doing right now, but meticulous records prove you’re committed to safety every single day, not just when someone's watching.
I always tell managers to keep an "inspection-ready" binder. This can be a physical binder or a well-organized digital folder, but the key is that you can pull it up in seconds. It’s your single source of truth for everything related to food safety.
The Must-Have Documents for Your Inspection Binder
When that inspector asks for paperwork, you don't want to be scrambling. Have these documents updated and ready to go:
- Staff Certifications: Keep a copy of every team member's current ServSafe or equivalent food handler card.
- Temperature Logs: Daily logs for every single cooler, freezer, and walk-in are non-negotiable. They need to show consistent, daily monitoring.
- HACCP Plan: If you're doing anything specialized like sous-vide, curing meats, or packaging food with reduced oxygen, your Hazard Analysis Critical Control Point plan must be complete, accurate, and on-site.
- Pest Control Reports: Your most recent service reports from a licensed pest control operator should be right on top and easy to find.
Getting this right is more important than ever. The global food inspection services market is expected to grow to over $25 billion by 2033, a clear sign that regulations are only getting stricter. Keeping organized isn't just good practice; it's how you stay ahead of the curve. You can dig deeper into these food inspection industry trends to see where things are headed.
Get Ahead of Pests—Don't Just React
Having a pest control contract is the bare minimum. What really shows an inspector you know what you’re doing is evidence of proactive prevention. You’re not just calling someone to spray after you see a problem; you’re actively stopping pests from ever getting inside.
An inspector doesn't just want to see a receipt for a spraying service; they want to see that you understand how pests get in. They'll check the small details—the ones that show you're thinking like a pest.
This means sealing your building up tight. Get on your hands and knees and look for gaps around pipes where they enter the walls. Check the weather stripping on your back door—can you see daylight underneath? That’s a welcome mat for rodents.
Keep your dumpster area spotless with the lids always closed. And make it a rule: every food delivery gets a quick inspection for unwanted hitchhikers before it comes through the door. This is how you show you're running a tight ship.
Answering Your Top Health Inspection Questions
Even seasoned restaurant owners get a little anxious when the health inspector walks in. Let's tackle some of the most common questions and clear up any confusion, so you can face your next inspection with confidence.
How Often Do Restaurants Get Health Inspections?
This really boils down to your local health department's rules and how they categorize your restaurant's risk level. Generally, you can expect an inspector to visit anywhere from one to four times a year.
A high-risk establishment, like a steakhouse handling raw meat and cooking complex dishes from scratch, is going to be on a much more frequent schedule than, say, a small coffee bar that primarily sells pre-packaged snacks. It's also worth remembering that a customer complaint or a history of past violations can trigger an unexpected visit at any time.
What Are the Biggest Reasons for Failing a Health Inspection?
From my experience, the vast majority of failures and critical violations stem from the same three issues: improper food temperatures, cross-contamination, and poor employee hygiene. These are the absolute non-negotiables on any restaurant health inspection checklist.
Inspectors see the same mistakes over and over again. Think of things like leaving temperature-sensitive foods (TCS) in the "danger zone" between 41°F and 135°F for too long, storing a tray of raw chicken on a shelf dripping onto ready-to-eat produce below, or an employee handling cash and then making a salad without washing their hands. These are the red flags that will get you in trouble instantly.
What Is the Best Way to Act During an Inspection?
Stay calm, be professional, and be an open book. My best advice is to walk with the inspector, carry a notepad, and jot down every single thing they point out. If something isn't clear, ask them to explain it.
Think of the inspection as a free consulting session. If the inspector points out a minor issue you can fix on the spot—like covering a container or wiping down a surface—do it right then and there. It shows you're proactive and take food safety seriously.
Getting defensive or arguing is the worst thing you can do. A cooperative and respectful attitude goes a long way in building a good relationship with your inspector and your local health department.
Can I Challenge the Results of My Inspection?
Absolutely. If you genuinely believe an inspector made a factual mistake or a misjudgment, there's usually a formal appeal process. But you can't just disagree; you need to bring proof.
To have any chance of a successful appeal, you'll need solid documentation. This could be your temperature logs showing correct holding temps, an invoice for a recent equipment repair, or even time-stamped photos. The key is to contact your local health department right away to understand their specific appeal process, because the deadlines for filing are always incredibly tight.
Finding the right equipment is the first step toward building a kitchen that's always ready for inspection. PrepTables.com offers a full range of NSF-certified stainless steel work tables, refrigerated prep stations, and commercial sinks designed for durability and easy sanitation. Explore our selection to build a foundation of food safety at https://preptables.com.