
Your Guide to the 3 Bay Commercial Sink
A 3 bay commercial sink is much more than just a big piece of stainless steel; it's the operational heart of any serious commercial kitchen and an absolute must for meeting health code standards. You can think of it as a dedicated assembly line for cleanliness. Each of its three compartments plays a specific, critical role in the mandatory wash, rinse, and sanitize process. This methodical setup is your primary defense against cross-contamination and foodborne illnesses.
Why a 3 Bay Sink Is Your Kitchen's Command Center
Think of a 3 bay commercial sink as the non-negotiable foundation of your kitchen's entire hygiene protocol. It’s not just a good idea; it's a hard requirement in most professional food service environments for one simple reason: it forces a systematic workflow that prevents dangerous shortcuts.
Each basin has a distinct purpose, guiding your staff through a foolproof cleaning sequence. This deliberate design takes the guesswork out of the equation and ensures every single pot, pan, and utensil goes through the same rigorous cleaning process, time after time.
These sinks, also known as three-compartment sinks, became standard as food safety regulations got stricter around the mid-20th century. Today, health codes in most developed nations mandate them for any establishment that prepares and serves food. The FDA Food Code in the United States, for example, requires a compartmentalized sink for effective warewashing, making it a cornerstone of compliance. You can learn more by exploring the market growth and regulations of these essential sinks.
The Unbreakable Three-Step Process
The true power of a 3 bay sink is in its simple yet incredibly effective three-step sequence. This process is the gold standard for manual warewashing and is non-negotiable for passing health inspections. Each step has its own set of rules that must be followed to achieve true cleanliness and proper sanitation.
This visual guide breaks down the essential flow and temperature requirements you need to know.
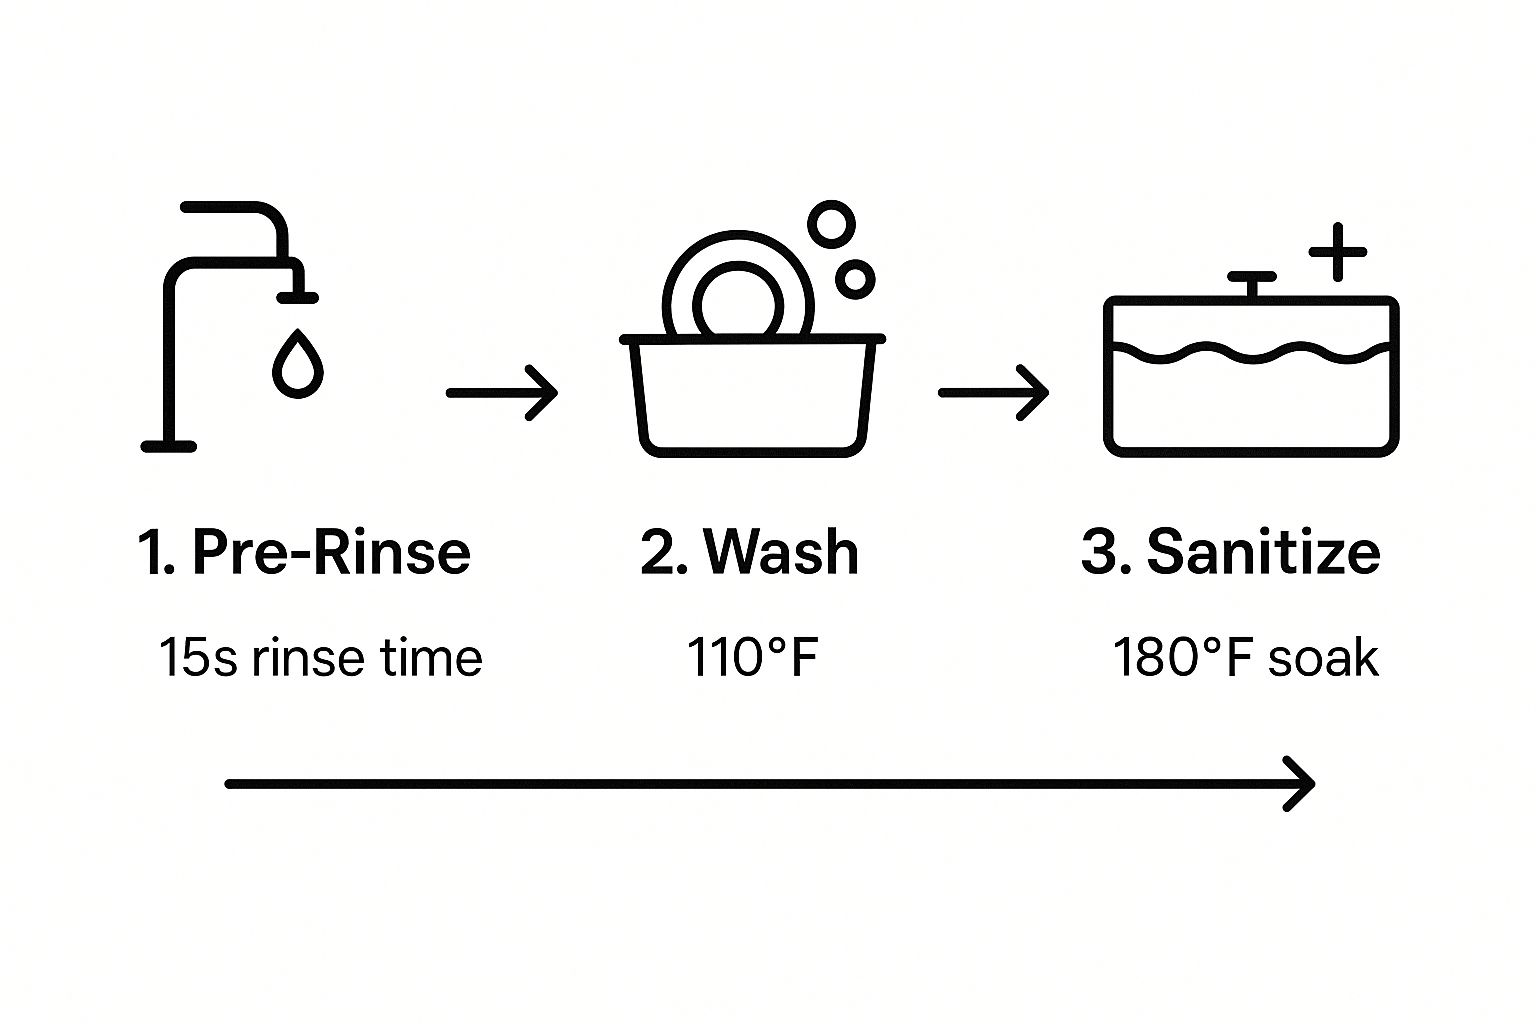
As you can see, food safety is a game of both process and precision. You have to nail the specific temperatures and actions at each stage.
To make it even clearer, let's break down exactly what happens in each compartment.
The 3-Step Cleaning Process in a 3 Bay Sink
| Compartment | Function | Key Requirements |
|---|---|---|
| Bay 1: Wash | Scrub away all visible food debris and grease. | Hot water (at least 110°F) mixed with a commercial-grade detergent. |
| Bay 2: Rinse | Remove all soap and detergent residue from the wash stage. | Clean, warm water with no soap. This step is crucial for the sanitizer to work. |
| Bay 3: Sanitize | Eliminate harmful bacteria and pathogens. | Either very hot water (at least 171°F) or a chemical sanitizer mixed to the correct concentration. |
This table shows how each bay has a unique job, working together to get your wares from dirty to safely sanitized.
The core principle is separation. By isolating washing, rinsing, and sanitizing, you prevent dirty wash water from contaminating the final rinse, and rinse water from diluting the sanitizer. This separation is what makes the system so effective.
Finally, after the sanitizing step, every item must be placed on a clean drainboard or rack to air dry completely. Never, ever use a towel to dry them—it can reintroduce bacteria and undo all your hard work. This final, hands-off step is just as important as the active washing stages.
Choosing the Right Sink Material and Construction
When you're outfitting a professional kitchen, the 3 bay commercial sink isn't just another piece of equipment—it's the backbone of your sanitation process. The two things that truly determine if that sink will last for years or fail in months are its material and construction.
In any commercial kitchen, stainless steel is the undisputed champion. There’s a good reason for that. Its surface is non-porous, which gives bacteria nowhere to hide, it’s a breeze to clean, and it’s tough enough to handle the daily grind of heavy pots, scorching water, and strong cleaning chemicals.
The global demand for these sinks is huge and only getting bigger. The compartment sink market hit USD 1,145 million in 2025 and is on track to reach a staggering USD 2,087 million by 2035. This isn't just a random number; it shows how critical these durable, hygienic sinks are for kitchens everywhere, with stainless steel leading the charge. You can see the full breakdown in the compartment sinks market report.
But here’s the thing: not all stainless steel is the same. To make a smart buy, you need to understand two critical terms: gauge and grade.
Decoding Steel Gauge: The Strength Indicator
The term gauge simply refers to how thick the stainless steel is. It works on a reverse scale, which can be a little counterintuitive at first: the lower the gauge number, the thicker and stronger the steel.
- 16-Gauge Steel: This is the workhorse of the industry. For most busy, high-volume kitchens, this is the gold standard. Its thickness gives it incredible resistance to dents, dings, and the warping that can happen from constant use and extreme temperatures.
- 18-Gauge Steel: As a more budget-friendly option, 18-gauge steel is a bit thinner. It’s perfectly fine for kitchens with light-to-medium duty needs, where the sink won't be taking a beating from heavy pots and pans all day long.
For a bustling restaurant, spending a little extra on 16-gauge steel is almost always the right call. It’s an investment that pays for itself in longevity and reliability.
Understanding Steel Grade: The Durability Factor
If gauge is all about brute strength, grade is about long-term endurance, especially against rust and corrosion. The grade is all about the steel's recipe—specifically, how much chromium and nickel are in the mix.
Think of the steel grade like a car's rust-proofing package. A standard package works fine in dry climates, but you’ll want the premium, all-weather protection for harsh, salty conditions. In a kitchen, 304 grade is that premium protection.
You'll mainly come across two grades in your search:
- Type 304 Stainless Steel: This is what the pros use. It has a higher content of chromium and nickel, which gives it top-tier resistance to rust and corrosion from salts, acidic foods, and cleaning chemicals. For any surface that touches food, this is the grade you want.
- Type 430 Stainless Steel: This is a more economical grade because it has very little or no nickel. While it's still a solid material, it's more likely to rust or corrode over time, especially if it stays wet or is exposed to certain chemicals. You'll often see it used for parts that don't touch food, like the sink's legs or support bracing.
A great sink is just one part of an efficient kitchen. The workstations around it are just as important. To create a seamless workflow, you'll need the right prep tables to complement your new sink.
Sizing and Essential Features for Your Kitchen
Choosing the right material for your 3 bay commercial sink is a great start, but it's only half the story. To really get your kitchen humming, you need to match the sink's size and features to how your team actually works. Nail these details, and you’ll prevent slowdowns and turn your dish pit into a model of efficiency.
Think of it this way: you wouldn't give an artist a tiny easel for a giant mural. In the same way, you shouldn't force your warewashing into a sink that's too small or missing the right tools. Every detail, from the bowl dimensions to the backsplash, directly impacts your kitchen’s daily rhythm and output.
Drainboards: The Unsung Heroes of Workflow
One of the most critical features you'll decide on is the drainboard setup. These aren't just for drying dishes; drainboards are essential for keeping your entire washing process organized and sanitary. In fact, most health codes require them for proper air-drying.
Your choice here quite literally dictates how dishes move through the wash, rinse, and sanitize cycle.
- Left and Right Drainboards: This is the gold standard for any high-volume operation. You get one side (usually the left) for dirty dishes waiting their turn and the other (right) for clean, sanitized items to air dry. This setup creates a clear, one-way street for wares, which drastically cuts down on re-contamination.
- Single Drainboard (Left or Right): If you're tight on space, a single drainboard is still a massive upgrade from having none. You can pick a left or right configuration to fit your kitchen's layout and create a natural workflow.
- No Drainboards: Only go this route if you have plenty of dedicated, NSF-certified counter space right next to the sink for both dirty and clean items.
A smart drainboard configuration is like a traffic cop for your dishes, making sure the dirty and clean flows never cross. It’s a simple feature that forms the backbone of an efficient and compliant dish station.
Bowl Size and Other Critical Features
Beyond the drainboards, a few other elements are non-negotiable for a truly functional sink. The size of the sink bowls is a huge one. Before you buy anything, grab a tape measure and check the dimensions of your largest pots, stockpots, and sheet pans. They need to fit completely inside the basin for a proper soak and scrub. A bowl that’s too shallow or narrow will slow your team down and make a thorough cleaning nearly impossible.
You’ll also want to consider these key features:
- Backsplash Height: A good backsplash is your wall's best friend. It blocks constant splashes, preventing water damage and mold. Taller backsplashes give you more protection, and most sinks come with pre-drilled holes to make faucet installation a breeze.
- Faucet Type: The right faucet makes all the difference. A pre-rinse sprayer is an absolute must-have, letting your staff power-wash food scraps off plates before they even hit the soapy water. This keeps your wash water cleaner for much longer.
- Leg Bracing: Look for sinks with solid, adjustable legs and cross-bracing. This keeps the whole unit stable and level, even when it's loaded with hundreds of pounds of water and heavy cookware.
The price for these professional units often reflects these features. You'll find top-selling models priced anywhere from $1,000 to $3,000. More specifically, popular 44-inch models with drainboards typically land in the $1,400 to $1,700 range. You can dig deeper into kitchen sink market trends to see how different features impact cost. By taking careful measurements and thinking through these features, you can find a sink that not only fits your space but improves your entire kitchen operation.
Pairing Your Sink with the Right Prep Tables
 A 3 bay commercial sink is a powerhouse, but it can't do its job alone. To truly unlock its potential, you have to think about how it fits into your kitchen's entire workflow. The most critical connection? The one it shares with your prep tables.
Think of your prep tables and sink like a relay team in a high-stakes race. The prep tables handle the first leg—all the chopping, mixing, and plating. Then, they pass the baton of dirty pans and utensils to the sink for the final clean-up lap. A smooth handoff keeps your kitchen moving like a well-oiled machine. A clunky one brings everything to a grinding halt.
Types of Stainless Steel Prep Tables
Every kitchen needs a solid foundation, and that's where stainless steel prep tables come in. These are your all-rounders, the workhorses where the bulk of the prep work happens. Their straightforward, tough design makes them absolutely essential, but they come in several varieties to suit different needs.
A few key features to look for across all types include:
- Undershelves: This is a total game-changer for organization. An undershelf gives you a dedicated spot for bulk ingredients, small appliances, or spare pans, keeping your primary work surface clear for action.
- Adjustable Feet: Kitchen floors are almost never perfectly level. Adjustable bullet feet let you stabilize the table, eliminating the dangerous wobbling that can happen when you're working with sharp knives or hot pans.
- Backsplashes: Just like with a sink, a raised backsplash on your prep table contains splatters and spills, protecting your walls and making cleanup infinitely easier.
Getting the right mix of these features helps you build a custom workstation. If you want to dive deeper into all the options, our complete prep tables buying guide can walk you through creating the perfect setup for your space.
Specialized Workstations for Peak Efficiency
While general-purpose tables are the backbone of your kitchen, some tasks demand more specialized gear. For operations that crank out specific items—think pizzerias, sub shops, or high-volume salad bars—a dedicated prep station isn't a luxury. It's a necessity for maintaining speed and quality.
Specialized prep tables are like having a dedicated pit crew for a race car. Every ingredient and tool is perfectly positioned for a single job, which allows for unbelievably fast and consistent work. A chef at a standard table is fast; a chef at a specialized station is faster.
These units are brilliant because they integrate refrigerated storage directly into the prep surface, putting everything a chef needs right at their fingertips.
- Pizza Prep Tables: Built specifically for the art of pizza making. They feature a refrigerated top rail to hold pans of toppings, keeping everything fresh and cold. The work surface is often a wide cutting board, while the refrigerated base below provides ample storage for dough and extra ingredients.
- Sandwich and Salad Prep Tables: Very similar to pizza tables, these have refrigerated wells to hold all your veggies, meats, cheeses, and dressings at safe temperatures. They also typically include an integrated cutting board running the full length of the unit, creating the perfect assembly line for building sandwiches and salads in a flash.
When you strategically place these tables in your kitchen, you create a natural, logical path from raw ingredient prep all the way to the final wash-down at your 3 bay commercial sink. This integrated system cuts down on wasted movement, reduces the risk of cross-contamination, and ultimately fosters a safer, more productive kitchen.
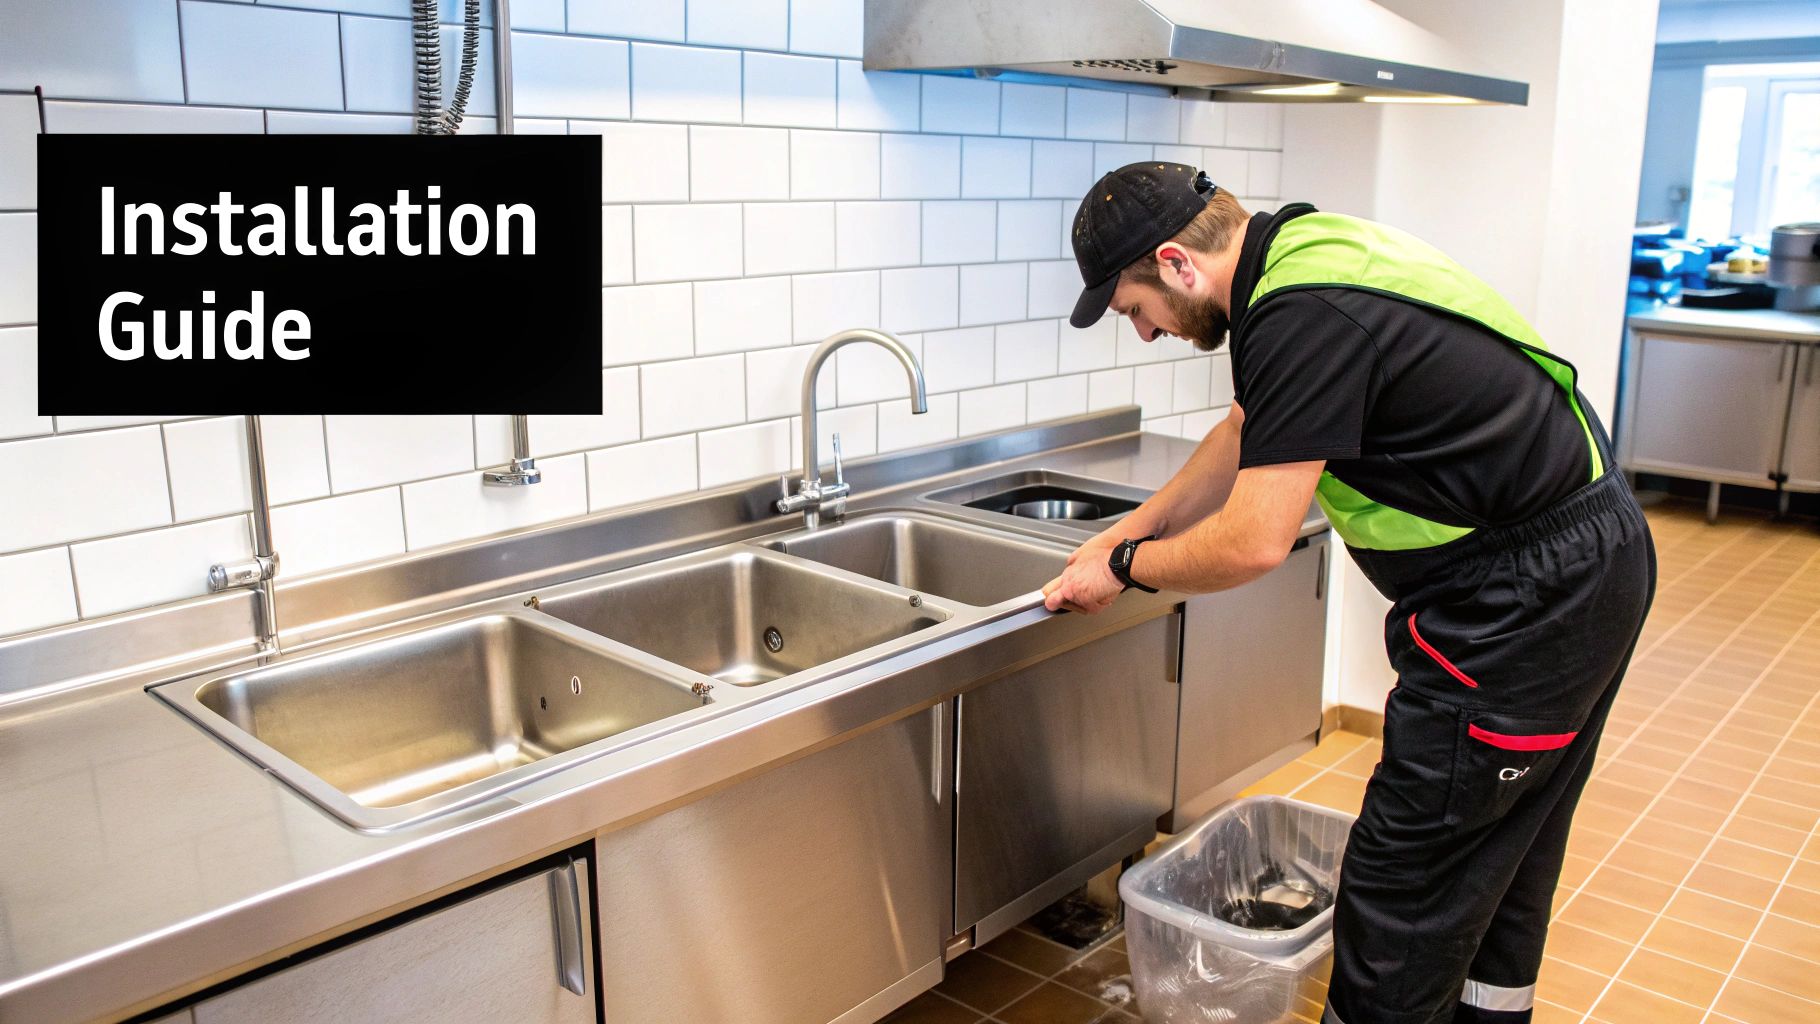
Installation and Maintenance Best Practices
A brand new 3 bay commercial sink is a serious investment in your kitchen’s efficiency, but you only unlock its real value with a proper setup and consistent care. Getting the installation right from the very beginning saves you from a world of future pain—think wobbly legs, leaky pipes, and all sorts of plumbing nightmares. In the same way, a simple but disciplined cleaning routine will protect that stainless steel shine, keep you on the right side of health codes, and add years to its working life.
Think of it like laying the foundation for a house. If it isn't level and secure from the start, everything you build on top of it will be a little bit off. A solid installation is all about safety, hygiene, and durability for the long haul.
Getting the Installation Right
Proper installation isn’t just about dropping the sink into place; it’s about making it a seamless part of your kitchen's plumbing and workflow. Each of these steps is crucial for heading off problems before they can start.
- Level and Secure the Unit: Your first job is to get the sink perfectly level. Use the adjustable bullet feet on each leg to kill any wobble. An unstable sink is a major safety hazard, especially when it’s full of a few hundred pounds of hot water.
- Connect Plumbing Lines Correctly: All your plumbing connections need to be tight and totally leak-free. This means connecting both the hot and cold water lines to your faucet and, just as importantly, making sure the drain lines have the right slope. You need gravity on your side to prevent water from pooling up and creating a swampy breeding ground for bacteria.
- Install a Grease Trap: In most places, a grease trap isn't optional—it's the law. This device catches fats, oils, and grease (FOG) from your wastewater before it escapes into the main sewer lines. Without one, you’re just asking for a massive, expensive clog down the road.
- Seal All Edges: Once the sink is snug against the wall, run a bead of food-safe silicone caulk along the gap where the backsplash meets the wall. This creates a watertight seal that blocks moisture and food bits from getting trapped behind the sink, which is a prime spot for mold and bacteria to thrive.
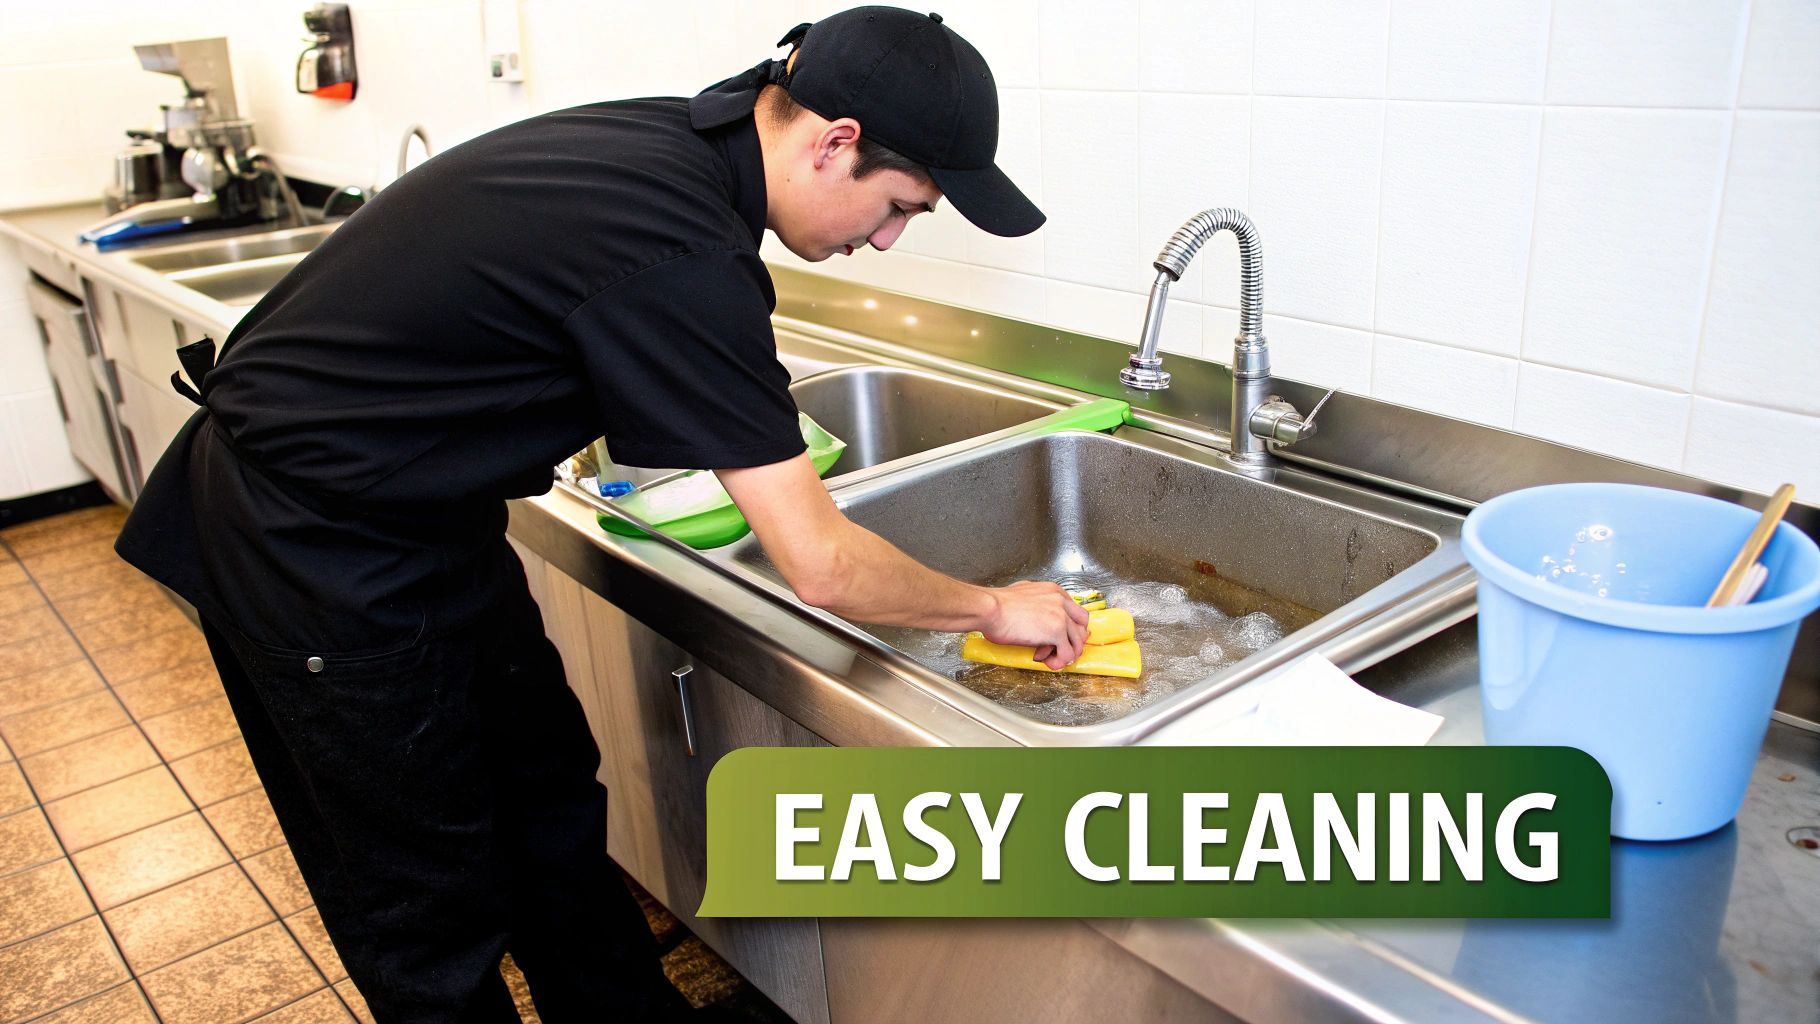
A Practical Cleaning and Maintenance Schedule
Just like any piece of high-performance equipment, your stainless steel sink needs regular attention to stay in top shape. A simple, consistent routine is your best weapon against grime, rust, and damage. By making these tasks part of your kitchen's closing duties, you'll have no trouble maintaining a high standard of cleanliness.
“Passivation is the secret to stainless steel's longevity. It's a natural process where a thin, invisible layer forms on the surface to protect it from corrosion. Your job is to keep that layer intact through proper cleaning, not destroy it with harsh tools.”
Follow this three-tiered approach for the best results:
- Daily Tasks: At the end of every shift, wash out the sink basins and drainboards with a mild soap and a soft cloth or a gentle nylon brush. Rinse it thoroughly with clean water, and here’s the most important part: wipe it completely dry with a soft towel. This simple step is your best defense against water spots and mineral deposits, which are often the first step toward corrosion.
- Weekly Tasks: Once a week, give the sink a deeper clean. Use a cleaner and polisher made specifically for stainless steel. Always be sure to scrub in the same direction as the steel's grain to avoid creating tiny scratches. This helps restore that protective passive layer and keeps the steel looking brand new.
- Monthly Tasks: Check and clean out your grease trap based on the manufacturer's instructions. Take a good look at all the plumbing connections for any drips or signs of a leak. You should also inspect the silicone sealant for any cracks or gaps that need to be touched up.
While stainless steel is incredibly tough, it isn't invincible. To keep from damaging your investment, never use steel wool, wire brushes, or abrasive scouring pads. These tools will scratch the surface right up, destroying its protective layer and basically rolling out the welcome mat for rust. Along the same lines, stay away from harsh chemicals like bleach or any cleaners with chloride, as they can cause pitting and permanent stains.
For those trying to build a fully cohesive and professional kitchen, it’s a great idea to apply these same care principles to all your stainless surfaces. You can find more tips in our guide on the care and selection of restaurant stainless steel tables, which will help ensure every surface in your kitchen stays pristine and ready for service.
Answering Your Questions About 3 Bay Sinks
Investing in something as fundamental as a 3 bay sink is a big decision, so it’s only natural to have a few questions. Getting the right answers helps you pick the perfect unit, use it the right way, and keep your entire kitchen humming along. This section tackles the most common questions we hear from kitchen owners and managers.
Think of this as your quick-reference guide. We’re cutting through the noise to give you the straightforward, practical advice you need for a safe and efficient warewashing station.
Do I Still Need a 3 Bay Sink If I Have a Commercial Dishwasher?
Yes, absolutely. In nearly every jurisdiction, a 3 bay commercial sink is mandatory, even if you run a high-temp dishwasher. Health departments insist on this for a couple of critical reasons. First, it’s the only practical way to clean those large, bulky items like stockpots, mixing bowls, and sheet pans that just won’t fit in a standard dishwasher.
More importantly, your sink is your lifeline. If your dishwasher goes down during a busy dinner service—a nightmare scenario for any manager—that three-compartment sink lets you keep washing, rinsing, and sanitizing. It ensures you can stay open and operate safely, preventing a full-blown shutdown. Always double-check with your local health inspector, as their rules are the ones that matter most.
What’s the Difference Between 16-Gauge and 18-Gauge Steel?
When we talk about "gauge" in stainless steel, we're talking about its thickness. It’s a bit counterintuitive, but the lower the number, the thicker and stronger the steel is.
- 16-Gauge: This is your heavy-duty champion. It’s built for high-volume kitchens and can take a beating, offering much better resistance to dents, dings, and warping from heavy pots and extreme temperatures.
- 18-Gauge: This is a bit thinner and more budget-friendly. It’s perfectly fine for kitchens with light-to-medium use where the sink isn’t getting constantly slammed with heavy equipment.
For a busy restaurant, we almost always recommend investing in 16-gauge. The extra durability pays for itself over the long run.
Should I Choose a Sink With or Without Drainboards?
Drainboards are a game-changer and, in many cases, a non-negotiable for passing health inspections. They give you a dedicated, sanitary space for air-drying your freshly cleaned dishes, which is a crucial step to prevent germs from getting back on them.
The gold standard for workflow and hygiene is a sink with two drainboards. You get one side for dirty items waiting to be washed and another for clean items to dry. This creates a clean, one-way street for your dishes, making it impossible for dirty and clean items to mix.
If your kitchen is tight on space, a single drainboard is still worlds better than none. Sinks without drainboards are only a viable option if you have plenty of NSF-approved counter space right next to the sink to serve the same purpose.
What’s the Best Way to Prevent Rust on a Stainless Steel Sink?
The secret to keeping stainless steel looking new is simple: consistent, gentle cleaning. Just clean the sink daily with a mild soap and a soft cloth, rinse it well, and wipe it completely dry. This easy habit stops mineral deposits from water spots from building up, which can weaken the steel’s natural protective layer.
For any stubborn grime, grab a cleaner made specifically for stainless steel. What you absolutely must avoid are abrasive tools like steel wool or wire brushes. They will scratch the surface, creating tiny crevices where rust can start to form. And never let harsh chemicals like bleach sit in the sink for long periods.
Ready to get your kitchen’s sanitation and workflow in order? At PrepTables.com, we stock a huge selection of durable, NSF-certified 3 bay commercial sinks built for the toughest professional kitchens. Find the perfect model for your space by exploring our collection at https://preptables.com.