

A Guide to Installing an Electric Stove in a Commercial Kitchen
Putting in a new commercial electric stove isn't just about dropping a piece of equipment on the floor. It's a fundamental upgrade that sets the tone for your kitchen's entire workflow, not to mention its safety and efficiency. This process really kicks off with a solid plan—you've got to nail down your space, power, and ventilation needs from the get-go to sidestep some seriously expensive headaches later on.
Laying the Groundwork for a Flawless Installation
A smooth installation all comes down to the prep work you do before the stove even shows up. You need to think about how this new piece of gear will fit into the rhythm of your kitchen. From digging into local codes to picking a stove that actually matches your menu, this is where you lay the foundation for success. With the whole industry shifting towards kitchen electrification, getting this right is becoming the new standard for a reason—it pays off in precision, safety, and lower energy bills.
One of the biggest things people forget is simply mapping out where the stove will physically live in relation to your prep areas. You're aiming for a seamless path from chopping and mixing to cooking. Placing your stove smartly next to your essential stainless steel prep tables can make a night-and-day difference in your kitchen's output.
Understanding the Types of Stainless Steel Prep Tables
Pairing your new stove with the right prep table is critical for an efficient workflow. While a basic work surface is useful, specialized tables are designed to streamline specific tasks and minimize wasted movement. The key is choosing the right type of stainless steel table for your menu and operational needs.
Here are the primary types of prep tables available for commercial kitchens:
- Standard Work Tables: These are the versatile workhorses of any kitchen. Built from durable stainless steel, they provide a simple, hygienic surface for all-purpose prep work like chopping vegetables or portioning proteins. They are available in various sizes and gauges (thicknesses), and most feature an undershelf for convenient storage of equipment and ingredients.
- Sandwich Prep Tables: Essential for delis, cafes, and any operation with a high-volume sandwich or salad line, these are refrigerated units designed for speed. They feature a refrigerated rail on top to hold cold pans of ingredients, an integrated cutting board work surface, and refrigerated cabinet storage below. This setup keeps everything a cook needs within immediate reach.
- Pizza Prep Tables: Specifically engineered for pizzerias, these units are a specialized version of the sandwich table. They typically have a wider, raised refrigerated rail to accommodate larger ingredient pans and a deep work surface—often made of marble or granite—ideal for stretching and working with dough. The refrigerated base is designed to hold dough boxes and other toppings at safe temperatures.
Setting up a sandwich prep table right next to your griddle or a pizza prep table near your new electric oven creates a super-efficient work cell. This simple move cuts down on wasted steps, letting your team work faster and safer.
Navigating Site Prep And Critical Electrical Needs
The success of your commercial stove installation is decided long before the delivery truck ever shows up. Think of site prep not as a preliminary chore, but as the foundation for a safe, efficient kitchen. Getting these details wrong can lead to expensive delays, daily operational headaches, and serious safety problems.
First, let's talk about the physical space. Commercial electric stoves are heavyweights, often tipping the scales at over 500 pounds. Your floor needs to be perfectly level for even cooking, sure, but it also has to be strong enough to handle that weight without sagging or cracking. You also need to map out a clear path from the loading dock to the stove's final home, making sure there are no tight corners or doorways that could damage the unit or your building.
Clearances are absolutely non-negotiable. Every manufacturer specifies the minimum distance you need between the stove and combustible surfaces like drywall or wooden cabinets. Ignoring these isn't just a fire risk; it's a guaranteed way to fail an inspection. These details are a core part of any good kitchen blueprint. For more on this, check out our guide to commercial kitchen layout planning.
This flowchart breaks down the big-picture planning, from checking your space and power to making sure you have the right ventilation.
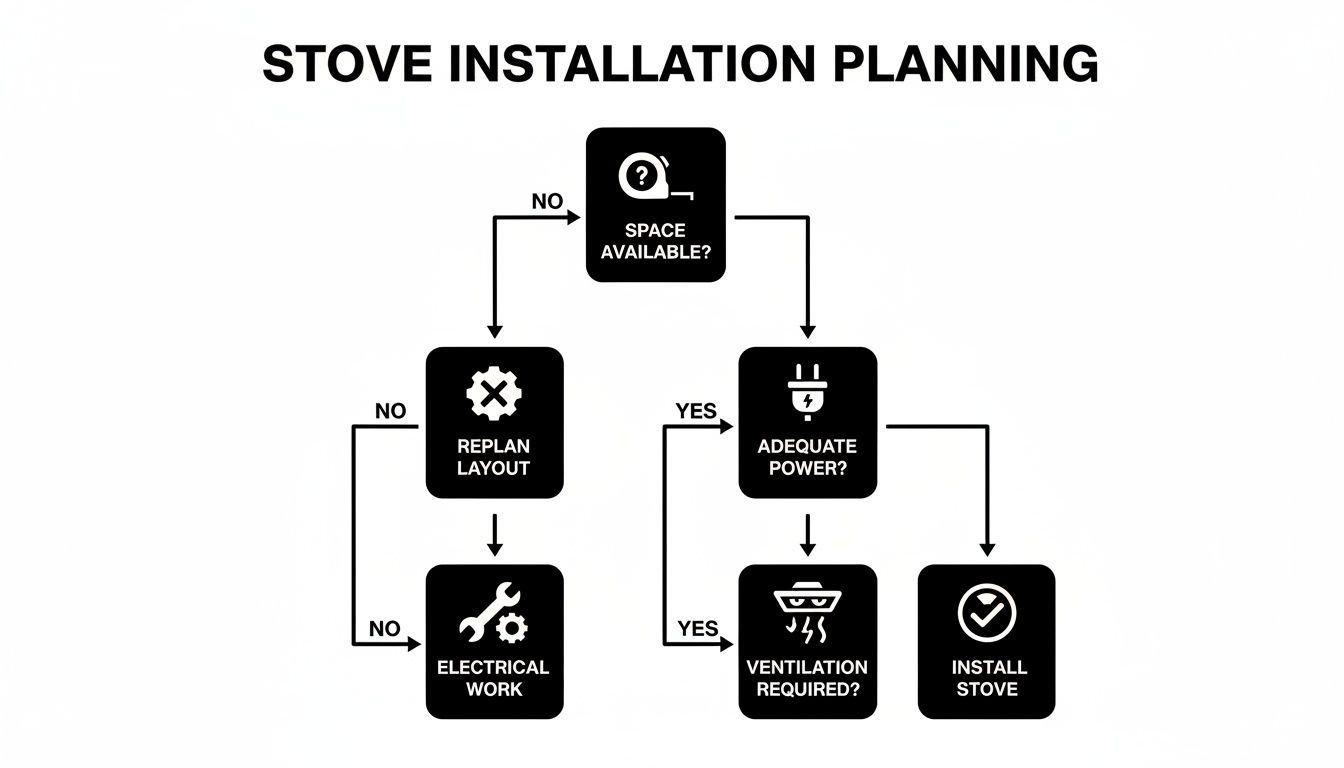
As you can see, a successful install means looking at your kitchen's entire infrastructure before you even pick out a stove.
Decoding Your Electrical System
While getting the physical space ready is crucial, the electrical system is where things most often go sideways without an expert. This is the heart of the project. Get it right, and your stove will work like a charm for years. Get it wrong, and you're looking at constant breaker trips, poor performance, or worse, an electrical fire.
The first thing you need to do is find the stove's power requirements on the manufacturer's spec sheet, listed in kilowatts (kW). That one number dictates everything else.
- Circuit Size: These stoves are power-hungry. They need a dedicated circuit, usually 40A, 50A, or even 60A. A standard wall outlet won't even come close.
- Voltage: You have to know if your building runs on single-phase or three-phase power and order a stove that matches. Hooking up the wrong type will fry the equipment instantly.
- Wire Gauge: The thickness of the wire running to the outlet is critical. Wire that’s too thin for the amperage will overheat, melt, and create a massive fire hazard.
One of the most common—and dangerous—mistakes is trying to reuse existing wiring to save a few bucks. Don't do it. Always assume you'll need a brand new, dedicated circuit installed by a pro.
Getting the correct circuit breaker size is essential for safety, and online calculators can be a good starting point for your planning. But they are no substitute for an on-site assessment by a qualified electrician.
To give you a clearer picture, here’s a quick reference for what you might expect.
Typical Electrical Requirements For Commercial Electric Stoves
This table outlines common electrical specs for various stove sizes to help with your initial planning.
| Stove Type / Size | Typical Wattage Range | Required Circuit Breaker | Voltage | Recommended Wire Gauge (Copper) |
|---|---|---|---|---|
| 4-Burner Range | 8,000W - 12,000W | 40A - 50A | 208V/240V (Single or Three-Phase) | 8 AWG / 6 AWG |
| 6-Burner Range | 12,000W - 18,000W | 50A - 60A | 208V/240V (Single or Three-Phase) | 6 AWG |
| Heavy-Duty Griddle Top | 15,000W - 25,000W | 60A+ | 208V/240V (Three-Phase) | 6 AWG / 4 AWG |
| Convection Oven Base | Add 5,000W - 10,000W | Varies | Varies | Varies |
Remember, these are just typical values. Always, always, always refer to the specific manufacturer's spec sheet for the unit you are installing.
Why You Absolutely Need A Licensed Electrician
This isn't a DIY job. The complexity and risk involved in commercial electrical work are just too high. A licensed electrician does more than just connect a few wires. They make sure the entire system is safe and up to the National Electrical Code (NEC) and all your local rules.
They’ll check if your panel can even handle the new load, pick the right wire and breaker, and install the proper high-amperage outlet. Hiring a pro is an investment in protecting your equipment, your building, and your team. It's a mandatory expense for doing the job right.
Mastering Ventilation and Fire Suppression Systems
A common mistake I see in kitchens is underestimating the need for ventilation just because the stove is electric. It's an easy trap to fall into. While you're not dealing with the byproducts of gas combustion, a commercial electric range still blasts out an incredible amount of heat, smoke, and grease-laden vapor.
Getting this right isn't just about keeping the kitchen comfortable—it's a non-negotiable for safety and passing inspections.
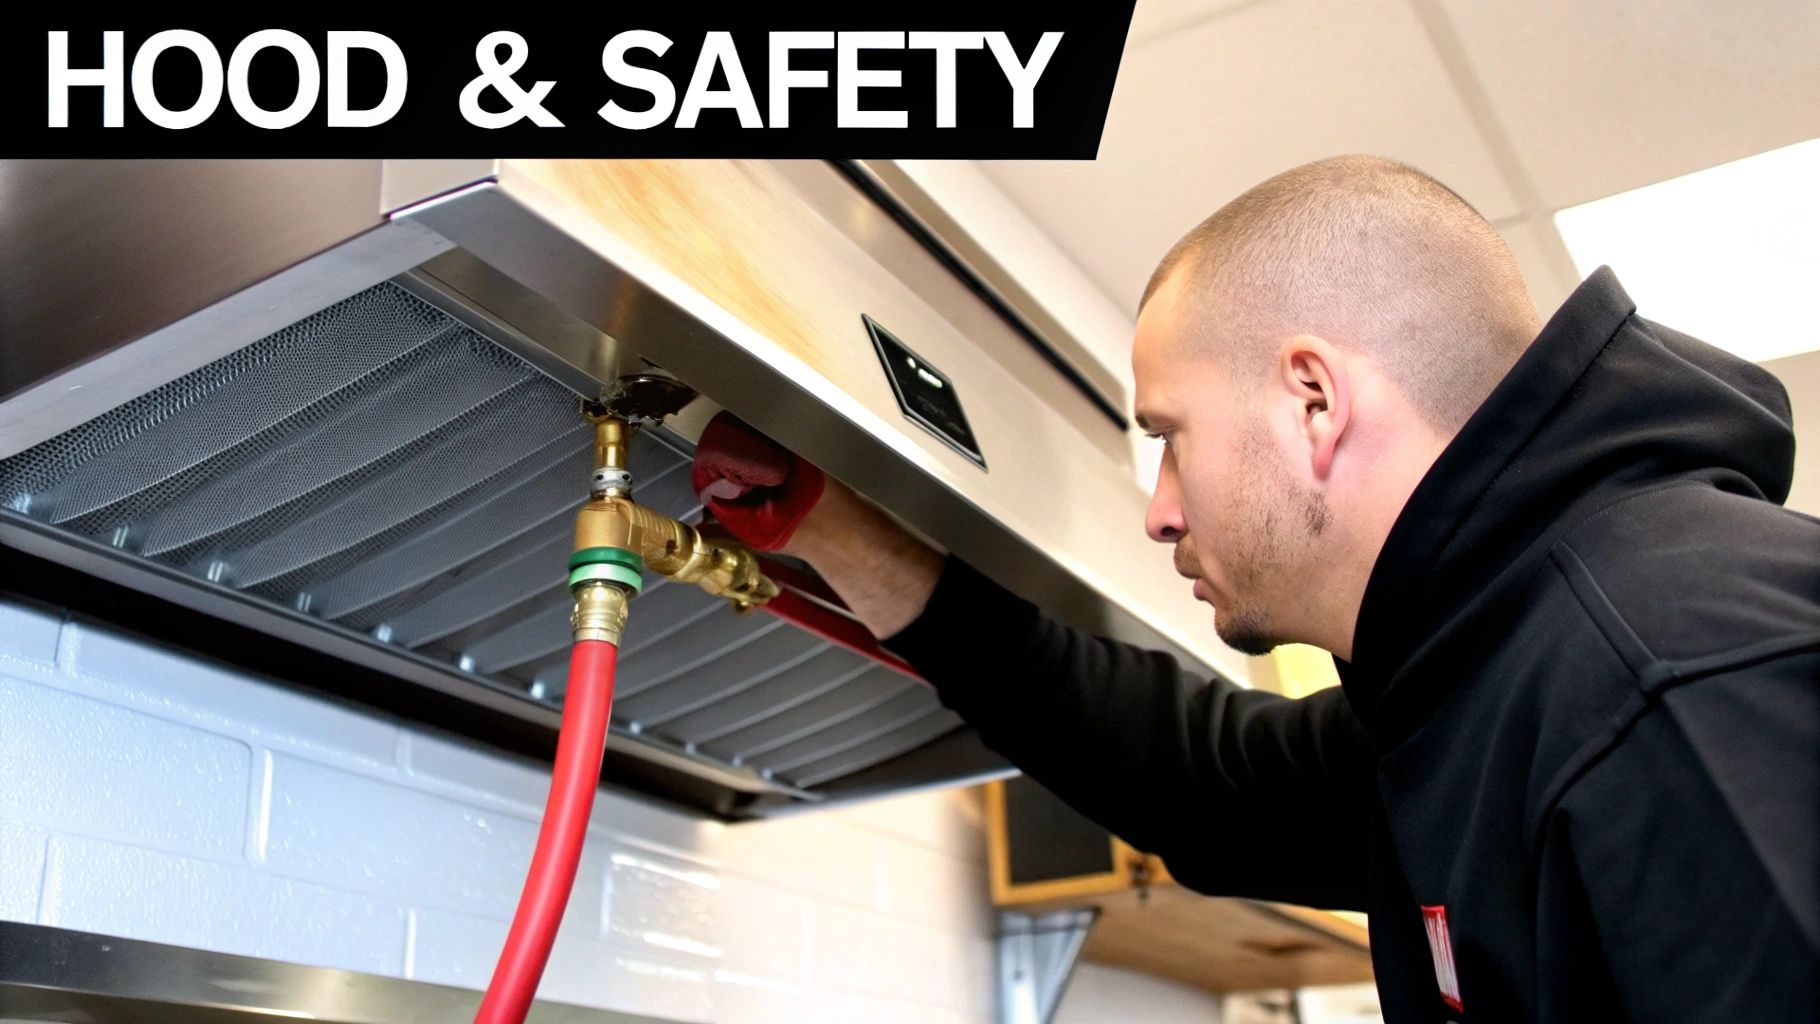
Without a proper ventilation system, your kitchen turns into a hazard zone pretty quickly. Grease builds up on every surface, creating a huge fire risk, and the poor air quality will tank your staff's health and productivity. This is where your commercial kitchen hood becomes the most important piece of the puzzle.
Choosing Between Type I and Type II Hoods
Not all commercial hoods are created equal. They fall into two main categories, and picking the wrong one is a one-way ticket to a failed inspection.
-
Type II Hoods (Condensate Hoods): Think of these for steam and heat, but not grease. They're perfect for equipment like commercial dishwashers or big pasta cookers. They simply don't have the filtration needed to handle grease particles.
-
Type I Hoods (Grease Hoods): This is what you need for your electric stove. Type I hoods are mandatory for any appliance pumping out greasy vapor. They use a system of baffle filters to trap grease right at the source before it can get into your ductwork and create a fire hazard.
For 99% of commercial electric stove installations, you are legally required to have a Type I hood. Trying to slide by with a Type II over a range is a serious safety violation and a guaranteed inspection fail. You can dive deeper into the specifics in our guide to commercial kitchen ventilation requirements.
Calculating Your Hood's Power CFM
Okay, so you know you need a Type I hood. Now, how powerful does it need to be? A hood's muscle is measured in CFM (Cubic Feet per Minute), which tells you how much air it can suck out. An undersized hood is useless—it won't capture all the smoke and grease, completely defeating the purpose.
A mechanical engineer should always sign off on the final numbers, but you can get a solid estimate with a common industry formula:
CFM = (Appliance Width in Feet) x (CFM per Linear Foot)
The "CFM per Linear Foot" changes based on what's underneath it. For a standard electric range, you're usually looking at around 300-400 CFM per linear foot. A heavy-duty charbroiler? That number jumps significantly.
Integrating Fire Suppression Systems
A Type I hood is only half the safety story. It absolutely must be paired with an integrated fire suppression system—think brands like Ansul, which are the industry standard. This is a network of nozzles installed right inside the hood, aimed directly at your cooking surfaces.
Here’s how it works if a fire breaks out:
- Heat-sensitive links melt, triggering the whole system.
- Nozzles spray a wet chemical fire retardant that smothers the flames and cools the hot metal.
- Here’s the critical part: The system is wired to a shunt trip breaker that instantly kills all power to your electric stove. This prevents the hot elements from re-igniting the fire.
This automatic shutdown isn't just a good idea; it's a core requirement of the NFPA 96 standard for commercial kitchens. Making sure your electrician properly wires the fire suppression system to your stove's circuit is one of the most important final steps of any installation.
The Physical Installation and Kitchen Integration
Once the prep work is done, it's time to get hands-on and move the stove into place. This is where all that careful planning pays off, turning a heavy hunk of steel into a seamless part of your kitchen's workflow. Getting it right involves more than just sliding the unit into a gap—it demands precision for safety and top-notch cooking performance.
First things first: safely unbox and move the unit. Commercial stoves are bulky and deceptively heavy. Always use a dolly or hand truck, and make sure you have at least two people on the job. Before you even think about moving it, strip off all the packaging materials, snip any zip ties, peel off protective films, and give the whole unit a thorough inspection for shipping damage.
Achieving a Perfectly Level Cooking Surface
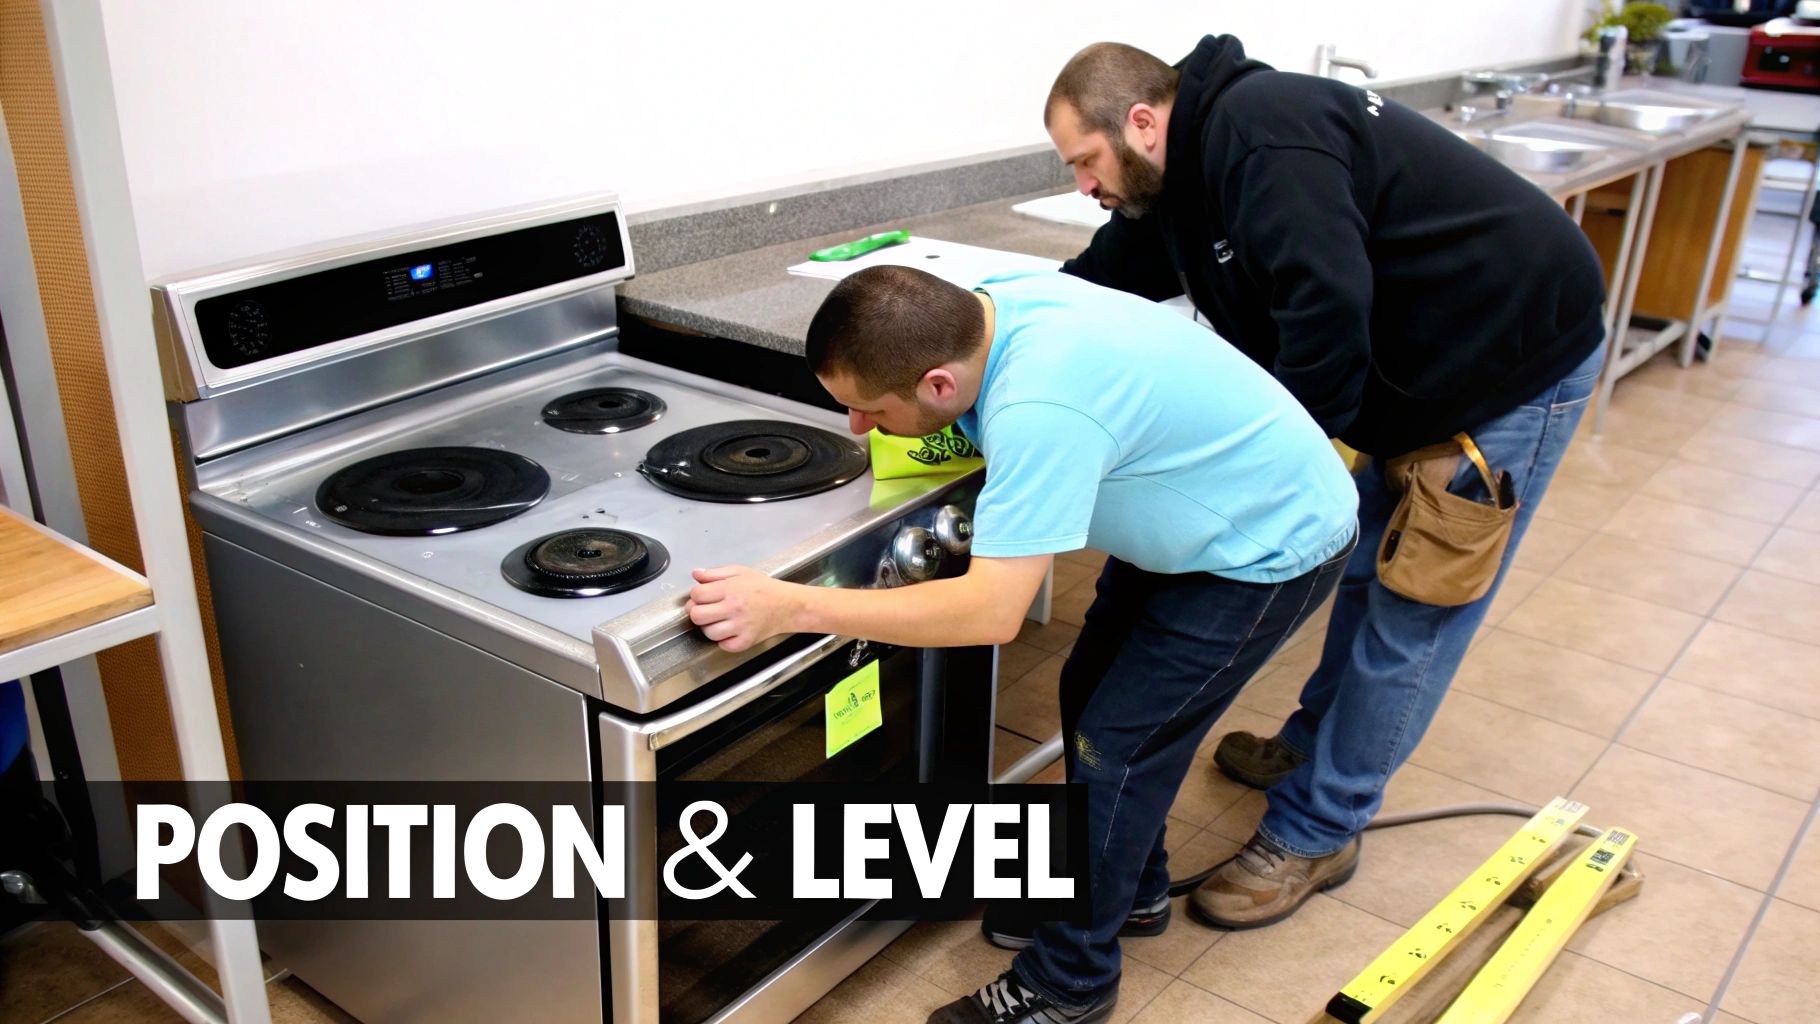
After the stove is in its designated spot, your most critical adjustment begins: leveling. An unlevel stove isn't just a minor annoyance. It causes oil to pool in one corner of the pan, batters to bake unevenly, and can even create a dangerous tipping hazard.
Most commercial stoves come with adjustable legs, usually a simple screw mechanism. Grab a carpenter's level and place it on the cooktop, checking it from front to back and then side to side.
- Front-to-Back Check: Place your level near the front edge, then move it to the back. Tweak the front or rear legs until the bubble is dead center in both spots.
- Side-to-Side Check: Now, move the level to the left and right sides of the cooktop to make sure it’s balanced across the entire width.
This small step makes a huge difference in cooking consistency and is a clear sign of a professional installing an electric stove.
Securing the Anti-Tip Bracket: A Vital Safety Step
In the hustle of a commercial kitchen, an unsecured range is a major liability. That's where the anti-tip bracket comes in. This small but essential safety device anchors the stove to the wall or floor, preventing it from tipping forward if someone leans on the open oven door or pulls a heavy stockpot off a front burner.
The bracket is usually a U-shaped piece of metal that you screw securely into the wall studs or floor right behind the stove. One of the stove's rear legs then slides into this bracket, locking it down. Never, ever skip this step—it’s required by safety codes for a very good reason.
Pro Tip: Install the anti-tip bracket before you make the final electrical connection. It gives you much more room to work behind the unit. Once it’s installed, slide the stove back slowly until you feel the leg engage firmly with the bracket.
Integrating with Stainless Steel Prep Tables
A successful stove installation goes beyond the electrical hookup; it demands a hard look at your general kitchen integration projects. How this new stove fits in with your prep stations will dictate the kitchen's entire flow. The goal is to create a tight, efficient work triangle that minimizes the steps between prepping and cooking.
In most commercial kitchens, this means strategically placing the stove next to various stainless steel prep tables.
- Standard Work Tables: A simple stainless steel table right next to your stove creates the perfect landing zone for hot pans and a staging area for ingredients.
- Sandwich Prep Tables: For a diner or café, a refrigerated sandwich prep table needs to be within arm's reach of the griddle. This lets a line cook move from cooking proteins to assembling sandwiches without wasting a single step.
- Pizza Prep Tables: A pizza prep station, with its refrigerated topping rail and cold base, should have a direct line to the electric deck oven. This logical flow is the secret to high-volume production.
Making the switch to electric is becoming more common than you might think. For kitchens moving from gas, market data shows this isn't a niche trend but a major industry shift. The global electric ranges market was valued at about USD 23.06 billion in 2023 and is projected to grow at a 7.3% CAGR from 2024 to 2030. This growing familiarity means electricians and inspectors are seeing these setups more often, which can help streamline the entire process from permitting to final sign-off.
Final Testing Commissioning and Inspection
Your new commercial electric stove is in place and anchored. It's tempting to fire it up and get cooking, but hold on—the most critical part of the installation is just getting started. This final phase of testing and commissioning is where you confirm every connection is safe, every function works flawlessly, and your entire setup is ready to pass inspection.
Don't rush this. Skipping these checks can lead to a damaged unit, a failed inspection, or worse, a dangerous kitchen. Taking a methodical approach now protects your investment and ensures you're ready for service on day one.
The Power-Up Sequence and Initial Checks
Before you even dream of plugging that stove in, get your multimeter out. The very first thing you need to do is verify the voltage at the receptacle you just installed. It absolutely must match the stove’s required voltage, which is usually 208V or 240V as stamped on the unit's data plate.
Getting this wrong can fry the stove's expensive electronics in an instant. Once you've confirmed the voltage is correct, go ahead and plug in the unit. Now, head to your panel and flip the dedicated circuit breaker to the "ON" position. You should see a power indicator light on the stove's control panel. If you get nothing, stop immediately and call your electrician.
Systematically Testing Every Function
With the stove powered up, it’s time to run it through its paces. This is more than just turning knobs; you need to observe performance and listen for any red flags. A simple checklist makes sure you don't miss a thing.
- Test Each Burner Individually: Turn one burner on at a time, cranked to the highest setting. It should start glowing red within a minute or so. Listen for any weird buzzing or clicking—that could signal a loose connection or a faulty element. Do this for every single burner.
- Verify Oven Functions: Set the oven to a standard temperature, like 350°F. You need to confirm that both the bake element (on the bottom) and the broil element (on the top) are heating up properly. If your model has a convection fan, turn it on and listen. It should be a smooth, quiet whir, not a scraping or rattling sound.
- Calibrate Oven Temperature: Don't just trust the dial. Grab a reliable oven thermometer, place it right in the center of the middle rack, and let the oven preheat for a solid 20 minutes. If the thermometer reading is off by more than 15-20 degrees, you might have a bad thermostat that needs professional calibration.
Important Note: The Burn-In Process
Brand new commercial ovens come with factory coatings that need to be burned off before you cook any food. This "burn-in" will create smoke and a pretty strong chemical smell. It's totally normal. Just crank your ventilation hood to high, open any nearby windows or doors, and run the oven at a high heat (around 400°F) for 30-60 minutes, or until the smell is gone.
Preparing for the Final Inspection
Once the stove is fully tested, your last hurdle is the official sign-off from the local health or building inspector. These folks have a specific job: verify safety and compliance. They work off a detailed checklist, and being prepared makes all the difference.
Here’s what they’ll be looking at closely:
- Electrical Connections: They’ll check the receptacle, the plug, and may ask to see the labeled breaker in your panel.
- Clearances: They will bring a tape measure to verify the stove is a safe distance from any combustible surfaces.
- Anti-Tip Bracket: The inspector will physically try to tip the stove to ensure the anti-tip bracket is properly installed and engaged. This is a non-negotiable safety feature.
- Ventilation and Fire Suppression: They'll confirm your Type I hood is working and, crucially, that it's correctly tied into the stove’s power via a shunt trip breaker.
To make sure you're truly ready, it's a smart move to go over a comprehensive restaurant health inspection checklist. This will give you a better sense of everything an inspector looks for, not just with the stove but across your entire kitchen. Being proactive shows you know what you're doing and helps guarantee a smooth approval, getting you that much closer to opening your doors.
Troubleshooting Common Installation Problems
Even the most carefully planned installations can hit a snag. You might flip a switch and get nothing, or find a burner just isn't heating up. The real skill is knowing how to run a quick diagnostic check for the simple stuff, and more importantly, recognizing when it's time to put down the tools and call in a pro.
Stove Won’t Power On At All
If the brand-new stove is completely dead, don't jump to conclusions about a faulty unit. More often than not, the problem is something simple between the stove and the wall.
- Check the Circuit Breaker: This is the usual suspect. Head over to your electrical panel and locate the stove's dedicated breaker. If it’s tripped (usually in the middle position), flip it all the way to "off" before firmly switching it back to "on."
- Inspect the Plug and Outlet: Make sure that heavy-duty plug is seated securely in the receptacle. A connection that isn't completely flush can interrupt the power. Get out your multimeter and verify you're getting the correct voltage right at the outlet.
If that breaker immediately trips again, you've got a short circuit. Stop right there and do not try to reset it again. This is a clear signal to call a licensed electrician immediately.
Burners Are Not Heating Correctly
Another common headache is a burner that stays cold or just doesn't get hot enough. This almost always points back to the heating element itself or its connection.
Before you even think about touching any internal parts, your first move is always to unplug the stove or kill the power at the circuit breaker. Safety first, no exceptions.
Start by checking that the burner element is pushed all the way into its socket. They can sometimes get jostled loose in transit. If it’s properly seated and still not working, you're likely looking at a bad element—thankfully, it's a replaceable part. But if you're seeing multiple burners fail or you think it's a wiring issue, it's time to call a certified appliance technician.
Every time a kitchen manager installs a new electric stove, they're joining a huge global move away from gas appliances. In fact, the electric ranges market is on a tear, projected to more than double from USD 26.63 billion in 2025 to a massive USD 50.29 billion by 2034. A big part of this is the rise of induction cooking, which completely changes the heat profile in a cookline. This affects everything, including how close you can safely place refrigerated gear like sandwich prep tables. You can learn more about this major market shift toward electric ranges.
Answering Your Stove Installation Questions
When you're getting ready to install a piece of equipment as critical as a commercial electric stove, a few questions are bound to pop up. It's totally normal. You're dealing with serious electrical work, safety codes, and the flow of your entire kitchen. Let's clear up some of the most common questions we hear from kitchen managers and restaurant owners.
Can I Just Install This Stove Myself?
You can definitely handle the uncrating, physical placement, and maybe even the initial leveling. But when it comes to the electrical hookup? That's a hard stop. All the real electrical work—running a new dedicated circuit, wiring it up, and installing that heavy-duty receptacle—is a job strictly for a licensed electrician.
Trying to DIY the wiring is a massive fire risk. It's the kind of mistake that will instantly fail a safety inspection, void your warranty, and could even get your insurance claim denied if something goes wrong. An electrician makes sure it's done right, safely, and up to every single local and national code.
What's This Single-Phase vs. Three-Phase Power Thing?
Understanding the power in your building is absolutely critical. Think of single-phase power as the standard stuff you have at home; it's delivered through two wires. Three-phase power is the workhorse of commercial buildings, using three wires to deliver a much smoother, more powerful, and consistent current that heavy equipment like your stove needs.
You must order a stove that matches your building's electrical service. Hooking up a three-phase stove to single-phase power (or vice versa) won't just not work—it will fry the internal components and create a dangerous situation. Before you even think about clicking "buy," have an electrician confirm what kind of service your facility has.
I can't tell you how many times I've seen this happen: a restaurant owner assumes their new location has the same power as their old one. It's a costly mistake that leads to returns and weeks of delays. Always, always verify your power supply first.
How Much Space Do I Need to Leave Around My Stove?
Clearance isn't just a suggestion; it's a non-negotiable safety rule for fire prevention and keeping your stove from overheating. The manufacturer's installation manual is your bible here—always follow its specific dimensions.
As a general rule of thumb, you’ll need at least six inches of breathing room between the stove and any combustible surfaces like drywall, wood cabinets, or wall studs. If you're placing it next to non-combustible surfaces, like a stainless steel wall panel or another piece of stainless equipment, you can often get away with a tighter fit. Proper spacing ensures air can circulate, makes cleaning easier, and is one of the first things a fire marshal will look for during an inspection.
At PrepTables.com, we know a great kitchen is more than just a stove. It’s an entire system of tough, reliable equipment working together. From stainless steel work tables to refrigerated prep stations, we have the essential gear to build out the efficient kitchen your crew deserves. Explore our full catalog at https://preptables.com.