

How to Clean a Manitowoc Ice Maker: (how to clean a manitowoc ice maker)
When it comes to knowing how to clean a Manitowoc ice maker, you need to focus on two non-negotiable jobs: descaling to get rid of mineral buildup and sanitizing to kill off nasty bacteria and mold. If you skip this routine, you’re setting yourself up for bad-tasting ice, a broken machine, and even health code violations. A consistent cleaning schedule is the only way to keep your ice safe and protect your investment.
Why a Clean Ice Machine Is Your Most Important Ingredient
It's easy to look at an ice machine and see a simple box that freezes water. But in a commercial kitchen, that machine is a workhorse. The quality of your ice has a direct line to how your drinks taste, your customers' safety, and even your utility bills. When cleaning gets pushed to the back burner, the problems that pop up are a lot worse than just cloudy ice.
Neglect creates the perfect home for two main culprits: scale and slime. Scale is that chalky, white crud left behind by minerals like calcium and magnesium in your water supply. Slime is a biofilm—a gross mix of bacteria, mold, and yeast that absolutely loves the dark, damp environment inside your machine.
The Real Cost of a Dirty Machine
Picture this: a popular restaurant is gearing up for the busiest weekend of the summer. Inside their Manitowoc ice maker, scale has been quietly choking the water lines and coating the evaporator plate. The machine is now working overtime just to make a fraction of the ice it should, causing an energy bill spike no one has noticed yet.
Then, on a blazing hot Saturday afternoon, it quits. The constant strain from the scale buildup has fried the compressor. Suddenly, there’s no ice for cocktails, food displays, or service stations. The result? Lost sales, unhappy customers, and an emergency repair bill that was completely avoidable. This isn't just a story; it's what happens every day in businesses that don't take maintenance seriously. Keeping your ice maker clean is just as important as understanding general mold prevention techniques to protect your whole operation.
The difference between a proactive cleaning schedule and reactive maintenance is often the difference between a profitable weekend and a catastrophic equipment failure.
Your Manitowoc Ice Maker Cleaning Toolkit
To get this job done right, you need to have the right gear ready to go. Getting everything together beforehand makes the whole process faster and less of a headache. While we’ll walk through the process step-by-step, you can get more great insights in our overview of the best commercial ice machines. Here’s a quick checklist of what you'll need.
| Category | Required Items | Purpose |
|---|---|---|
| Cleaning Solutions | Manitowoc-approved Nickel-Safe Descaler | Safely dissolves mineral and scale buildup without damaging sensitive components like the evaporator plate. |
| Cleaning Solutions | Manitowoc-approved Sanitizer | Kills bacteria, mold, slime, and other harmful microorganisms to ensure the ice is safe for consumption. |
| Safety Gear | Waterproof Gloves & Safety Goggles | Protects your skin and eyes from direct contact with potent cleaning and sanitizing chemicals. |
| Tools | Soft-Bristle Brushes, Sponges, Clean Cloths | Used for manually scrubbing removable parts and wiping down surfaces without causing scratches or damage. |
| Tools | Bucket or Container | Needed for mixing cleaning solutions according to manufacturer specifications and for soaking parts. |
Having these items on hand ensures you can follow the manufacturer's guidelines perfectly, keeping your machine in top shape and your warranty intact.
Safely Preparing Your Ice Maker for Service
Before you even think about grabbing the cleaning solution, the absolute first thing you have to do is get the machine ready for service. I can't stress this enough: rushing this part is a recipe for damaging the equipment or, even worse, hurting yourself. The goal here is to create a totally safe, controlled environment where the machine is completely dead before you start taking things apart. It’s more than just flipping a switch; it's a deliberate shutdown process that protects both you and your expensive machine.
First things first, get that ice bin completely empty. Shovel every last cube into some clean, food-safe containers if you need to save it, or just toss it. An empty bin is non-negotiable—it gives you the access you need and stops leftover ice from melting and messing with your cleaning chemicals later on. With the bin clear, go ahead and turn the machine off at the control panel. This starts the shutdown sequence properly.
Power and Water Disconnection
Once the control panel says it’s off, you need to physically cut the power and water. This is a critical safety step you can't skip.
Unplug the machine from the wall. If it's a hardwired unit, you'll need to flip the dedicated circuit breaker. In a busy kitchen, the pro move is to put a lockout/tagout device on that breaker. It’s a simple thing, but it guarantees that nobody can accidentally flip the power back on while your hands are inside the machine.
Next up is the water. Find the water line that runs into the back of the ice maker and turn the valve completely off. This is essential to prevent a flood of water from pouring in while you have all the internal components pulled out for cleaning.
The entire cleaning job breaks down into a few key stages. This simple visual shows the core flow: descaling, sanitizing, and then just keeping up with it.

As you can see, a proper clean isn't just one action. It’s a routine that tackles different kinds of gunk in different ways.
Removing Key Internal Components
Alright, with the machine powered down and disconnected, it's time to start pulling out the internal parts. These are the pieces that need a good hand-scrubbing because the automated cleaning cycles just can't get to them. Be gentle here—these parts can be delicate.
Pop the front panel off to get into the food zone. From there, you can usually remove the following parts without needing any tools:
- The Water Curtain: It's a plastic shield that directs the water flow. It just lifts up and out.
- The Distribution Tube: This piece sits up top and spreads water over the evaporator plate. It typically pops right out of its holding clips.
- The Ice Thickness Probe and Water Level Probe: These are your sensors. They usually unclip or might have a simple thumbscrew. Be extra careful with these—if you bend or damage them, your machine won't make ice correctly.
As you take each part out, put it on a clean, dedicated surface. Seriously, don't just set them on the floor or a dirty prep counter. That completely defeats the purpose of sanitizing them later. This simple habit is a big part of learning how to clean a Manitowoc ice maker the right way.
Running the Automated Cleaning and Sanitizing Cycles
Alright, you’ve done the prep work, and now it’s time to let the machine take over. The automated cycles on a Manitowoc are fantastic, but they still need you to kick things off and add the right solutions at the right time. Think of yourself as the pilot for this cleaning flight.
Your first stop is the control panel. Most Manitowoc models have a button labeled ‘Clean’ or ‘Service.’ Go ahead and press it. This tells the machine to stop making ice and start its cleaning routine. You'll likely see a light or a message on the display change, which is your signal to get the cleaning solution ready.
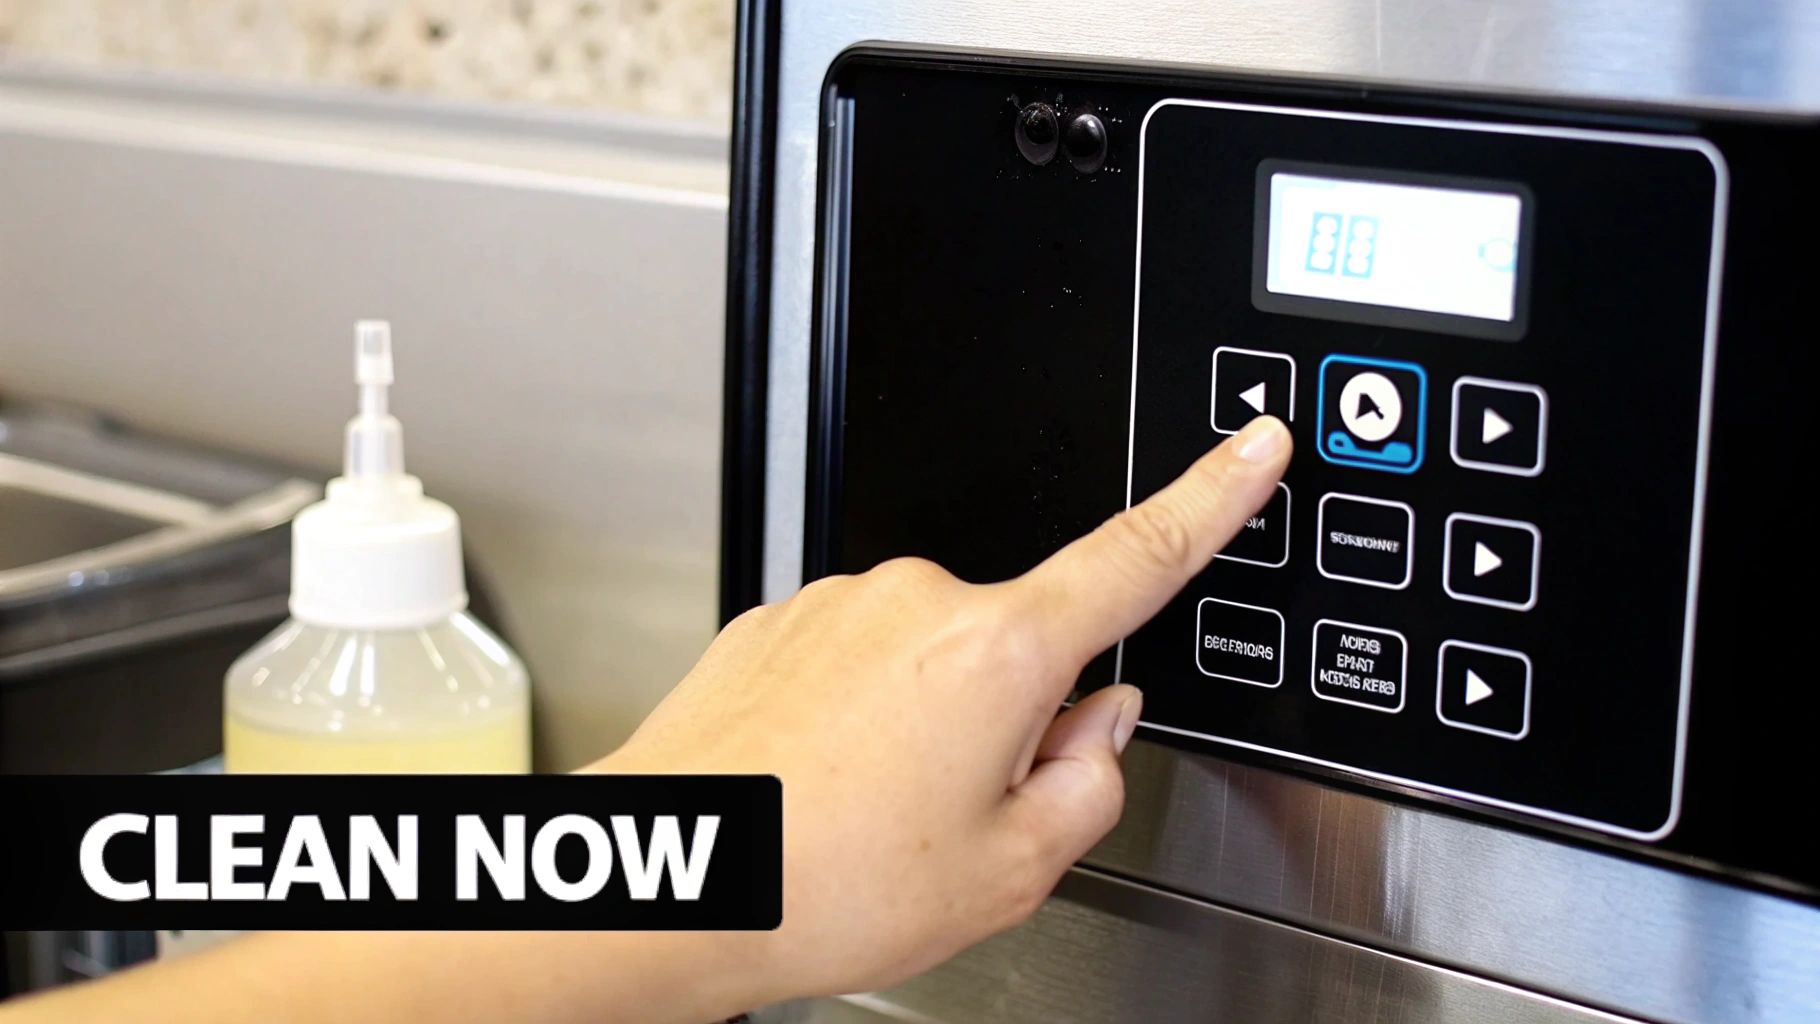
Activating the Descaling Cycle
With the cleaning mode engaged, the machine will first drain its water trough. Once it's empty, it will prompt you to add the descaler. This is where you grab your Manitowoc-approved, nickel-safe descaler. Follow the directions on the bottle to get the right mix, then pour it directly into the water trough. Your service manual will show you exactly where.
Once the solution is in, the machine handles the rest. It will start circulating the descaler through every nook and cranny of the water system. This is what breaks down all that stubborn scale and mineral gunk that builds up on the evaporator and other parts. The whole cycle usually takes about 20-30 minutes. You’ll actually be able to see the scale dissolving and getting flushed out.
The Importance of Using Approved Chemicals
I can't stress this enough: only use manufacturer-approved chemicals. This isn't just a suggestion—it's essential for protecting your machine and your warranty. Manitowoc evaporators have a special nickel plating that's great for making ice but can be easily wrecked by the wrong kind of acid. If you use an unapproved cleaner, you risk stripping that plating, which leads to corrosion and a very expensive repair bill that won't be covered.
Major suppliers agree. Your machine's service manual is your bible here, and you should never use concentrated cleaners too often. For most places, cleaning every 2 months is plenty, unless you're dealing with exceptionally hard water. You can find more detailed guidance on maintaining your Manitowoc ice machine on Katom.com.
Switching to the Sanitizing Cycle
After the descaling is done, the machine will run a few rinse cycles to get all the cleaner out. Pay attention to the control panel, as it will tell you when it’s ready for the sanitizer. This is another step where you need to be precise.
Grab your Manitowoc-approved sanitizer and mix it according to the label. Just like before, you’ll add it to the water trough when the machine tells you to. The sanitizer will then circulate everywhere the water goes, killing off any lingering bacteria, slime, or mold. If you're unsure which products to get, check out our guide to ice machine cleaners and sanitizers.
Critical Safety Warning: Never, ever mix the descaler and sanitizer together. These are different chemicals that can create a dangerous reaction, producing toxic fumes and damaging your machine. Always let the ice maker finish its full rinse cycle between the cleaning and sanitizing phases.
Detailing Removable Parts for a Thorough Clean
While the automated cycles do the heavy lifting, a truly deep clean happens by hand. This is where the real work begins. Those removable components you set aside earlier are notorious for hiding slime and stubborn scale, especially in places the machine's internal rinse just can't reach.
Honestly, this manual detailing is what separates a decent clean from a professional-grade one.
With your cleaning mixture ready in a bucket, it's time to give each part some individual attention. A soft-bristle brush is your best friend here—it's tough enough to scrub away grime but won't scratch up the plastic surfaces. Really focus on all those little nooks and crannies where buildup loves to accumulate.
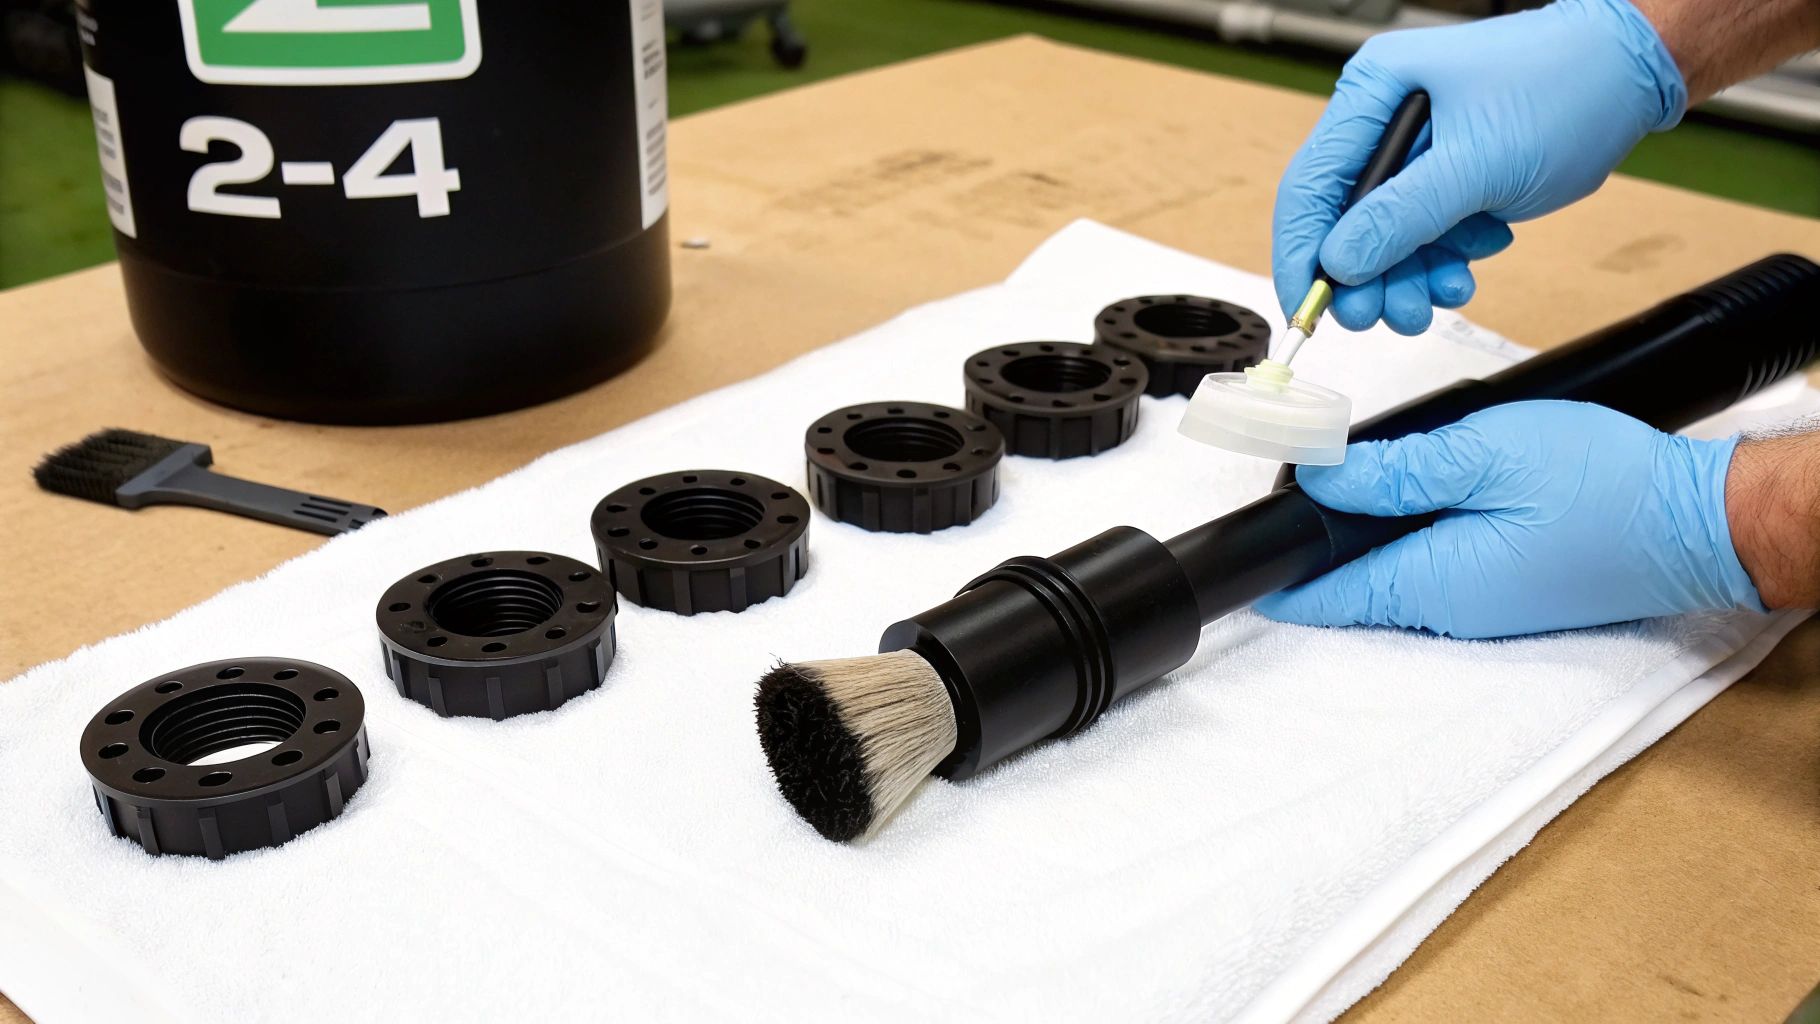
Tackling Key Components
I always start with the water distribution tube. Use your brush to carefully clean out every single one of its tiny holes. Clogged ports are a common cause of uneven water flow, which leads to those frustratingly misshapen ice cubes. Next up, gently scrub the water curtain, paying close attention to any corners or edges where biofilm might be hiding.
Now for the more delicate parts. Go easy on these.
- Ice Thickness Probe: You need to be extremely gentle when cleaning this sensor. Any aggressive scrubbing can damage it, and that will throw off your ice production down the line.
- Water Level Probe: Similarly, a careful wipe-down is all that's needed. You just want to remove any mineral film that could cause inaccurate water level readings.
This kind of hands-on process is pretty standard for many kitchen appliances. If you want a good example, even simple homeowner guides for the detailed cleaning of appliance components offer valuable techniques that apply here.
Once every single piece is spotless, give them all a thorough rinse with clean water. Set them on a sanitized surface to air dry completely.
Cleaning the Ice Bin and Exterior
While those parts are drying, let's turn to the ice bin. This area is a prime spot for mold and slime to take hold if you're not careful.
Wash the entire interior of the bin with your sanitizing solution, then rinse it out completely and wipe it dry with a fresh, clean cloth. Don't forget the ice chute and the scoop—they need a good sanitizing, too.
Finally, give the outside of the machine a wipe-down. I like to use a clean cloth and a dedicated stainless steel cleaner to get rid of fingerprints and smudges. It leaves the unit looking as good as it runs.
Takeaway Tip: Before you start putting parts back in, do one last visual check. Make absolutely sure there's no cleaning solution residue left behind. A complete rinse is just as critical as the cleaning itself for ensuring your ice is pure and tasteless.
Careful Reassembly
Once everything is clean and completely dry, it's time to put your ice maker back together.
Reinstall all the components in the reverse order you took them out. Double-check that each part—from the probes to the distribution tube and water curtain—clicks securely back into its proper place. Trust me, a loose or improperly seated component is one of the most frequent causes of malfunctions right after a cleaning.
Taking a moment for careful reassembly ensures your Manitowoc is ready to get back to work safely and efficiently.
Bringing It Back Online and Setting a Cleaning Schedule
With the deep clean done and every part back in its place, you’re in the home stretch. But don't rush this last part—bringing your Manitowoc ice maker back online safely is just as important as the cleaning itself.
First, go ahead and reconnect the water supply line. You'll want to make sure that connection is snug and completely drip-free. Now, you can plug the machine back in or flip the circuit breaker you turned off earlier. Head to the control panel and switch the machine on to kick off a new ice-making cycle.
This next part is critical: discard the first one or two full batches of ice. Think of this as a final flush. It guarantees that any lingering traces of descaler or sanitizer are completely purged from the system before that ice makes it anywhere near a customer's drink.
Shifting to a Proactive Maintenance Mindset
You’ve just seen how to properly clean a Manitowoc ice maker. The goal now is to turn this into a routine, not a frantic response to a problem. While Manitowoc suggests a baseline of two deep cleanings per year, the real answer depends entirely on your kitchen. That number could realistically be anywhere from once to four times annually. You can find more detailed guidance on Manitowoc's recommended cleaning schedules on EasyIce.com.
This is where you have to put on your detective hat. Keep an eye on your machine's performance in the weeks and months after a cleaning. It'll tell you everything you need to know.
Tailoring Your Cleaning Schedule
A few key factors will determine how quickly scale and slime reappear. If you can get a handle on them, you can build a custom cleaning schedule that keeps your ice pure and your machine humming along.
Pay close attention to these environmental factors:
- Local Water Hardness: If your area has hard water, you're going to see mineral scale build up much faster. If you spot those tell-tale white, chalky deposits within just a few months, that's your sign to move to a quarterly cleaning schedule.
- Ambient Air Quality: The air in your kitchen plays a huge role. A bakery kicking up airborne yeast or a kitchen with a lot of grease in the air from deep fryers will introduce contaminants that feed slime growth.
- Daily Ice Demand: A machine that’s running nonstop is under a lot more stress. This constant cycle can speed up how fast impurities build up, meaning it's going to need more frequent attention from you.
By moving from a "clean it when it breaks" approach to a scheduled, proactive one, you're not just ensuring great ice—you're preventing expensive emergency repairs down the road. For more tips on building a solid routine, check out our general guide on ice machine cleaning best practices.
Answering Your Top Manitowoc Cleaning Questions
Even with a good guide in hand, you're bound to have questions. It's only natural. We get calls from kitchen managers all the time who are just getting the hang of cleaning their Manitowoc ice makers.
Let's walk through some of the most common questions we hear. Getting these details straight will make sure your cleaning routine is safe, effective, and keeps your machine humming along.
Can I Just Use Vinegar to Clean My Machine?
I get this one a lot, and the answer is always a hard no. It might seem like a simple, cheap fix, but using vinegar is probably one of the worst things you can do to your Manitowoc.
These machines are built with sensitive parts, like nickel-plated evaporators. The intense, uncontrolled acid in vinegar will eat away at that nickel plating. This leads to corrosion, poor ice production, and eventually, a repair bill that will make your eyes water.
Plus, using an unapproved chemical like vinegar will almost certainly void your warranty. Always, always stick with the nickel-safe descaler and sanitizer recommended by Manitowoc. It's the only way to protect your investment.
What’s with the Blinking Lights During the Clean Cycle?
Those blinking lights and error codes aren't just for show—they're your machine’s way of talking to you. Each flash is a specific signal pointing to a problem, whether it's a water flow issue, a component that’s stuck, or a faulty sensor.
The meaning of each code is different for every Manitowoc model, so your first stop should always be the user manual. It will have a chart that translates those codes into troubleshooting steps you can actually use. If you follow the manual's advice and the light is still blinking, it's time to call in a certified tech. Don't try to force it.
A blinking light during a clean cycle is a stop sign. Pushing through without figuring out the problem can lead to a half-cleaned machine or, even worse, serious damage.
How Often Should I Be Cleaning if I Have Bad Water?
Your ice maker will give you some pretty obvious clues. The biggest tell is seeing that chalky, white mineral buildup—what we call scale—reappearing on the internal parts not long after you've cleaned them.
Another dead giveaway is if your ice production starts slowing down way sooner than it should. If you suspect hard water, you can grab a simple water test kit or just look up your city's water quality report online. For any kitchen dealing with hard water, I strongly recommend bumping up your cleaning schedule from twice a year to every three months. It's also a really smart idea to invest in a dedicated water filtration system. It'll protect your equipment and save you a lot of headaches in the long run.
At PrepTables.com, we understand that reliable equipment is the heart of any professional kitchen. From durable stainless steel work tables to the commercial ice makers that keep your service running smoothly, we provide the high-quality gear you need to succeed. Stainless steel prep tables are essential, available in various configurations to suit any need. General-purpose tables offer a simple, flat work surface, often with an undershelf for storage. For specific workflows, specialized options like sandwich prep tables and pizza prep tables integrate refrigerated compartments below the work surface and a refrigerated rail on top for holding cold ingredients, streamlining the assembly process. Explore our full range of NSF-certified equipment today at https://preptables.com.