

Your Complete Guide to Choosing a Cooler for Restaurant Success
Picking the right cooler for your restaurant is one of those make-or-break decisions that quietly impacts your food safety, kitchen flow, and even your utility bills. This guide is your roadmap, breaking down every critical factor you need to think about before you invest in this essential piece of equipment. We'll walk through everything from the different types of commercial coolers to figuring out the exact capacity your kitchen actually needs.
Your Guide to Selecting the Perfect Restaurant Cooler
Choosing a new cooler isn't just a purchase; it's a strategic investment in the very core of your kitchen's infrastructure. The right unit is the heart of your food storage system, keeping ingredients fresh, safe, and ready to go. That quality directly translates to every single plate you serve.
Make the wrong choice, though, and you could be looking at spoiled inventory, a clunky workflow, and energy bills that make your eyes water. This guide is here to cut through the confusion. We'll start with the fundamentals every restaurant owner or kitchen manager needs to know, beginning with the main types of coolers out there and where they fit best.
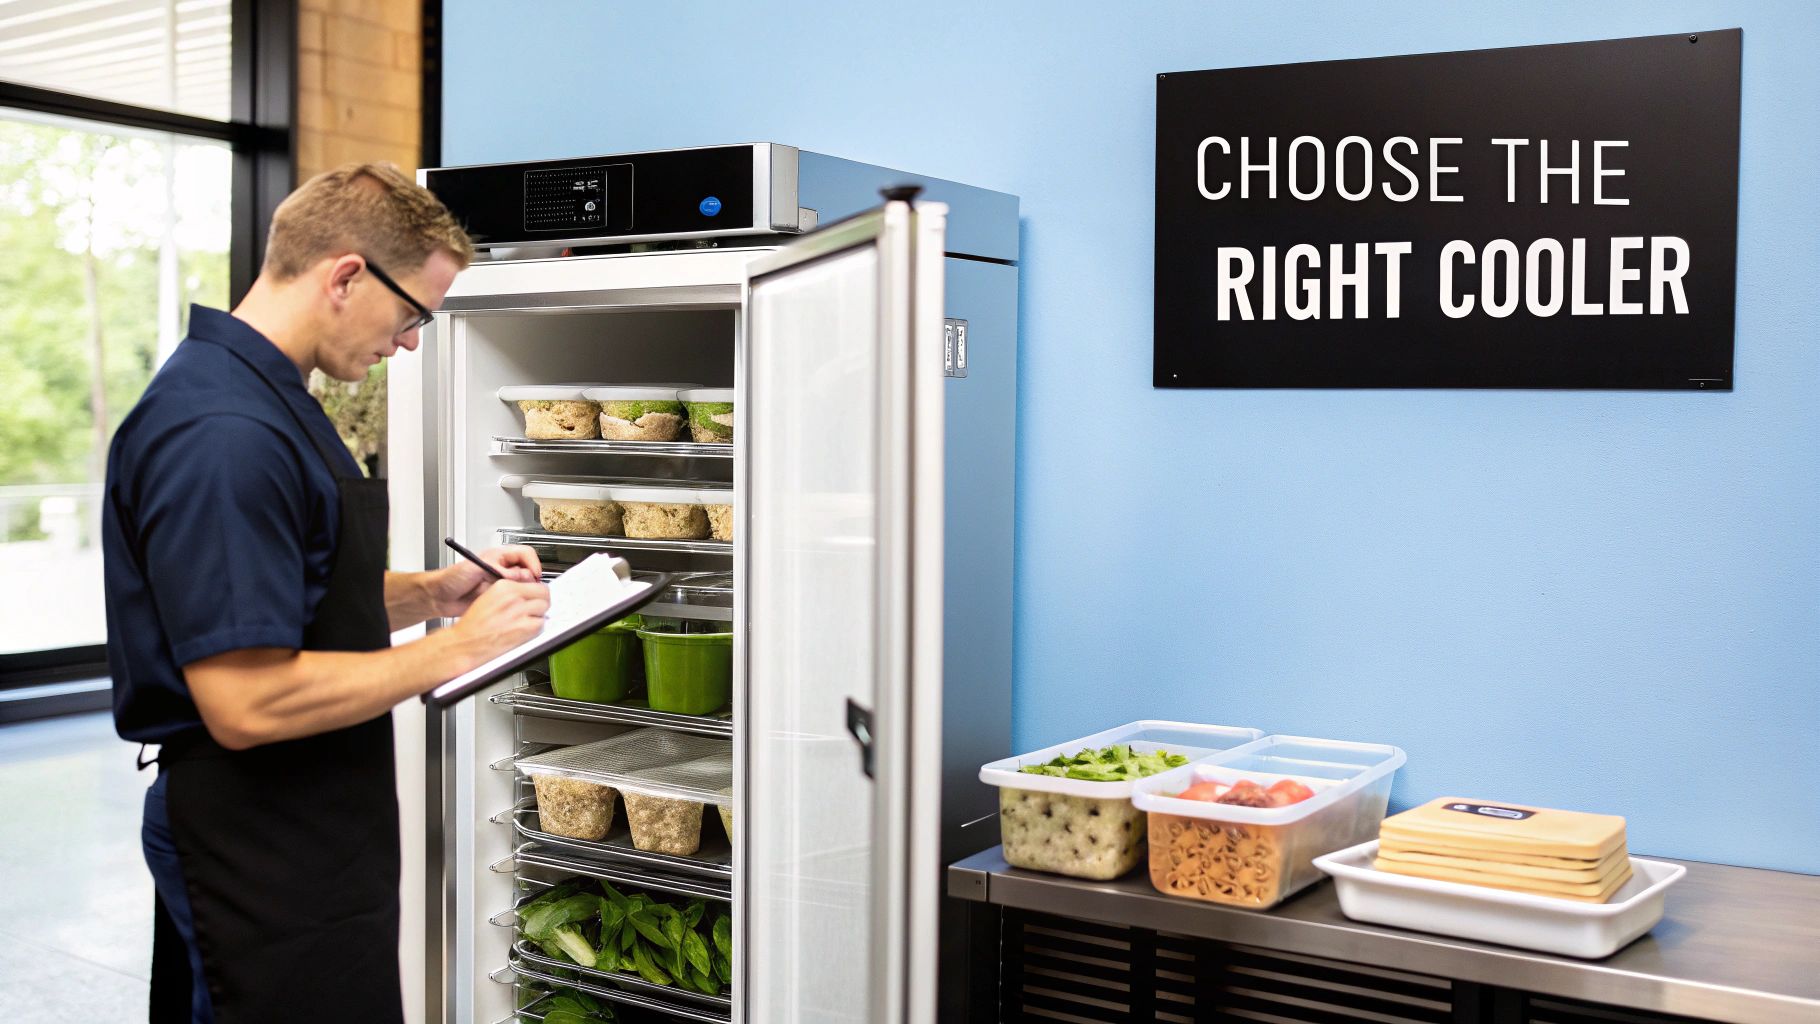
Key Cooler Categories at a Glance
To make your search easier from the get-go, let's break down the main options. Each cooler type is built for a specific job, whether it's holding bulk deliveries or keeping prepped ingredients at arm's reach on the line. Getting a handle on these differences is the first real step to finding the perfect match for your operation.
The table below gives you a quick side-by-side comparison, highlighting what makes each style unique and where it truly shines.
Quick Guide to Commercial Cooler Types
This at-a-glance summary will help you quickly narrow down the options and identify which category best aligns with your restaurant’s unique needs.
| Cooler Type | Primary Use | Best For | Key Feature |
|---|---|---|---|
| Reach-In Coolers | General-purpose, frequent access | Storing prepared ingredients, sauces, and daily-use items near prep stations. | Vertical design with shelving for organized, easy-to-grab storage. |
| Walk-In Coolers | Bulk, long-term storage | Holding large deliveries of produce, meat, and dairy in cases or boxes. | High-capacity, room-sized storage for maximizing inventory space. |
| Undercounter Coolers | Compact, point-of-use refrigeration | Small kitchens, bars, or specific workstations needing chilled items within arm's reach. | Space-saving design that fits neatly under existing counters. |
| Prep Table Coolers | Combined workspace and refrigeration | Sandwich shops, pizzerias, and salad bars that require immediate access to ingredients. | An integrated refrigerated base with a durable food-prep surface. |
By starting here, you can approach the more detailed specs with a clear sense of direction, making sure your final decision is both smart and effective for your kitchen.
Decoding the Different Types of Restaurant Coolers
Picking the right cooler for your restaurant is a lot like choosing a specific knife for a job; you wouldn't use a paring knife to break down a side of beef. Not all commercial coolers are built the same, and knowing their distinct roles is the first step to building an efficient kitchen. Each type is engineered for a specific purpose, whether it's for bulk storage in the back or for high-speed prep work right on the line.
The journey to finding the perfect fit starts by understanding the three main categories: the massive walk-ins, the flexible reach-ins, and the specialized prep tables. Each one plays a different part in your kitchen's day-to-day rhythm. A high-volume steakhouse has completely different refrigeration needs than a small corner deli, and their equipment choices have to reflect that.
The Generalists: Reach-In and Walk-In Coolers
Think of a walk-in cooler as your restaurant's main pantry. It’s the big, room-sized unit where you stash your bulk inventory—crates of produce, boxes of meat, and cases of dairy that come in from suppliers. Its whole job is long-term storage, keeping huge quantities of food safely chilled until you need them. You'd never put this on your main cook line; it’s a backstage workhorse, plain and simple.
The reach-in cooler, on the other hand, is more like your kitchen's ready-access cabinet. These are the upright units, usually with glass or solid doors, that you strategically place near prep stations or the cook line. They hold the ingredients for the day's service, like portioned proteins, sauces, and prepped vegetables. Their vertical design and shelving make it easy for staff to grab exactly what they need in seconds without having to leave their station. Learn more about how a reach-in cooler can fit into your kitchen workflow and keep your daily operations running smoothly.
The Specialists: Stainless Steel Prep Tables
While walk-ins and reach-ins cover your storage needs, the real action happens at the prep stations. This is where stainless steel prep tables with built-in cooling completely change the game for your kitchen's efficiency. These hybrid units combine refrigerated storage with a durable workspace, creating a self-contained station where a chef can build a dish from start to finish. They are the secret weapon for a streamlined workflow, cutting down on the steps a cook has to take between their cutting board and the cooler. Everything is right there, within arm's reach, which is critical during a chaotic dinner rush.
These tables aren't one-size-fits-all; they are highly specialized based on the menu they're designed to support. The main types include sandwich/salad prep tables and pizza prep tables.
A well-placed prep cooler can drastically reduce ticket times. By eliminating the need for chefs to walk back and forth to a central refrigerator, you can shave precious seconds off every order, which adds up to a significant increase in efficiency over a busy service.
Sandwich and Salad Prep Tables for Precision and Speed
A sandwich prep table, often doubling as a salad prep table, is the MVP of any deli, cafe, or sandwich shop. Its entire design is focused on quick, organized assembly. Here’s what makes it unique:
- Refrigerated Wells: The top is lined with a series of cooled wells made to hold standard food pans (usually 1/6-size). This keeps your sliced meats, cheeses, veggies, and condiments perfectly chilled and right at the chef's fingertips.
- Narrow Cutting Board: A cutting board, typically 8-12 inches deep, runs along the front. This gives you just enough space to assemble sandwiches, wraps, and salads without being too bulky.
- Undercounter Storage: Below the work surface, a refrigerated cabinet provides backup storage for ingredients, making it easy to restock the line quickly without a trip to the walk-in.
Picture a slammed lunch service at a deli. The sandwich maker can stand in one spot, pull fresh turkey from the cabinet below, grab pickles and tomatoes from the chilled wells above, and assemble the whole order on the cutting board. This compact, all-in-one design is purpose-built for speed and consistency.
Pizza Prep Tables for Scale and Volume
While it looks similar, a pizza prep table is engineered for a totally different job. It’s built to handle bigger, more complex menu items. The key differences are obvious once you see one in action:
- Raised Pan Rail: Unlike the flush wells on a sandwich table, a pizza prep table has a raised, refrigerated rail. This rail is made to hold larger pans (often 1/3-size) for bulkier ingredients like shredded cheese, pepperoni, and chopped peppers.
- Extra-Deep Cutting Board: Its most defining feature is the massive cutting board, which can be 19 inches deep or even more. This huge surface is essential for stretching out large pizza doughs and gives you plenty of room to work without making a mess.
- Robust Refrigeration: The cooling system is usually beefier to make sure the large pans in the raised rail stay ice-cold, even when the lids are being opened and closed constantly.
For a pizzeria, this setup is a must-have. A cook can stretch a 16-inch dough, slide it onto the board, add the sauce, and then easily reach for all the toppings from the raised rail above. The entire pizza is built in one fluid motion, ready to hit the oven. This is the kind of specialized cooler for restaurant use that enables high-volume kitchens to pump out orders while maintaining quality.
How to Calculate Your Restaurant's Cooling Needs
Picking the right size for your restaurant cooler isn't just guesswork—it's a critical business decision. Get it wrong, and you're either looking at spoiled inventory from a unit that's too small or burning cash on energy bills for a cooler that's too big. A properly sized unit is your first line of defense for food safety and a cornerstone of an efficient kitchen.
Think of it like stocking a pantry. You need enough space for what you have now, room for incoming deliveries, and a logical layout so your team can rotate stock easily. A cooler that’s bursting at the seams is a recipe for cross-contamination and food waste. On the flip side, a half-empty cooler forces the compressor to work overtime cooling empty air, which is a massive energy drain.
This decision tree can help you narrow things down right away. It links what you need to do—whether it's high-volume storage, daily access, or prep work—to the type of cooler that gets the job done.
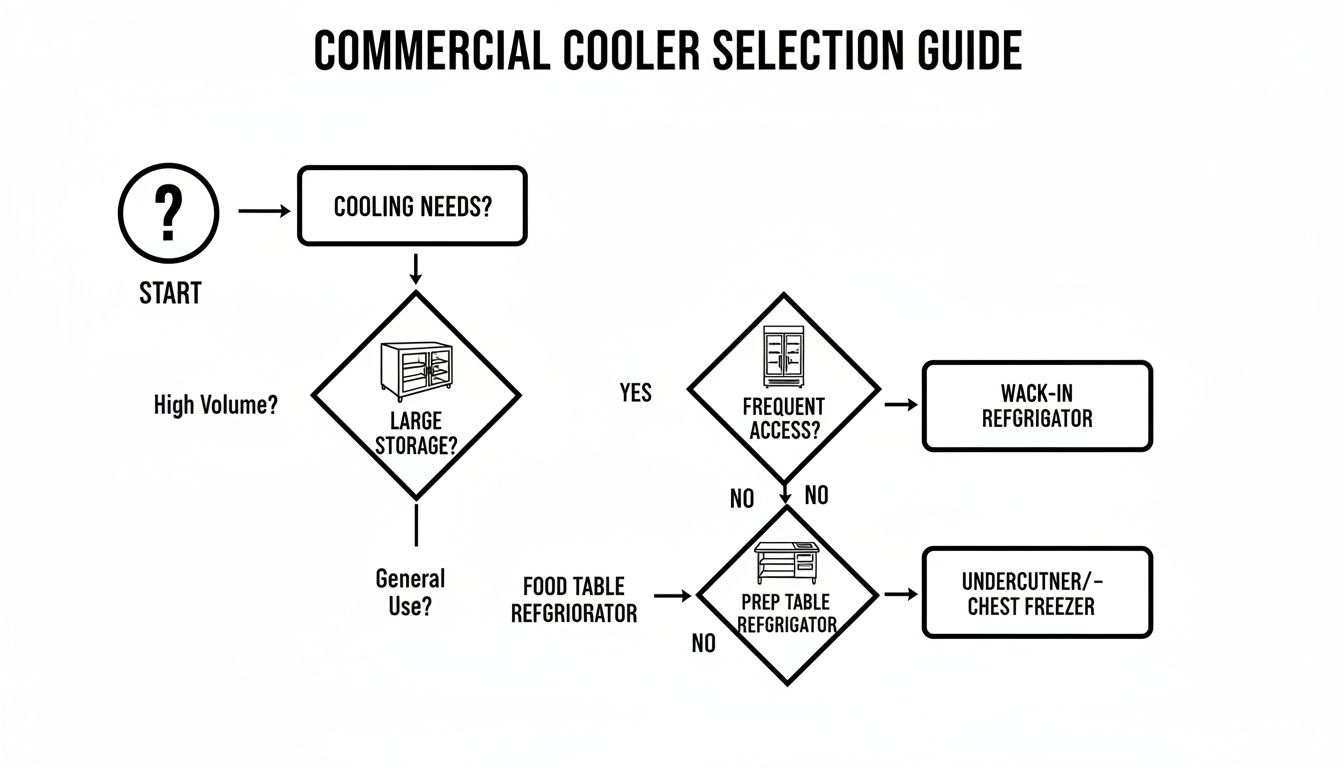
As you can see, your workflow is the biggest factor. The chart points you from a broad question about your needs straight to a specific category of equipment.
Start with a Baseline Calculation
A good rule of thumb in the industry is to plan for 1.5 to 2.5 cubic feet of cold storage for every seat in your restaurant. So, if you run a 60-seat bistro, you’d be looking for a total of 90 to 150 cubic feet of capacity across all your refrigerators and freezers.
But that's just a starting point. Your menu and how you operate will mean you need to tweak that number. A steakhouse aging large cuts of beef is going to have vastly different storage needs than a cafe that gets fresh produce delivered every morning.
Key Factors That Influence Your Sizing
Once you have that baseline number, it’s time to get specific. These operational details will help you fine-tune your estimate so your cooler actually fits how your kitchen runs day-to-day.
- Menu Complexity: The more diverse your menu, the more you need to keep ingredients separate to avoid weird flavor transfers or cross-contamination.
- Delivery Schedule: Big deliveries once or twice a week demand a lot more storage space than a place that gets daily drop-offs.
- Peak Service Volume: Think about your busiest Friday night. Your cooler needs to hold enough prepped ingredients to get you through the rush without being dangerously overstuffed.
- Product Turnover: How fast do you burn through ingredients? High-turnover items need to be in an easy-to-access reach-in, while bulk goods you use less often can live in the walk-in.
- Kitchen Layout and Ambient Temperature: A cooler sitting right on a hot cook line has to fight a constant battle against the heat. The temperature and airflow around the unit will impact its efficiency and the type of compressor you need.
Remember to leave some breathing room. A cooler should never be packed more than 75% full. You need that extra space for air to circulate properly. Overload it, and you’ll create warm spots where bacteria can thrive.
Putting It All Together for a Final Estimate
Now, blend your baseline with the real-world factors of your kitchen. Start with the "per seat" calculation, then adjust it up if you have a complex menu or only get a couple of deliveries a week. You might adjust it down a bit if your kitchen is tight on space and you run a lean, just-in-time inventory.
For bigger operations, you need to dig deeper. Understanding the logistics behind a proper walk-in cooler installation, for example, helps you plan not just for sheer volume but for long-term workflow. Taking the time to think it through now ensures your investment pays off for years to come.
Understanding Your Cooler's Key Technical Components
When you’re buying a cooler for a restaurant, looking past the size and price tag is critical. The technical parts inside are what really determine how well it performs, how reliable it is, and what it’s going to cost you over time. It’s like looking under the hood of a car before you buy it—this is what tells you how the machine will run when you’re slammed on a Saturday night.
The commercial refrigeration market is massive, valued at around USD 51.66 billion, and it's only getting bigger. This growth fuels constant innovation, making it more important than ever to understand what separates a great cooler from a mediocre one.
The Heart of the System: The Compressor
Think of the compressor as the engine of your cooler. It’s the workhorse that circulates refrigerant to pull heat out of the cabinet and keep everything inside safely chilled. Where this component is placed has a huge impact on its performance and how easy it is to maintain.
You’ll typically see two main setups:
-
Top-Mounted Compressors: These are perfect for cooler, cleaner parts of the kitchen, like a prep area that isn't right on the cook line. Since heat naturally rises, a top-mounted unit pushes hot air up and away from your workspace. It also stays clear of the dust and grease that settles on the floor, which helps keep the coils from getting clogged.
-
Bottom-Mounted Compressors: Placed at the base of the unit, these are usually a better choice for hot spots like a busy cook line. They pull in cooler air from near the floor, which helps them run more efficiently in high-heat environments. Plus, the components are much easier to get to for cleaning and service—no ladder required.
The right choice really boils down to your kitchen's layout. If the cooler is going next to a deep fryer, a bottom-mounted unit is your best bet. If it’s destined for a cooler bakery or pantry, a top-mounted design will serve you better.
The Cooling Trio: Condenser, Evaporator, and Insulation
While the compressor supplies the muscle, three other components work together to actually manage the cold. The condenser and evaporator handle the heat exchange, and the insulation makes sure all that hard work doesn't go to waste.
The condenser coil is responsible for releasing the heat that’s been pulled out of the cooler’s interior. At the same time, the evaporator coil absorbs the heat from inside the cabinet. The better these coils work, the less your compressor has to run. For anyone with larger cooling systems, learning about the condensing unit for a walk-in cooler can offer some great insight into how these powerful systems operate on a bigger scale.
Insulation is the unsung hero of energy efficiency. Good coolers use high-quality polyurethane foam that’s injected into the walls and doors. This creates a powerful thermal barrier, keeping cold air in and warm air out. The result? The compressor kicks on less often, saving you a surprising amount of money on your energy bill over the cooler's lifetime.
Managing Moisture: The Defrost Cycle
As a cooler pulls moisture out of the air, it’s natural for ice to build up on the evaporator coil. If left unchecked, this frost will kill your cooler’s efficiency. That's where the defrost cycle comes in.
- Electric Defrost: This system uses a heating element that periodically turns on to melt away any ice. It's a reliable and common method, though it can cause the internal temperature to tick up slightly while the cycle is running.
- Off-Cycle Defrost: This is a simpler approach. The system just turns the compressor off for a short time, letting the fans and the air inside the cooler melt the frost. It uses less energy but works best in kitchens that aren't too humid.
Choosing the right defrost system depends on your climate. A steamy kitchen in a humid area will almost certainly need a more powerful electric defrost system to keep the coils clear and the unit running at its best.
Maximizing Energy Efficiency to Lower Operating Costs
Think of your restaurant’s cooler as a silent, tireless employee who never clocks out. It runs 24/7, guarding thousands of dollars in inventory, which makes it one of the biggest line items on your monthly utility bill. Choosing an energy-efficient model isn’t just about being green—it's a smart financial move that pays you back over time.
Energy costs are a massive concern in any food service operation. Commercial refrigeration alone can eat up around 40% of the total energy consumption in a typical kitchen. That’s a staggering number, and it’s why savvy owners are making efficiency a top priority. The U.S. commercial refrigeration market hit roughly USD 23.5 billion and is projected to nearly double, showing just how much the industry is investing in better, more efficient equipment.
This is all about turning a necessary expense into a manageable one, directly boosting your bottom line.
Decoding Energy Efficiency Features
Today’s commercial coolers are packed with smart tech designed to slash power usage without compromising on cooling power. When you're shopping around, keep an eye out for these game-changing features. They’re what separate a money-pit from a long-term money-saver.
- ENERGY STAR® Certification: This is the gold standard. If you see this label, it means the unit is, on average, 20% more energy-efficient than its non-certified counterparts. It's a guarantee that the cooler meets strict guidelines from the U.S. Environmental Protection Agency.
- High-Efficiency Compressors: The compressor is the engine of your cooler. Modern versions, like variable-speed models, are way smarter. Instead of running at full throttle all day, they only use the exact amount of power needed to hold the right temperature.
- LED Lighting: Old-school incandescent bulbs are energy vampires. They also produce heat, which makes the compressor work even harder to compensate. Bright, clean LED lights use up to 75% less energy and stay cool to the touch, reducing the overall workload on your cooler.
- Superior Insulation: Look for high-density, polyurethane foam insulation. This creates a powerful thermal barrier that locks the cold air in and keeps the warm kitchen air out. The less cold air that escapes, the less the compressor has to run.
Think of these features as a well-oiled team. Each one does its part to keep your operating costs as low as possible.
The Power of Proactive Maintenance
Here’s the thing: buying an efficient unit is just the first step. To keep it running lean, you have to take care of it. Without regular maintenance, even the best cooler will slowly turn into an energy hog, driving up your bills and straining its own parts.
Think of your cooler's condenser coils like the radiator in your car. When they get clogged with dust, grease, and kitchen grime, the system can't get rid of heat properly. This forces the compressor to work overtime, wasting a ton of energy and putting it at risk of an early burnout.
A quick, simple maintenance routine can make a world of difference.
Monthly Efficiency Checklist:
- Clean the Condenser Coils: Grab a stiff brush and a vacuum to clear away all that built-up gunk. This is the single most effective thing you can do to lower your cooler's energy use.
- Inspect Door Gaskets: Run your hand along the door seals to check for cracks, tears, or gaps. A bad seal lets cold air pour out, making the unit run non-stop. Pro tip: close the door on a dollar bill. If you can slide it out easily, it's time for a new gasket.
- Clear Drain Lines: Make sure the drain lines are clear of blockages. Clogged lines can lead to ice buildup, which messes with performance and efficiency.
Ultimately, mastering energy efficiency through maintenance is just as important for your coolers as it is for any other major piece of equipment. By staying on top of these simple tasks, you’re not just cleaning—you’re protecting your investment and keeping your utility bills under control.
Navigating Food Safety and Compliance Standards
Let's talk about something that can make or break your restaurant: compliance. It’s not the most exciting topic, but it’s the bedrock of your reputation and, more importantly, your customers' safety. When you’re choosing a cooler for restaurant use, a few key certifications are totally non-negotiable.
Think of these certifications as a built-in insurance policy. They guarantee your cooler is tough enough for a commercial kitchen while meeting strict public health rules. Choosing a certified unit protects your business from liability and ensures you’re always ready for that surprise health inspection. These standards cover everything from the steel it's made of to how easy it is to clean.
The Gold Standard: NSF Certification
If there's one acronym you need to burn into your memory, it's NSF, for the National Sanitation Foundation. An NSF certification is the absolute gold standard for any piece of foodservice equipment, especially a commercial cooler. It tells you that an independent third party has verified the unit against a long list of public health and safety benchmarks.
When a cooler has that NSF seal, it means:
- Safe Materials: Every surface that touches food is non-toxic, won't absorb spills, and resists corrosion. No weird chemicals are going to leach into your expensive ingredients.
- Hygienic Design: The cooler is built smart. There are no tiny cracks, sharp internal corners, or hidden crevices where bacteria and gunk can build up. This makes cleaning and sanitizing way faster and more effective.
- Performance Tested: The unit has been put through its paces to prove it can hold safe food temperatures, even during a chaotic dinner rush.
Simply put, an NSF-certified cooler is designed from the ground up to keep your operation clean and safe. It's a must-have if you want to pass your health inspections without breaking a sweat.
Accessibility and Local Health Codes
Beyond sanitation, a couple of other standards are critical for keeping your staff and customers safe. It’s a good idea to get familiar with these before you pull the trigger on a purchase.
First is the Americans with Disabilities Act (ADA), which sets rules for accessibility. For coolers, this might mean a specific counter height or ensuring controls are low enough for an employee in a wheelchair to reach. Not every cooler in your kitchen needs to be ADA-compliant, but any in self-service areas or certain workstations definitely do.
Don’t forget about your local health department. While NSF and ADA are national standards, your city or state might have its own quirky rules. They could require specific temperature logging systems or have regulations about where you can place refrigeration. Always check your local codes to sidestep any expensive fines or delays.
Navigating these rules doesn't have to be a headache. Just make NSF certification your top priority. After that, a quick check on ADA requirements for specific areas and a call to your local health inspector will ensure your new cooler is a compliant, safe, and fantastic asset for your kitchen.
Got Questions About Choosing a Restaurant Cooler? We've Got Answers
When it's time to pull the trigger on a new cooler, a few final questions always seem to pop up. It’s a big investment, so getting clear, straight-to-the-point answers is the only way to make sure you’re choosing a unit that’s a perfect fit for your kitchen.
Let's walk through the most common questions we hear from restaurant owners. We'll cover the real-world differences between unit types, the tech specs that actually matter for performance, and the simple maintenance that will protect your cooler for years to come.
What Is the Difference Between a Sandwich Prep Table and a Pizza Prep Table?
The main difference is all about the design, which is built specifically for the food you're making. A sandwich prep table has a skinnier cutting board and refrigerated wells made for smaller food pans, like 1/6-size pans. It's set up to hold your sliced meats, cheeses, and veggies for a fast, assembly-line-style workflow.
On the other hand, a pizza prep table is built with a much deeper cutting board to give you room to work with large pizza doughs. It also has a raised, refrigerated rail that fits larger pans (usually 1/3-size) to hold bulky toppings like shredded cheese and pepperoni. Your menu is the deciding factor here; one is built for speed and precision, the other is built for volume.
Should I Choose a Top-Mounted or Bottom-Mounted Compressor?
This choice really boils down to your kitchen's environment. There's no single right answer, just what's right for your space.
- Top-Mounted Compressors are your best bet for cooler, less greasy areas. Because they're up high, they don't suck in dust and debris from the floor. They also vent hot air up and away from your staff, which everyone on the line will appreciate.
- Bottom-Mounted Compressors are better suited for hot environments, like right on a busy cook line. They pull in cooler air from down low near the floor. The big advantage is they are way easier to get to for cleaning and maintenance, but you'll probably need to clean the coils more often.
Just take a look at where the cooler is going to live. The ambient temperature and general cleanliness of that spot will tell you which one to pick.
Key Takeaway: You can't skip out on consistent maintenance. It's non-negotiable if you want your cooler to run efficiently and last a long time. Simple monthly checks on the condenser coils and door gaskets can stop expensive breakdowns before they happen and seriously lower your energy bills.
Why Is NSF Certification So Important?
Think of NSF (National Sanitation Foundation) certification as your guarantee that a cooler meets the highest standards for public health and safety. It's proof that the materials used are non-toxic, the unit is designed to be cleaned easily (no hidden cracks for bacteria to grow), and it can hold food at safe temperatures without fail.
An NSF-certified cooler for restaurant use isn't just a nice-to-have; it's essential for passing health inspections and showing your customers you're serious about food safety.
Once you’ve nailed down the specs, don't forget the simple logistics of getting the unit into your kitchen. Knowing how to move heavy furniture safely and easily can be a lifesaver during installation, especially when navigating tight corners and doorways. A little planning for delivery and placement ensures your new cooler gets set up right from day one, without any headaches.
Ready to find the perfect cooler that checks all the boxes for performance, efficiency, and compliance? Explore the huge collection of professional-grade refrigeration at PrepTables.com and set your kitchen up for success. Visit us at https://preptables.com to browse our durable and reliable options today.