

The Ultimate Guide to Choosing a Reach In Cooler
A reach in cooler is one of those pieces of equipment you'll find in almost every commercial kitchen. It’s an upright, self-contained refrigerator built for one thing: giving your staff quick, easy access to fresh ingredients. It's the unsung hero of countless food service operations, quietly ensuring food safety and keeping the kitchen humming day in and day out.
The Heartbeat of the Commercial Kitchen
Think of your reach-in cooler as the steady heartbeat of your kitchen. It runs 24/7, keeping everything from produce to proteins fresh, safe, and ready to go. This isn't just a cold box; it's the anchor of your entire operational workflow. The right cooler supports every station, from the prep line to the final plating, and directly impacts everything from the quality of your dishes to your bottom line.
A bad cooler choice can throw that entire system into chaos, leading to spoiled food, sky-high energy bills, or even a dreaded health code violation. But the right one? It becomes a silent partner, streamlining your process and protecting your valuable inventory. Alongside other essential commercial kitchen accessories, a solid reach-in is what drives both efficiency and safety.
Why Your Cooler Choice Matters
Picking the right reach-in cooler is a foundational decision you'll live with for years. It's not something to take lightly. Here's exactly why it’s so critical:
-
Food Safety and Quality: This is non-negotiable. You need consistent, reliable temperature control to prevent spoilage, stop foodborne illness in its tracks, and preserve the flavor and texture of your ingredients.
-
Workflow Efficiency: A well-placed cooler that’s the right size shaves seconds off every task. It reduces the number of steps your staff has to take, which adds up to huge time savings during a busy service. Faster access means faster prep and quicker ticket times.
-
Operational Costs: Don't just look at the price tag. An energy-efficient model can dramatically lower your monthly utility bills. Investing in a durable, well-built cooler also means fewer emergency repair calls and less costly downtime.
This guide is designed to cut through the confusing technical jargon and give you a clear, practical roadmap for this investment. We'll walk through how to pick a unit that fits your space, keeps the health inspector happy, and supports your unique menu—whether you're running a high-volume restaurant, a bustling pizzeria, or a cozy café. Consider this your go-to resource for investing in your kitchen's most critical asset.
Choosing Your Ideal Reach In Cooler Configuration
Picking the right reach in cooler is about more than just finding a cold box. It's about finding a piece of equipment that fits the unique rhythm and flow of your kitchen. And that decision almost always starts with the most obvious feature: the doors.
Solid doors are the undisputed champs of insulation. They’re built like a vault to hold in cold air, which usually means better energy efficiency and a friendlier number on your utility bill. But glass doors have a huge workflow advantage—you can see everything at a glance. Your staff can spot exactly what they need without cracking the door open, saving precious seconds and keeping the internal temperature stable.
Door Count And Kitchen Scale
The number of doors on your cooler is a direct reflection of your storage needs and the size of your kitchen. Think of it like this: each configuration is built for a different scale of operation.
- Single-Door Models: These are the perfect fit for tight spaces. Think small cafes, food trucks, or even as a dedicated cooler for one station in a larger kitchen. You're typically looking at 12 to 25 cubic feet of storage here.
- Double-Door Models: This is the workhorse of the industry, the go-to for most small to medium-sized restaurants. Offering 30 to 50 cubic feet of capacity, they strike a great balance between storage volume and footprint.
- Triple-Door Models: When you're dealing with serious volume—like in a busy cafeteria, a large restaurant, or an institutional kitchen—you need one of these giants. They can hold 50 to 75 cubic feet or more, letting you consolidate a massive amount of inventory in one spot.
A cooler's setup is truly the heart of an efficient kitchen, directly impacting your bottom line and the quality of every plate that goes out.
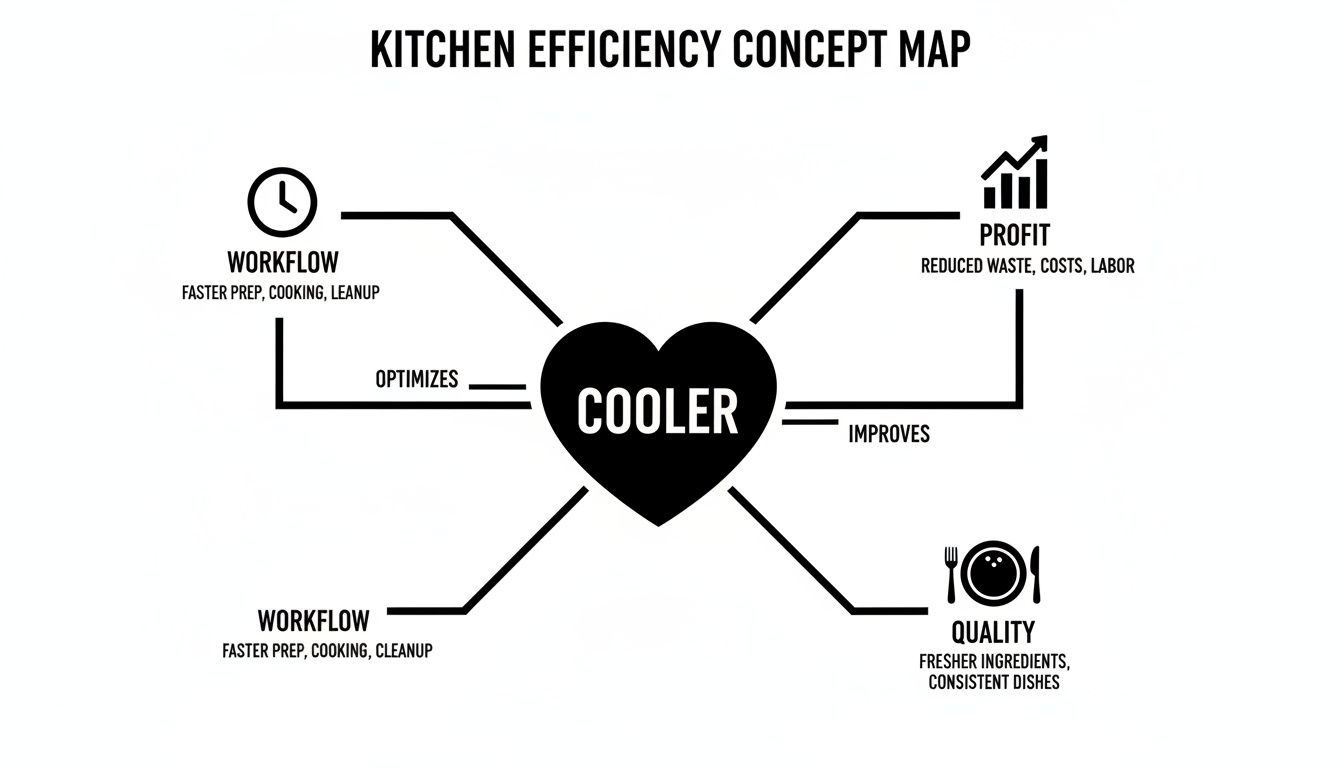
As you can see, the right cooler isn't just a box—it's a central hub that drives efficiency, profitability, and quality in your day-to-day operations.
Reach In Cooler Configuration At a Glance
To make the choice a bit easier, here’s a quick rundown of how these common configurations stack up against each other.
| Configuration | Typical Capacity (Cu. Ft.) | Best For | Key Feature |
|---|---|---|---|
| Single-Door | 12-25 | Small cafes, food trucks, dedicated stations | Compact footprint for tight spaces. |
| Double-Door | 30-50 | Small to medium restaurants, catering | Balanced storage and floor space. |
| Triple-Door | 50-75+ | High-volume restaurants, institutions | Maximum inventory consolidation. |
| Pass-Thru | Varies | Kitchens connecting prep and service | Doors on both sides for seamless workflow. |
This table should help you quickly pinpoint which style best aligns with your kitchen's space, inventory, and operational flow.
Specialized Units That Transform Workflow
Beyond the standard models, some specialized reach-in designs can completely change the way your kitchen works. One of the best examples is the pass-thru cooler, which has doors on both the front and back.
This smart design creates a direct bridge between your kitchen's prep line and the service area. Cooks can load fresh ingredients from the back, and servers can grab finished plates or drinks from the front. It's a simple idea that cuts down on foot traffic and collisions in a hectic kitchen, making everything smoother and more organized. And if you're thinking about frozen storage, it's worth understanding the differences in a commercial reach in freezer as well.
Integrated Prep Tables: The Ultimate Efficiency Hack
Want the ultimate workflow upgrade? Look at units that combine refrigeration with a dedicated workspace. Stainless steel prep tables with built-in reach-in coolers are game-changers for any kitchen focused on speed and organization.
-
Sandwich and Salad Prep Tables: These are the gold standard for delis, cafes, and salad bars. They feature a refrigerated base for bulk storage, topped with a durable cutting board and refrigerated ingredient rails. These rails hold cold pans of toppings, sauces, and proteins right at your fingertips, turning a multi-step process into one fluid motion.
-
Pizza Prep Tables: Specifically designed for pizzerias, these tables often feature a wider, refrigerated stone (like marble) or stainless steel top, perfect for stretching dough. They also include raised ingredient rails for instant access to cheese, sauce, and toppings, keeping everything at a safe temperature while assembling pizzas at high speed.
-
Undercounter/Worktop Refrigerators: These versatile units provide a solid stainless steel work surface on top of a compact reach-in cooler or freezer. They are perfect for placing under existing counters or creating standalone prep stations for various tasks, maximizing space in smaller kitchens.
By combining cold storage directly with a stainless steel work surface, you eliminate wasted steps, reduce the risk of cross-contamination, and keep your prep line organized and efficient.
This kind of smart integration is a big reason why the global commercial refrigeration market is projected to hit USD 79.38 billion by 2034. It's not uncommon for restaurant owners to report 25% workflow gains just from pairing reach-in units with dedicated prep tables. It's all about making the kitchen work smarter, not harder.
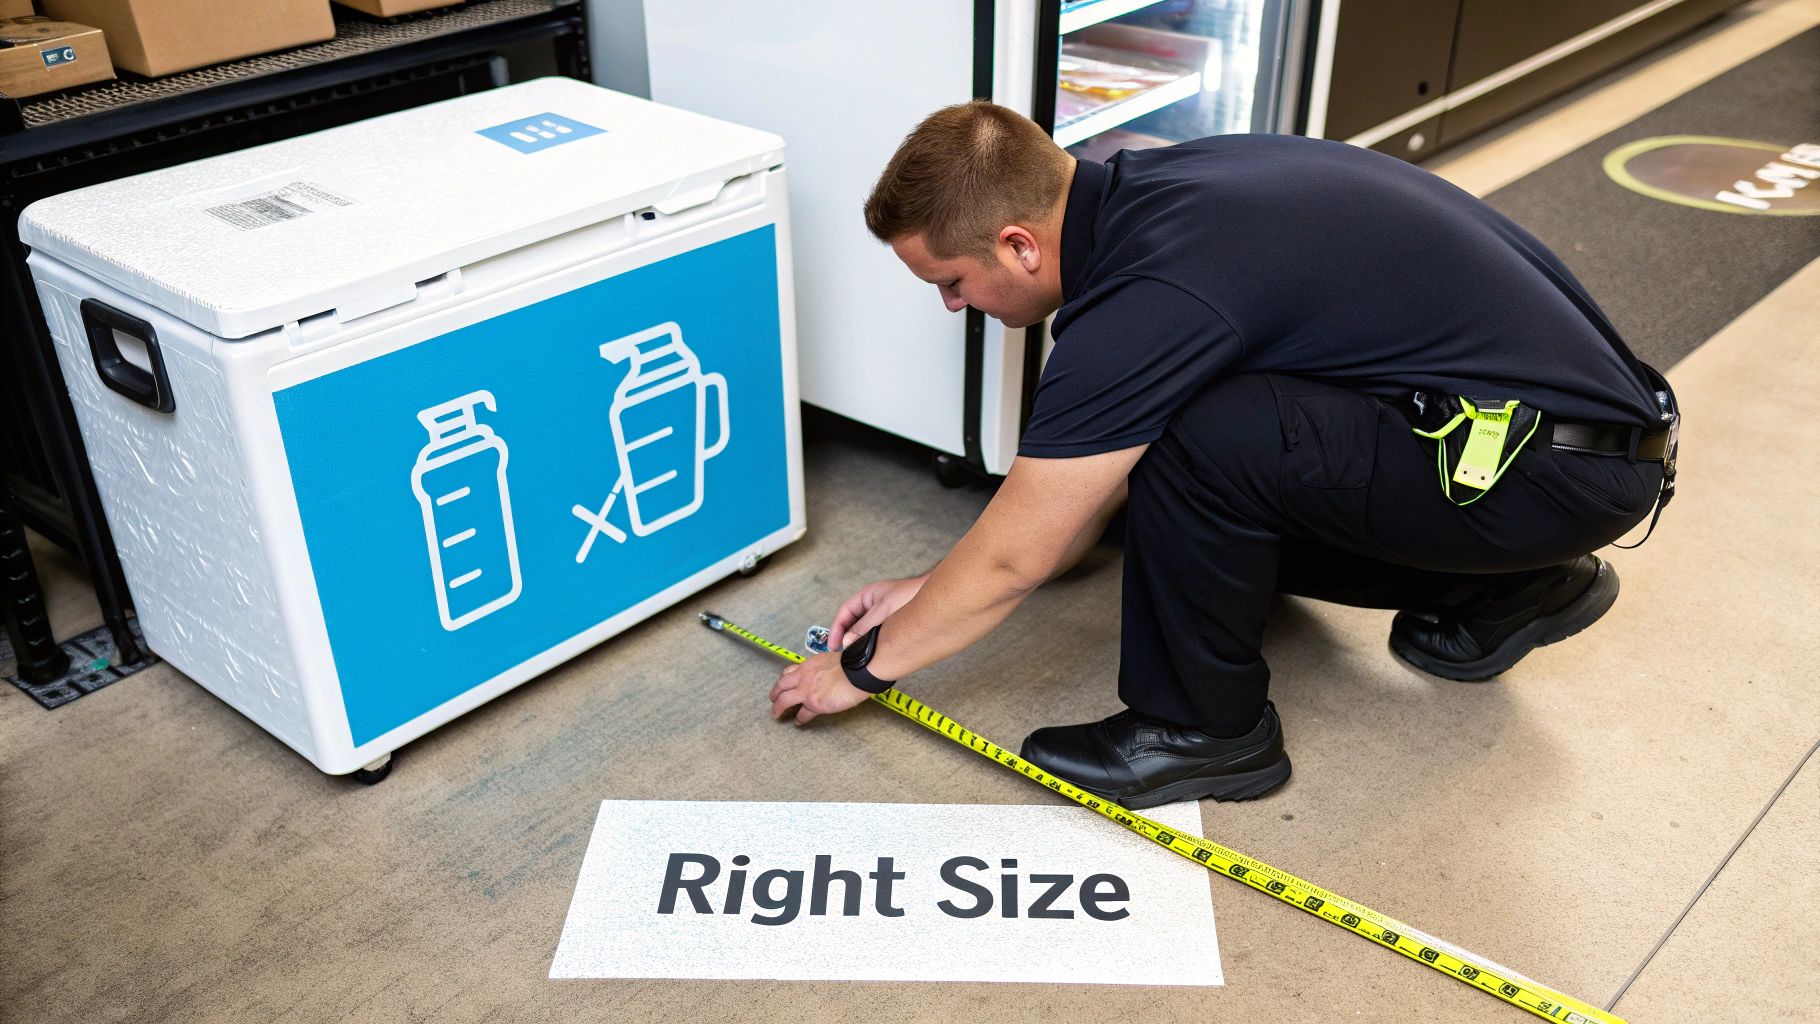
How to Correctly Size Your Reach-In Cooler
Picking the right size reach-in cooler is easily one of the most important decisions you'll make for your kitchen. Get it wrong, and you're in for a world of hurt. Too small, and you'll be dealing with overstuffed shelves, blocked airflow, and spoiled food. Go too big, and you've just bought a glorified, energy-guzzling box that cools empty air and pads your utility bill.
Getting the size right is more art than science. It's not just about what the spec sheet says, but about how your kitchen actually operates day-to-day. You need to find that perfect balance between how much stuff you need to keep cold and the physical real estate you have to work with.
A Simple Rule for Estimating Capacity
Instead of getting bogged down in complex calculations, start with a simple, tried-and-true rule of thumb. This little trick connects your storage needs directly to how busy you get.
The general guideline is to plan for 1.5 to 2 cubic feet of refrigerated storage for every meal you serve during your peak service period.
This formula gives you a solid starting point. For instance, a small café that pushes out 50 meals during the lunch rush would need a cooler with about 75 to 100 cubic feet of cold space. A massive university cafeteria serving 300 meals would need between 450 and 600 cubic feet, which would almost certainly be split across multiple coolers and walk-in units.
Measuring Your Kitchen Footprint
Once you’ve got a rough idea of the internal capacity you're after, it’s time to break out the tape measure. Sizing a reach-in isn’t just about making sure it fits through the door. You have to account for its total operational footprint, and that includes the all-important clearance space for ventilation.
Proper airflow is the lifeblood of your cooler. Without it, the compressor works itself to death trying to get rid of heat, which leads to sky-high energy bills and a much shorter lifespan for your equipment.
Follow these simple steps:
- Measure the Floor Area: Get the exact length and width of the spot where you plan to put the cooler. No guesstimates here.
- Account for Door Swing: Make sure there's enough room for the doors to swing wide open without blocking a walkway or smacking into your prep table. This is a classic mistake in tight kitchens.
- Add Clearance Space: This is non-negotiable. Most manufacturers will tell you to leave 2-3 inches of space on the back and sides and at least 6-12 inches of clearance on top for proper heat exchange.
Real-World Sizing Scenarios
Let's look at how this plays out in a couple of different kitchens. The goal is always to find that sweet spot between storage capacity and available space.
- Scenario 1: The Compact Café: A little coffee shop needs a single-door cooler for milk, cream, and a few grab-and-go sandwiches. They’re tight on space behind the counter. A 23-cubic-foot single-door model is perfect—it gives them plenty of storage without eating up their whole kitchen.
- Scenario 2: The High-Volume Pizzeria: A pizzeria that’s constantly slinging pies needs serious cold storage for dough, cheese, sauce, and toppings. They might go for a 49-cubic-foot double-door model as their main workhorse. To make the line more efficient, they’d also have a dedicated refrigerated pizza prep table to keep ingredients right where they need them.
By carefully figuring out your capacity needs and meticulously measuring your physical space—including that crucial ventilation clearance—you can pick a reach-in cooler that will work efficiently and support your kitchen's flow from day one.
Decoding Materials and Must-Have Certifications
What’s the real difference between a reach in cooler that lasts a decade and one that becomes a costly headache in a year? It all comes down to the stuff it’s made of and the certifications it carries. These details might seem minor, but they’re everything when it comes to durability, food safety, and your bottom line.
You have to look past the shiny exterior to see what really matters. The grade of stainless steel used is probably the biggest factor. In the world of commercial refrigeration, you'll generally run into two main types.
The Great Stainless Steel Debate
Here’s a simple truth: not all stainless steel is the same. The grade tells you what it’s made of, how tough it is, and most importantly, how well it resists corrosion—a huge deal in a busy, steamy kitchen.
- 304 Stainless Steel: Think of this as the gold standard, especially for any surface that touches food. It’s packed with more chromium and nickel, making it incredibly tough against rust and corrosion from salts, acids, and all the cleaning chemicals you’ll throw at it. This is what you want for the inside walls and shelves of your cooler.
- 430 Stainless Steel: This is a more wallet-friendly grade, often used for the outside of a unit—the back and sides. It’s still strong and easy to clean, but it's more likely to corrode over time, which is why it’s kept away from direct contact with food.
Knowing the difference helps you see the long-term value. A unit with a 304 interior is just a smarter investment; it’s built to handle the daily grind of a commercial kitchen without breaking down.
Why NSF Certification is Non-Negotiable
If you spot a piece of equipment in a professional kitchen, it better have an NSF sticker on it. This isn't just a friendly suggestion—most health departments flat-out require it. So what does it really mean?
NSF International is an independent group that puts products through the wringer to make sure they meet strict public health and safety standards. An NSF-certified reach in cooler has been proven to be easy to clean, designed to stop food contamination, and built with materials that are completely non-toxic.
That little seal is your guarantee that the cooler was designed with food safety as its number one job. It means there are no sharp, hidden corners where germs can build up, the shelves are durable and won’t absorb spills, and the whole thing is built for easy, proper sanitation. To get the full story on this vital standard, check out our guide on what NSF certification means for your kitchen.
Translating Energy Ratings into Real Dollars
The last piece of the puzzle is energy efficiency. A reach-in cooler runs 24/7, which easily makes it one of the biggest power hogs in your kitchen. An inefficient model can quietly siphon hundreds, even thousands, of dollars from your profits every single year.
This is where the ENERGY STAR rating becomes your best friend. An ENERGY STAR certified commercial refrigerator is, on average, 20% more energy-efficient than a standard model. They pull this off with better insulation, smarter compressors, and high-performance fan motors that do more with less.
Sure, an ENERGY STAR model might cost a little more upfront, but the return on investment is a no-brainer. Many kitchens find that pairing durable stainless steel prep tables with undercounter reach-ins offering 20-30 cubic feet of space is a game-changer. When those units are also NSF-approved and can hold up to 500 lbs on their shelves, they become absolute workhorses. In fact, industry data shows that delis using this kind of optimized setup can slash food spoilage by 18%, saving a small fortune annually. You can find more insights on this over at FutureMarketInsights.com.
Putting your money into a unit with top-notch materials and the right certifications isn't just about following the rules—it's a smart business move that pays for itself with lower utility bills, less food waste, and equipment that won't quit on you.
A Little Maintenance Goes a Long Way
Think of your reach in cooler as the unsung hero of your kitchen. It's one of your biggest investments, and it runs 24/7 without complaint. Giving it a little consistent care isn't just a good idea—it's the best way to dodge expensive emergency repairs and keep your cooler working hard for years.
You don't need to be a refrigeration tech to handle this. A simple preventative maintenance schedule, broken down into daily, weekly, and monthly tasks, is easy for any staff member to follow. It's a small time investment that protects your inventory and your profits.

Daily Habits for a Healthy Cooler
A few quick checks each day can stop big problems before they start. Make these part of your opening or closing routine.
- Wipe It Down: Give the interior and exterior surfaces a quick clean with a food-safe sanitizer. Pay attention to door handles to prevent grime and bacteria from building up.
- Check for Blockages: Make sure nothing is pushed up against the interior fans. Good airflow is everything when it comes to keeping temperatures even and consistent.
- Listen for Trouble: Is the compressor making strange grinding or rattling sounds? Any unusual noise is an early warning sign that could save you from a complete system meltdown.
These quick habits create a baseline, making it obvious when something’s not quite right.
Weekly and Monthly Deep Dives
Setting aside a bit of time each week and month for more focused tasks will seriously extend the life of your reach-in. These jobs directly impact how well your cooler runs and how much energy it uses.
One of the most important monthly jobs is cleaning the condenser coils. These coils are how the cooler gets rid of heat. In a busy kitchen, they get caked with dust and grease fast, forcing the compressor to work overtime just to keep things cool.
That extra effort doesn't just send your energy bills through the roof—it can cause the compressor to fail prematurely. And that's one of the most expensive repairs you can face. A quick cleaning with a stiff brush or vacuum is all it takes to prevent it.
Here are a few other key tasks to stay on top of:
- Inspect Door Gaskets: Check the rubber seals on the doors. If they're cracked, torn, or brittle, cold air is leaking out, and your cooler is running nonstop to compensate.
- Double-Check the Temp: Use a separate, trusted thermometer to make sure your cooler is actually holding at or below 40°F (4°C). Don't just trust the built-in display.
- Clear the Drain Lines: Make sure the drain lines are clear of gunk. Clogs lead to water backups, which can cause messy puddles and nasty frost buildup.
For a bigger-picture look at keeping all your equipment in top shape, our guide on commercial kitchen equipment maintenance offers a great starting point.
Simple Troubleshooting for Common Problems
Even with the best care, things can go wrong. Knowing how to spot and fix common issues can save you a lot of time and a pricey service call.
If the temperature seems to be fluctuating, the first things to check are the simple ones. Was the door left ajar? Are the gaskets creating a tight seal? Is there enough space around the unit for air to circulate? Often, the fix is that easy.
Frost buildup is another frequent headache, usually pointing to a bad door seal or a blocked drain. If you see ice forming, take a close look at the gaskets and make sure the drainage system is clear. For more in-depth maintenance tips for cooling appliances, this guide offers some great advice that applies just as well to commercial units.
By teaching your team to handle these basic checks, you can solve many minor issues yourself and keep your reach-in cooler running like a champ for years.
Making a Smart Investment with a Simple Checklist
Choosing the right reach-in cooler isn't just another purchase; it’s a long-term investment in your kitchen's efficiency, safety, and bottom line. When you start thinking of it that way, the initial price tag becomes less of a hurdle. Instead of an expense, it's an asset that pays you back through lower energy bills, less food spoilage, and a smoother-running kitchen.
Thinking about the return on investment (ROI) really puts things into perspective. Sure, an ENERGY STAR certified model might cost more upfront, but its lower energy consumption directly shaves money off your monthly utility bills. When you add up those savings with the value of food you don't have to throw out because of reliable temperatures, the cooler starts to pay for itself surprisingly fast.
Calculating Your Return on Investment
Let's walk through a quick, real-world scenario. Imagine you invest $3,000 in a high-efficiency reach-in cooler. Here’s how the returns can pile up:
- Energy Savings: A solid ENERGY STAR unit can easily save you $150-$200 a year compared to a standard, less efficient model.
- Reduced Food Waste: Consistent temps and better organization can cut spoilage by 15-20%. For a small kitchen, that could mean saving hundreds of dollars a month. Let’s be conservative and call it $1,200 a year.
In this simple example, your total annual savings are around $1,400. That means the cooler could pay for itself in just over two years, all while giving you peace of mind with its performance.
The push for efficient refrigeration is huge across the industry. In U.S. supermarkets, refrigeration systems eat up about 40% of all energy used, which is why there's such a big move toward better models. For any food service business, an NSF-certified unit doesn't just keep you compliant—it helps streamline your workflow and cut waste as environmental regulations tighten. For a deeper dive on these trends, you can discover insights about commercial refrigeration on GMI Insights.
The Ultimate Reach-In Cooler Buying Checklist
To make this decision as painless as possible, use this checklist to hit every critical point. It pulls together everything we've talked about into one simple, actionable tool.
1. Sizing and Capacity
* [ ] Calculate Required Capacity: Have you used the rule of thumb (1.5-2 cubic feet per meal served at your busiest) to estimate what you need?
* [ ] Measure Your Footprint: Do you have the exact width, depth, and height for the cooler’s spot?
* [ ] Confirm Ventilation Clearance: Did you account for at least 2-3 inches on the back/sides and 6-12 inches on top for airflow?
2. Configuration and Workflow
* [ ] Door Type: Solid doors for energy savings or glass doors for quick inventory checks?
* [ ] Number of Doors: Will a single, double, or triple door model fit your volume?
* [ ] Specialty Units: Would a pass-thru or prep table model make your kitchen flow better?
3. Materials and Durability
* [ ] Stainless Steel Grade: Does the interior use durable 304 stainless steel where food will be stored?
* [ ] Shelf Construction: Are the shelves coated, easy to adjust, and strong enough for what you'll be storing?
4. Certifications and Performance
* [ ] NSF Certification: Is the unit NSF-certified for commercial food safety? This is a must-have.
* [ ] ENERGY STAR Rating: Is it ENERGY STAR certified to guarantee lower utility costs?
* [ ] Refrigeration System: Is the compressor top-mounted (better for hot kitchens) or bottom-mounted (easier to clean and service)?
By taking a few minutes to walk through this checklist, you can be confident you're picking the perfect reach-in cooler—one that will be a reliable and profitable cornerstone of your operation for years to come.
Frequently Asked Questions
Even after going through all the specs and features, a few practical questions always seem to pop up when it's time to actually buy a reach in cooler. Getting a straight answer to these common concerns can make all the difference in your final decision. Let's tackle some of the most pressing questions we hear from buyers about placement, energy use, and safety.
What Is the Ideal Temperature for a Commercial Reach In Cooler?
The most important rule, without a doubt, is to keep your reach in cooler at or below 40°F (4°C). This isn't just a friendly suggestion—it’s a non-negotiable food safety standard that most health departments enforce to prevent the growth of dangerous bacteria. If you're looking at a freezer, the magic number is 0°F (-18°C).
A pro tip: don't just trust the built-in digital display. It's smart to keep a separate, calibrated thermometer inside the unit and check it daily. This ensures the reading is spot-on and your expensive inventory is truly safe.
How Much Clearance Does a Reach In Cooler Need?
You have to give your cooler room to breathe. Proper ventilation is absolutely critical for the cooler's long-term health and efficiency. Without enough space, the compressor can easily overheat and will have to work way harder than necessary, which means higher energy bills and a much shorter lifespan for your equipment.
As a solid rule of thumb, plan on leaving:
- 2-3 inches of space on the back and sides.
- 6-12 inches of space on top.
This gap allows heat to escape properly from the condenser coils. But always, always double-check the manufacturer's manual. The specific requirements can vary a bit from one model to the next.
Can I Use a Residential Refrigerator in a Commercial Kitchen?
Let me be crystal clear: the answer is an absolute no. Putting a residential fridge in a professional kitchen is just asking for trouble and will get you written up for a health code violation in a heartbeat.
Residential units are not built for the constant demands of a commercial environment. They lack the powerful compressors needed to recover temperature quickly after frequent door openings and can't handle the high ambient heat of a busy kitchen.
Even more importantly, refrigerators made for home use are not NSF-certified. This means they fail to meet the strict public health and safety standards for storing food served to the public. A health inspector will flag a non-commercial unit immediately, which could lead to fines or even force you to temporarily close. Always invest in equipment that was designed and certified for professional use.
For durable, NSF-certified refrigeration and prep solutions that optimize any commercial kitchen, explore the extensive collection at PrepTables.com. Find the perfect equipment to enhance your workflow at https://preptables.com.