

Undercounter Refrigerators Dimensions: The Essential Guide
Choosing the right undercounter refrigerator isn't just about picking a model; it's about making sure it fits perfectly. Get the dimensions right, and you've got a seamless kitchen workflow. Get them wrong, and you're stuck with a daily operational headache.
These numbers aren't just specs on a sheet. They're the blueprint for an efficient, safe, and productive workspace that slides right under your stainless steel prep tables.
Why Undercounter Refrigerator Dimensions Are Crucial
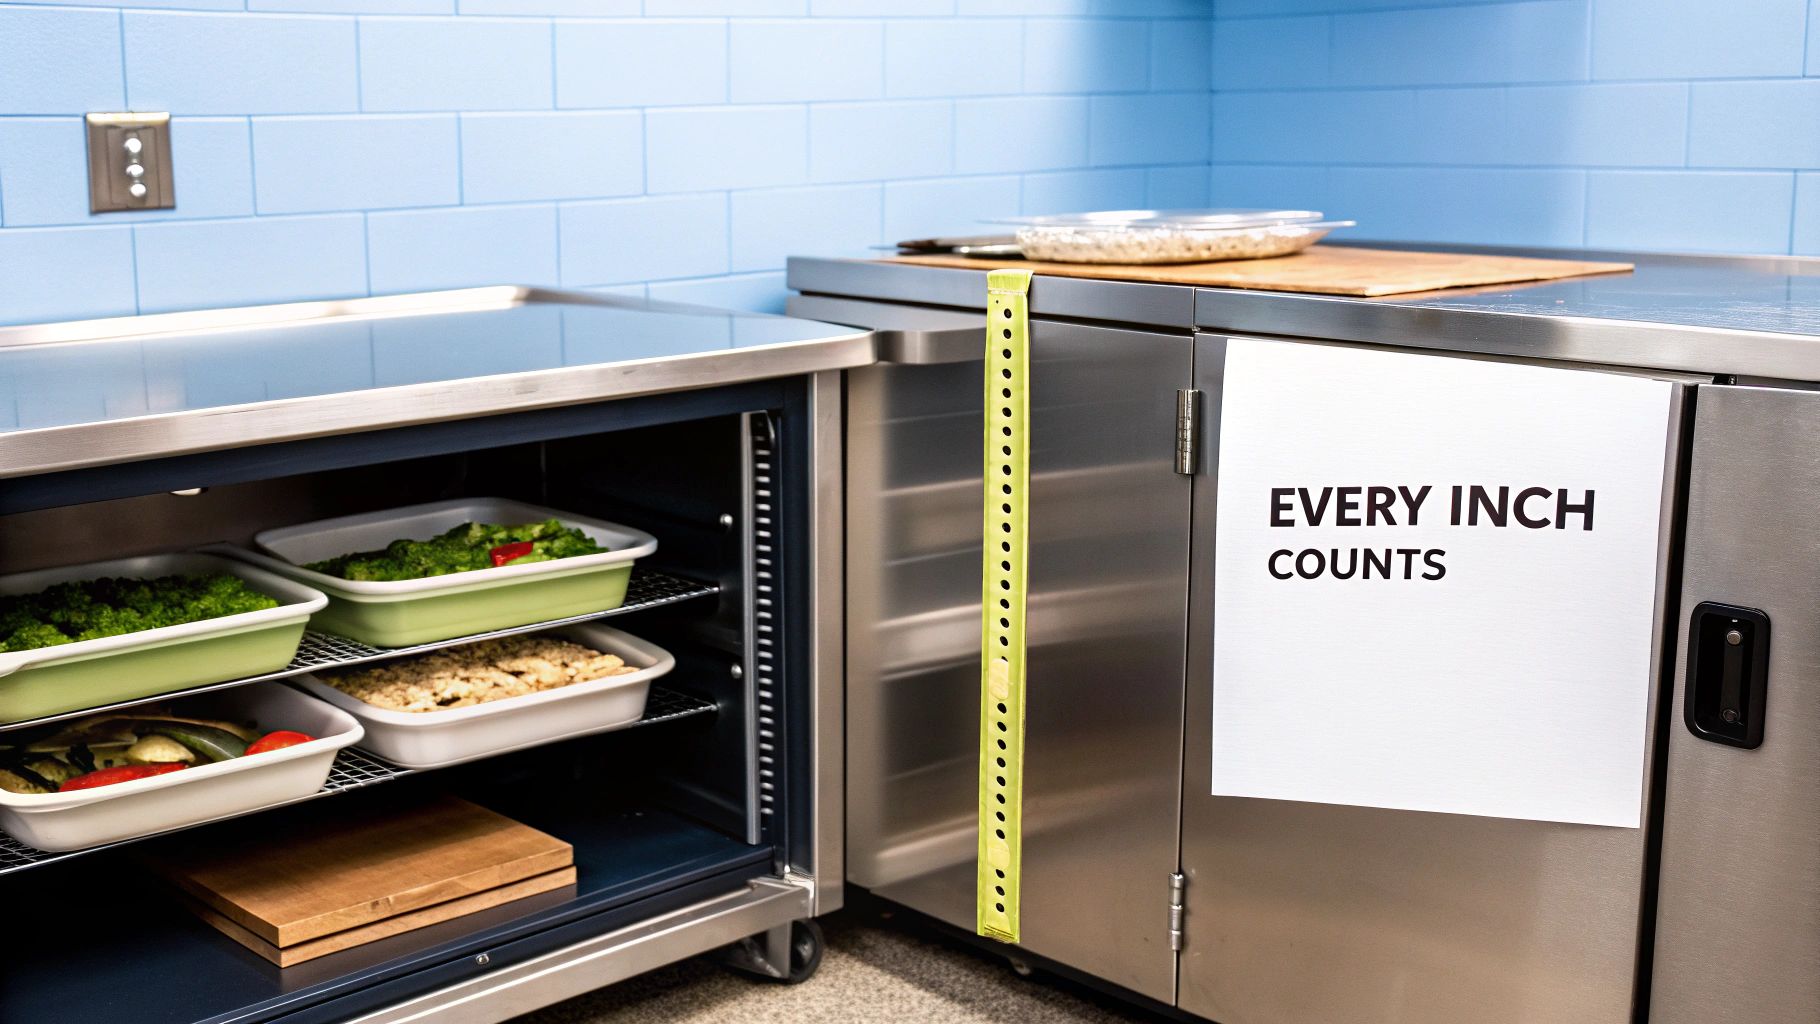
Think of your kitchen line as a puzzle. Every piece has to fit just right. An undercounter fridge that’s even a hair too wide or deep can throw the whole thing off, creating bottlenecks and even safety risks. Nailing these measurements from the get-go is one of the most important steps.
The big three dimensions—width, depth, and height—determine how the unit will slot into your kitchen. If the width is off, you'll end up with awkward gaps or, worse, it won't fit at all. The wrong depth can make the unit stick out, blocking walkways and creating a trip hazard. And height is just as critical for making sure it slides under the counter with enough room left for proper ventilation.
The Foundation of a Flawless Fit
Thankfully, most manufacturers stick to standard undercounter refrigerator dimensions, which makes planning a whole lot easier. You'll typically find that the height falls somewhere between 32 to 34.5 inches. This gives you plenty of internal space while keeping the unit compact enough to fit.
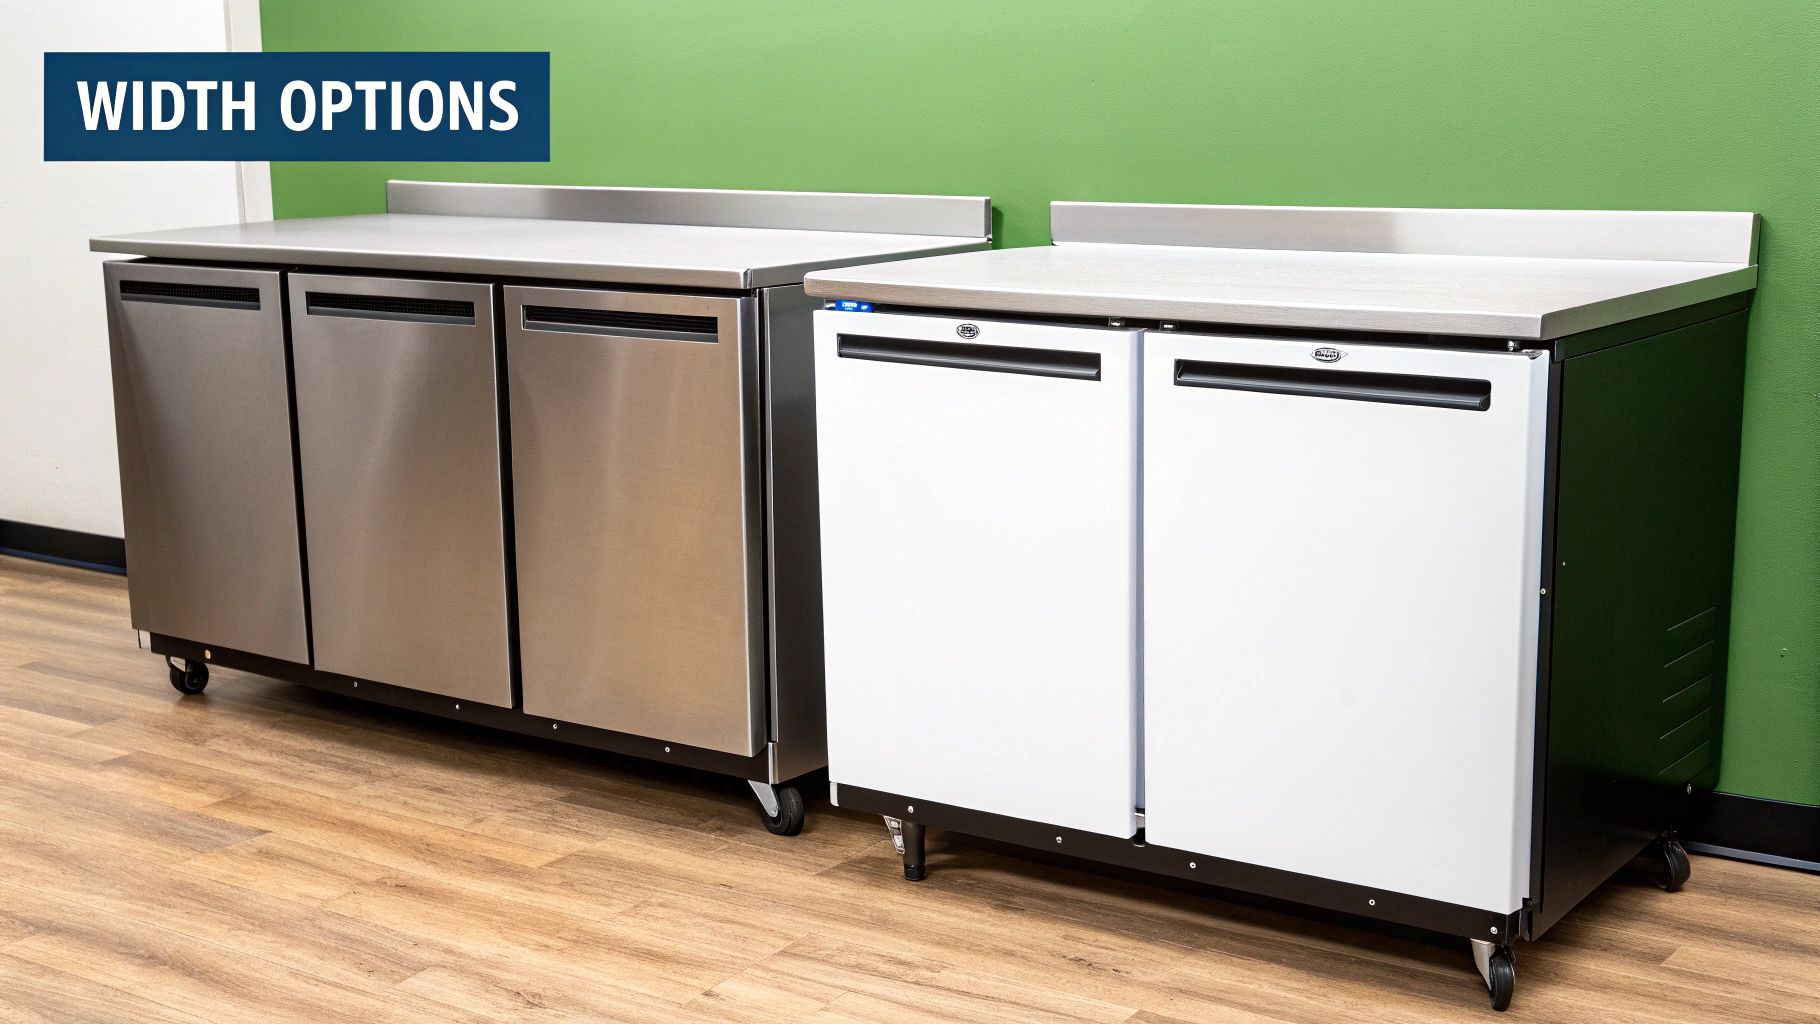
Widths usually come in three common sizes: 15, 18, and 24 inches, with the 24-inch model being the go-to for most kitchens. Depth is almost always standardized at approximately 24 inches, a key measurement that lets the front of the unit sit flush with your cabinets for a clean, built-in look.
When you're aiming for a truly custom feel, understanding how these appliances fit is a huge part of bespoke kitchen renovations. Every single measurement plays a role in creating a space that looks great and works even better.
An undercounter unit that fits perfectly does more than just save space—it enhances speed and safety. By keeping ingredients close at hand, whether at a sandwich prep station or a pizza prep table, it reduces unnecessary steps for staff, directly boosting productivity during busy service hours.
To help you get started, here's a quick rundown of the standard sizes you’ll most likely be working with.
Quick Guide to Standard Undercounter Refrigerator Sizes
This table provides a quick reference to the most common industry-standard dimensions for undercounter refrigerators, helping you quickly identify the size you need.
| Dimension | Common Range or Standard Sizes | Primary Use Case |
|---|---|---|
| Height | 32" – 34.5" | Fits under standard 36" countertops with ventilation room. |
| Width | 15", 18", or 24" | Matches standard cabinet openings and workflow needs. |
| Depth | Approx. 24" | Allows for a flush, built-in look with cabinets. |
Having these common sizes in mind makes it much simpler to map out your kitchen and choose the right equipment without any guesswork.
Choosing the Right Width for Your Kitchen Line
Picking the right width for your undercounter refrigerator isn't just about measuring a gap in your counter. It's a strategic move that shapes your entire kitchen's flow. Think of it like a chef selecting a knife—you wouldn't use a tiny paring knife for a task that needs a heavy-duty cleaver. The width you choose defines the unit's role on your line.
The first question you have to ask is: what's this fridge for? Is it a dedicated station for one specific task, or does it need to be a versatile workhorse for general storage? The three industry-standard widths—15, 18, and 24 inches—each have a very different answer to that question.
The Specialist: 15-Inch Units
The 15-inch undercounter fridge is the specialist, the precision tool in your kitchen. Its slim profile is built for specific, low-volume jobs where every inch of space is precious. It’s the perfect fit for a bar’s garnish station, holding just enough lemons, limes, and cherries to get through service without hogging real estate.
In a commercial kitchen, you might find a 15-inch model tucked into a dessert station, holding nothing but creams, sauces, and fresh berries. Its small size is actually its biggest advantage. It forces a "first-in, first-out" inventory system, keeping those delicate ingredients fresh. It’s not for bulk storage; it’s for keeping crucial items exactly where you need them, minimizing movement and maximizing speed for a single task.
The Flexible Middle Ground: 18-Inch Models
Sitting right in the middle, the 18-inch width offers a nice mix of a compact size and real utility. It gives you a noticeable storage boost over the 15-inch model without demanding the full footprint of a standard unit. This makes it a fantastic choice for kitchens with slightly more complex needs that are still tight on space.
Picture an 18-inch unit at a small sandwich prep station, holding a decent selection of sliced meats, cheeses, and condiments. It’s also a great size for a coffee bar, storing various milks and creams. This size gives you just enough extra breathing room to expand your offerings without causing a bottleneck, making it a smart compromise when every inch counts.
The Workhorse: 24-Inch Refrigerators
The 24-inch undercounter refrigerator is the undisputed industry standard. This is the workhorse you’ll find in commercial kitchens everywhere. Why? Because this dimension hits the perfect balance of storage capacity and space efficiency, making it the most versatile option for almost any kitchen, commercial or residential.
Its popularity comes from how seamlessly it fits under standard stainless steel prep tables, from basic worktops to specialized sandwich and pizza prep stations. To make sure your unit fits perfectly with the surrounding millwork, having a solid grasp of standard cabinet sizes for kitchen layouts is essential. This common size means manufacturers have perfected the design, offering the best features and reliability. The 24-inch model simply dominates the market for a reason.
For most commercial kitchens, the 24-inch width is the default starting point. Its ability to hold multiple food pans, bulk containers, and a wide variety of ingredients makes it the foundation for an efficient prep line, ensuring chefs have everything they need within arm's reach.
Fitting Your Unit with Perfect Height and Depth
While width is often the first measurement people think about, the real secret to a perfect undercounter refrigerator installation comes down to two other dimensions: height and depth. These are the details that ensure your unit not only slides into place but actually works well within your kitchen line.
Get them right, and you’ve got a seamless, professional look. Get them wrong, and you’re stuck with an awkward gap or a unit that juts out, disrupting the whole workflow. Width gets it in the door, but height and depth make it part of the kitchen.
Nailing the Perfect Height
Most commercial undercounter refrigerators have a height between 32 and 34.5 inches. This isn't a random number; it’s designed to fit perfectly under standard 36-inch commercial countertops. This leaves just the right amount of space for top ventilation and makes leveling the unit much easier.
That little bit of clearance is crucial for the health of your refrigerator. It gives the heat from the compressor a place to go, preventing the unit from overworking itself to death.
A major factor for height is ADA (Americans with Disabilities Act) compliance. To be accessible, ADA rules state that countertops can't be higher than 34 inches from the floor. This means an ADA-compliant undercounter unit needs a shorter profile, usually around 32 inches tall, to fit properly under that lower counter.
You'll also find that many commercial units come with adjustable legs or casters. These aren’t just for rolling the unit around; they're your best tool for getting a perfectly level installation, even on those uneven kitchen floors we all know so well. A level unit means the door seals tight, keeping the cold air in and the internal temperature steady.
Achieving a Flush Fit with Standard Depth
Just as critical as the height is the unit’s depth. The standard here is about 24 inches. This measurement is what gives you that clean, built-in look that makes a professional kitchen layout so sharp. When the depth is right, the front of the refrigerator sits perfectly flush with your cabinets and prep tables.
This flush fit is more than just about looks; it has real practical benefits:
- Safety: A flush front means no corners sticking out to become a trip hazard in a busy, crowded kitchen.
- Cleanliness: It eliminates the gaps where food, spills, and grime can get trapped, making daily wipe-downs much simpler.
- Workflow: It creates a smooth, unbroken line, allowing staff to move easily along the prep station without anything getting in their way.
But remember, you can't just measure the cabinet opening. The unit's ventilation system adds to its total footprint. A front-venting model is designed to sit flush, but a rear-venting unit needs extra space behind it for air to circulate. Always check the manufacturer's clearance requirements to make sure you're measuring for the unit's full operational footprint, not just its box dimensions.
How to Measure Your Kitchen Space Accurately
There’s nothing more frustrating than ordering a brand-new undercounter refrigerator, only to find out it won’t slide into place. It’s a costly, time-consuming headache. To avoid this, live by the old carpenter’s motto: "Measure thrice, buy once." Getting your measurements right from the start is the best insurance policy for a smooth installation.
This isn't just a quick one-and-done measurement, either. Commercial kitchens are rarely perfect. Floors can be slightly uneven, and the walls of your cabinetry might have subtle imperfections. Taking just a single measurement won't capture the full picture and could leave you with a fit that’s off by a critical fraction of an inch.
The Rule of Three for Perfect Undercounter Refrigerator Dimensions
The secret to a foolproof measurement is checking the height, width, and depth in three different spots. This simple trick accounts for any sneaky irregularities in your cabinetry or flooring, making sure your new unit will fit without a fight.
Here’s the right way to do it:
- Height: Measure from the floor to the bottom of the countertop on the far left, then in the dead center, and finally on the far right.
- Width: Measure the gap between the cabinets at the very top, again in the middle, and once more near the bottom.
- Depth: Measure from the back wall out to the front edge of the cabinets on both the left and right sides.
Once you have all your numbers, always use the smallest measurement for each dimension. That smallest number is your true usable space. If you base your purchase on that figure, you guarantee the refrigerator will fit, even if the opening gets a little narrower in one spot. It’s a small detail that makes the difference between a perfect fit and a major problem.
The diagram below breaks down the key steps: measuring the height, confirming the depth, and then making those final leveling adjustments to get everything just right.
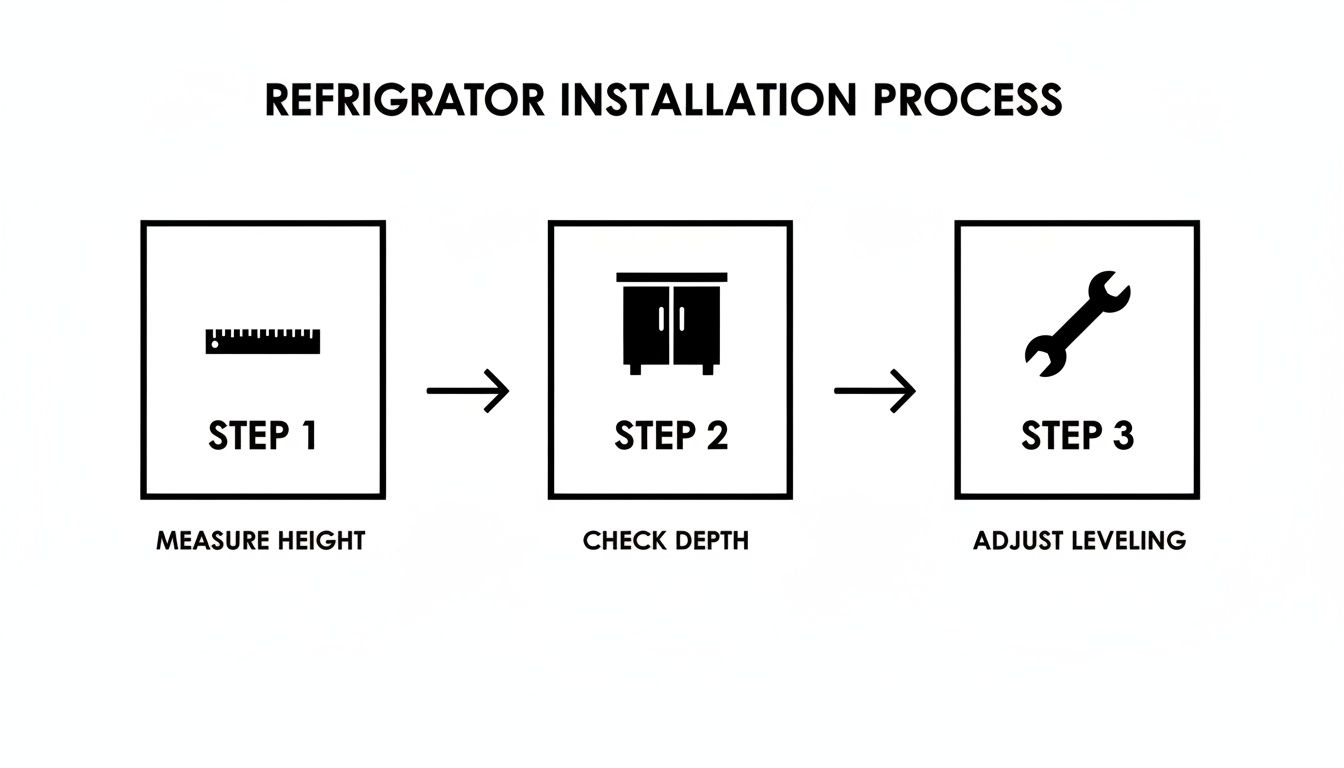
This visual guide shows how a successful installation is all about being methodical. It starts with precise measurements and ends with fine-tuning the unit for perfect stability.
To keep your measurements organized, use this simple checklist. It walks you through each step to ensure you don't miss anything.
Installation Measurement Checklist
| Measurement Step | What to Check | Pro Tip |
|---|---|---|
| Height Check | Measure height in 3 spots (left, middle, right). | Record the smallest of the three measurements. This is your maximum height. |
| Width Check | Measure width in 3 spots (top, middle, bottom). | Again, use the smallest number. This is your true available width. |
| Depth Check | Measure from the back wall to the cabinet front. | Make sure to account for any utility lines or outlets on the back wall. |
| Ventilation Space | Review the manufacturer's spec sheet. | Note the required clearance for the top, back, and sides. Add this to your total space needs. |
| Door Swing | Measure the unit's door width. | Check for walls or other equipment that could block the door from opening fully. |
| Delivery Path | Measure all doorways, hallways, and tight corners. | Don't forget this step! It’s crucial for a successful delivery day. |
Following this checklist methodically will prevent nearly every common installation issue, saving you a world of trouble down the road.
Don't Forget the Delivery Path
Your tape measure's job isn't done once you have the undercounter dimensions. A refrigerator that fits perfectly is useless if you can't get it into the kitchen in the first place. You have to measure the entire path from the delivery truck to its final home.
Walk the route the delivery crew will take. Measure the width of every single doorway, hallway, and tight corner. Keep an eye out for potential obstacles like low-hanging light fixtures or sharp turns that could make things difficult. A quick check of these dimensions can prevent a delivery day disaster.
Calculating Clearance for Ventilation and Door Swing
Finally, you need to plan for two types of "breathing room" that are absolutely essential for your refrigerator's performance and longevity. These aren't just suggestions—they're requirements.
- Ventilation Clearance: Every refrigerator creates heat, and that heat needs somewhere to go. Check the manufacturer's specs for the required clearance on the top, back, and sides. A front-venting unit might need very little space, but a rear-venting model could demand 1-3 inches of clearance to keep from overheating. Skipping this can lead to premature compressor failure.
- Door Swing Clearance: The refrigerator door has to open completely without slamming into an adjacent cabinet, wall, or other appliance. Measure the door's width and make sure you have enough open space next to the unit for it to swing wide. This is critical for pulling out shelves and drawers without a struggle.
For a deeper dive into how different models and their specific requirements can affect your planning, you can learn more about a variety of undercounter refrigerator sizes. Getting these final clearance calculations right is the key to ensuring your equipment runs smoothly for years to come.
Built-In vs. Freeststanding Refrigeration Explained
Not every undercounter refrigerator is built the same, and picking the wrong one can quickly turn an asset into a headache. The most important difference in undercounter refrigerator dimensions isn’t width or height—it’s how the unit breathes. This single detail is what separates built-in from freestanding models.
Think of it this way: a built-in refrigerator is designed to project its breath forward, just like a person speaking. All the air circulation happens at the front. This smart design lets you install it completely flush with your cabinetry, with zero extra space needed on the sides or back. It's engineered for that clean, integrated kitchen line.
A freestanding unit, on the other hand, breathes more naturally, needing open air all around it. The cooling system is usually on the back, pushing heat out from the sides and rear. If you box it in without enough clearance, you’re basically suffocating it.
The Importance of Front-Venting Design
The secret sauce for a true built-in model is its front-venting system. These refrigerators pull cool air in and push warm air out through a grille at the bottom front, right where the toe-kick would be. This self-contained airflow is exactly what makes them perfect for sliding into tight spots under stainless steel prep tables.
In any commercial kitchen, space is gold. You need equipment that fits seamlessly into the line, whether it's under a pizza prep station or a sandwich bar. A front-venting, built-in model is the only way to get that zero-clearance fit and create a smooth, unbroken work surface. Trying to use a freestanding unit for this job is a recipe for disaster—it will overheat in no time.
One of the most common—and costly—mistakes we see is someone trying to shove a rear-venting freestanding unit into a tight cabinet space. It forces the compressor to run nonstop, leading to terrible cooling, spoiled food, sky-high energy bills, and, eventually, a dead refrigerator.
Matching Ventilation to Your Kitchen Layout
So, how do you know which one to get? It all boils down to your kitchen's layout and where this refrigerator is going to live.
- For a seamless fit: If you plan to install the unit flush within a row of cabinets or directly under a prep counter, a built-in, front-venting model is non-negotiable.
- For open areas: If the refrigerator will stand by itself with plenty of room around it—maybe at the end of a counter or in a storage area—a freestanding model can be a more budget-friendly choice.
Always, always check the manufacturer’s spec sheet for clearance requirements. A typical freestanding unit might need 1 to 3 inches of open space on its sides and back to work properly. Ignoring these undercounter refrigerator dimensions for ventilation will kill your equipment’s lifespan. For a deeper dive into different models and what they need, you can check out our complete guide on undercounter refrigerators.
Getting this fundamental difference right from the start ensures you choose a unit that works with your space, not against it. It's the key to protecting your investment and keeping your kitchen running like a well-oiled machine.
Matching Interior Layout to Your Menu Needs
Getting the exterior dimensions right is only half the battle. For a kitchen to really hum, the inside of that undercounter refrigerator has to be just as dialed in to your specific workflow. It’s time to put down the tape measure and start thinking like a chef about how the internal setup will support your team during a busy service.
That "cubic feet" number on a spec sheet? It can feel a little abstract. In the real world of a fast-paced kitchen, you need to know what that actually means. Can you fit three full-sized hotel pans, or are you stuck with a jumble of smaller containers? A unit's listed capacity doesn't always tell you about its usable space—that comes down to the smart (or not-so-smart) design of its interior.
Shelves vs. Drawers: The Great Debate
Choosing between shelves and drawers isn't just a preference; it's a strategic decision that directly impacts your prep line's efficiency. Each setup has its own strengths, and the best choice is all about what you're storing and how fast you need to get to it. Think of it like organizing your toolbox—you wouldn't just toss tiny screws into one big open tray.
-
Shelves for Bulk and Versatility: Standard wire or solid shelves are the ultimate all-rounders. They're perfect for holding bulky items like large cambros of sauce, stacks of prepped veggies in pans, or even cases of drinks. Their open design gives you maximum flexibility to arrange items of all different shapes and sizes.
-
Drawers for Portion Control and Organization: Drawers are the specialists, built for high-volume stations like sandwich or pizza prep lines. They are fantastic for keeping smaller, portioned ingredients perfectly organized and separated. Just imagine pulling open a drawer to find neat rows of sliced cheeses, meats, and toppings, all right where you need them.
The most efficient kitchens often mix and match. You might see a drawer unit right on the sandwich line for immediate use, with a shelved unit nearby holding the backup supplies. This hybrid approach optimizes both speed and storage.
The Impact of Door Choice on Workflow
While the type of door won't change your undercounter refrigerator dimensions, it will absolutely change how your team interacts with the unit every single day. The choice between solid and glass doors is the classic trade-off between insulation and visibility.
A solid door is the king of insulation, which makes it a bit more energy-efficient. It’s the go-to choice for back-of-house applications where holding a precise, steady temperature is the absolute top priority.
A glass door, on the other hand, gives you at-a-glance inventory control. Your staff can see exactly what’s inside without opening the door, which saves time and stops cold air from escaping every few minutes. This makes glass doors a great fit for bar areas or prep stations with less temperature-sensitive ingredients.
This focus on operational efficiency is a big reason the market is growing. The global undercounter refrigerator market hit USD 3.42 billion and is expected to climb to USD 6.27 billion by 2033. This surge shows just how much demand there is for compact, efficient refrigeration across the entire foodservice industry. You can discover more about this market's growth trajectory on DataIntelo.com.
Ultimately, matching the interior layout to your menu turns an undercounter refrigerator from a simple cold box into a key part of your production line. For those needing even more flexibility, exploring an undercounter freezer and refrigerator combo can be a game-changer for a complex menu. By thinking carefully about shelves, drawers, and doors, you make sure your equipment is actively working to make your kitchen faster and more successful.
Frequently Asked Questions About Refrigerator Dimensions
Sorting through the specs for undercounter refrigerators can bring up a few final questions. Getting straightforward answers is the best way to make sure you choose and install the right unit for your kitchen, avoiding common headaches and making your investment count.
Here are the answers to some of the most common questions we hear from kitchen managers and restaurant owners.
Can I Use a Residential Refrigerator in My Business?
While a residential unit might seem like it fits the space, it's a risky move for any commercial kitchen. Commercial-grade refrigerators are built differently, using tough materials like heavy-gauge stainless steel. They also have powerful compressors made to handle the constant door openings and high heat of a professional kitchen.
Most importantly, they are NSF certified, which is a non-negotiable requirement for meeting health codes. A residential model simply doesn't have this certification, putting your business at risk for equipment that fails too soon and serious health code violations.
What is the Correct ADA-Compliant Height?
To comply with the Americans with Disabilities Act (ADA), the countertop surface sitting above the refrigerator cannot be higher than 34 inches from the finished floor. This detail ensures the workspace remains accessible for team members who use wheelchairs.
This means the undercounter refrigerator unit itself needs to be a bit shorter, usually around 32 inches tall, to leave room for the countertop's thickness. Always double-check your local codes and the unit's spec sheet to be certain you're compliant.
How Much Ventilation Clearance is Really Required?
The amount of open space you need to leave around the unit depends entirely on how it's designed to ventilate. This is a critical detail in undercounter refrigerator dimensions that you can't afford to get wrong.
- Front-Venting (Built-In) Models: These are designed to be slid into tight spaces and require zero clearance on the sides and back. All the air circulation happens through a grille on the front.
- Rear/Side-Venting (Freestanding) Models: These units need the exact clearance the manufacturer specifies, which is often 1-3 inches of open space around the unit for air to move freely.
If you ignore these clearance rules, the compressor will overheat. That leads to spoiled food, poor cooling, and a much shorter lifespan for your equipment.
Do Different Prep Tables Require Different Refrigerator Dimensions?
For the most part, standard 24-inch wide undercounter refrigerators are made to be compatible with most commercial prep tables. These tables come in various forms, from simple stainless steel work surfaces to specialized units. Sandwich prep tables, for instance, often include refrigerated rails for toppings and a cutting board, while pizza prep tables feature wider surfaces and rails designed for larger pans.
Despite these differences, the space underneath is generally standardized. The main thing is making sure the unit's height works with the table's adjustable legs. The depth should also allow the unit to sit flush, creating a workspace that is both seamless and safe. Before you buy, always measure the specific table’s under-shelf or leg-to-leg clearance to confirm you have a perfect match. A good fit ensures your table and refrigerator can function together as one efficient station.
At PrepTables.com, we offer a wide variety of commercial undercounter refrigerators built for the demands of any professional kitchen. Find the perfect dimensions and features to streamline your workflow by exploring our durable, NSF-certified equipment today. Visit https://preptables.com to learn more.