

under the counter refrigerator dimensions: A Practical Guide
When you're looking for the right undercounter refrigerator, knowing the standard dimensions is the first step to making sure it fits perfectly. Standard under the counter refrigerator dimensions usually fall between 24 to 30 inches deep and 34 to 35 inches high, which allows them to slide right under a typical 36-inch countertop.
While height and depth are pretty consistent, the width is where you'll see the most variety. Common widths like 15, 24, and 30 inches are available to fit different kitchen layouts and meet specific storage needs.
Decoding Standard Undercounter Refrigerator Sizes
Picking out an undercounter refrigerator starts with understanding the industry-standard sizes. While exact measurements can differ a bit between brands and models, most are designed to fit right into standard kitchen cabinetry, giving you maximum storage without messing up the clean lines of your kitchen.
The most important measurement to get right is the height. A standard kitchen counter is 36 inches tall. Because of this, undercounter refrigerators are almost always built to be between 34 to 35 inches high, leaving just enough of a gap for clearance.
Depth is also pretty standard, usually around 24 inches, which matches the depth of most kitchen cabinets. This ensures the unit will sit flush with your cabinetry for that clean, built-in appearance everyone wants.
To give you a quick overview, here’s a breakdown of the most common sizes you'll encounter.
Quick Reference Guide to Common Undercounter Fridge Sizes
| Refrigerator Type | Standard Width Range | Standard Height Range | Standard Depth Range |
|---|---|---|---|
| Compact/Beverage Center | 15 - 20 inches | 31 - 34 inches | 22 - 25 inches |
| Standard Undercounter | 24 inches | 34 - 35 inches | 23 - 26 inches |
| Wide/High-Capacity | 30 inches or more | 34 - 35 inches | 24 - 27 inches |
This table should help you quickly narrow down what will work for your space, but always remember to double-check the exact spec sheet of any model you're considering before making a purchase.
Common Widths and Their Applications
Width is where you have the most flexibility, which lets you pick a unit based on how much space you have and what you plan to use it for. Each size really has its own place in a kitchen or bar setup.
- 15-Inch Models: These are the slim, compact options perfect for tight spots. You'll often see them used as dedicated beverage centers or wine coolers, making them a great choice for a small bar area, a home office, or even a conference room.
- 24-Inch Models: This is by far the most popular width. It strikes a great balance between offering good storage capacity and not taking up too much floor space. It's the standard, go-to size for most kitchen remodels because it fits perfectly into standard cabinet openings.
A well-chosen undercounter refrigerator not only adds convenience but also enhances workflow by placing cold storage exactly where it's needed most. You can learn more about how a proper under counter refrigerator can transform your workspace.
How to Measure Your Space for a Perfect Fit
Getting your new undercounter refrigerator to slide perfectly into place all comes down to good measurements. Taking a few minutes to measure correctly upfront will save you a world of headaches on delivery day—trust me, there’s nothing worse than finding out the unit is a half-inch too tall for your counter or just won't clear the cabinet opening.
Before you grab the tape measure, make sure to completely clear out the space where the fridge will go. All you'll need is a good tape measure and a way to jot down the numbers, whether that's a notepad or your phone. Precision is everything here.
This simple guide shows you the three critical measurements you need to take.

As you can see, getting the width, height, and depth right is the first and most important step to finding the perfect appliance for your kitchen.
A Step-by-Step Measurement Checklist
To get the most accurate under the counter refrigerator dimensions, you need to measure your cutout space in a few different spots. It's a pro tip because floors and walls are almost never perfectly level or straight. This extra step accounts for any of those small, sneaky variations.
-
Measure the Height: Run your tape measure from the floor to the bottom lip of the countertop. Do this at the back, in the middle, and at the front of the opening. The number you want to write down is the smallest of the three.
-
Measure the Width: Do the same thing for the width. Measure the space between the cabinets at the back, middle, and front. Again, record the narrowest measurement you get.
-
Measure the Depth: Finally, measure from the back wall to the very front edge of your cabinetry. Don't forget to look for any pipes, electrical outlets, or even bulky baseboards that might eat into your available depth.
Factoring in Essential Clearances
Those raw numbers you just took? They're just the beginning. You also have to think about ventilation, where your plugs are, and how the door will open to make sure the installation is actually functional.
- Ventilation Space: Most built-in models need at least 1/8 to 1/4 inch of breathing room on the sides and top for proper airflow. This isn't just a suggestion—it's critical for keeping the unit running efficiently and making it last.
- Utility Access: Take a second to find your electrical outlet. If you're getting a model with an ice maker, locate the water line, too. You need to be sure there’s enough space behind the unit for the plugs and hoses without it sticking out past the front of your cabinets.
- Door Swing: This one’s easy to forget but so important. Check how much room the refrigerator door needs to swing open all the way. You don't want it banging into nearby cabinets, walls, or other appliances every time you reach for something.
Nailing these details is a huge part of seamless integration, especially in a busy and well-organized workspace. In fact, understanding how all your appliances fit together is a cornerstone of effective commercial kitchen layout planning.
Of course, there's more to it than just the basics. For a much deeper dive into [selecting the right fit for your kitchen renovation](https://templetonbuilt.com.au/appliance-sizing-guide-selecting-the-right-fit-for-your-kitchen- renovation/) that covers a wide range of appliances, this guide is a fantastic resource.
Understanding Built-In Versus Freestanding Models
When you're picking out an undercounter refrigerator, one of the first decisions you'll face is whether to go with a built-in or a freestanding model. This isn't just a style choice—it's a critical decision that dictates everything from the required under the counter refrigerator dimensions to how it gets installed. Honestly, the whole difference boils down to one thing: how the unit breathes.
Built-in models are the ones designed to slide perfectly into your cabinetry for that seamless, custom-kitchen look. They pull this off with a clever design featuring front-facing vents, usually a grille right at the bottom. This allows the fridge to pull in cool air and push out warm air from the front, meaning it can be installed completely flush with its neighboring cabinets without needing extra space.
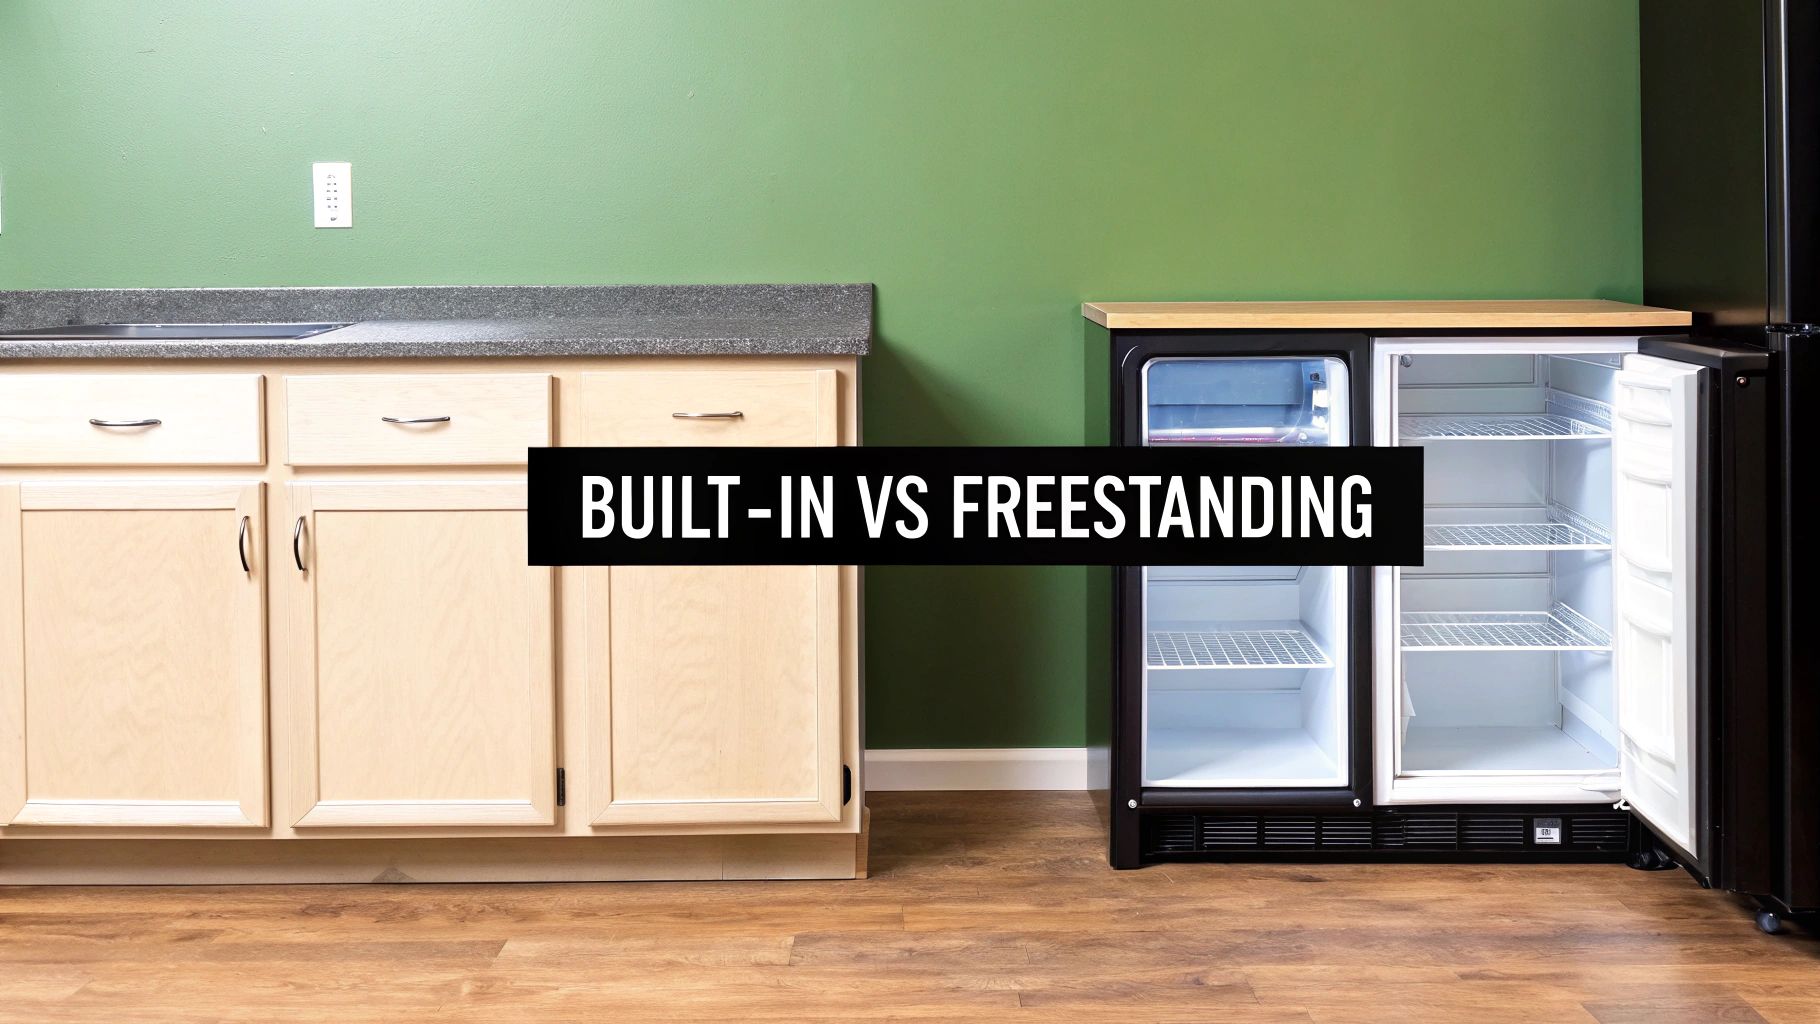
Freestanding units, on the other hand, are designed to be exactly that—standalone. The condenser coils that get rid of heat are typically on the back or sides of the machine. Because of this, they need a good bit of open space around them, often several inches, just to get proper airflow. Without that clearance, they can overheat, run inefficiently, and eventually fail.
Key Distinctions at a Glance
Getting these differences straight is crucial before you ever start cutting into cabinets. I’ve seen it happen time and again: someone tries to stuff a freestanding model into a tight enclosure, and it's a costly mistake that kills the appliance.
To make it simple, let’s break down the main contrasts between the two types.
Built-In vs Freestanding Refrigerator Comparison
Here’s a head-to-head comparison to help you visualize the key differences in installation, dimensions, ventilation, and cost.
| Feature | Built-In Models | Freestanding Models |
|---|---|---|
| Ventilation | Front-facing grille allows for a zero-clearance install. | Rear or side coils that need open air to breathe. |
| Installation | Designed to be installed flush within cabinetry. | Requires several inches of clearance on the sides and back. |
| Dimensions | Sized to fit standard cabinet depths and heights. | Dimensions are more variable and not cabinet-depth. |
| Aesthetic | Creates a seamless, integrated, and professional look. | Has a more traditional, standalone appliance appearance. |
| Cost | Generally more expensive due to specialized engineering. | Often more budget-friendly with versatile placement options. |
The takeaway here is pretty clear. If you're going for that true, built-in undercounter installation, you absolutely need a unit designed for it. That front-venting system is the non-negotiable feature that lets it work safely and efficiently while giving you the polished, custom finish that most people are after.
So, for anyone planning a flush installation, always look for a model that's specifically labeled as "built-in" or "undercounter-rated." It's the only way to guarantee the correct ventilation and a perfect, long-lasting fit.
How Refrigerators and Prep Tables Work Together
In a busy kitchen, every second counts. The way you arrange your equipment can make or break your workflow, which is why pairing undercounter refrigerators with prep tables is such a smart move. The standard under the counter refrigerator dimensions are designed specifically to slide right under commercial worktops, creating a tight, efficient, and incredibly practical workstation.
Putting these two pieces together means cold ingredients are always right where you need them. No more walking across the kitchen—just reach down. This simple setup shaves precious time off every order, especially when you're slammed. Most commercial prep tables and counters are a standard height of 34 to 36 inches, and wouldn't you know it, most undercounter fridges clock in at around 34 inches tall. It's a perfect match.
Different Kinds of Commercial Prep Tables
While you can slide an undercounter refrigerator under any basic worktop, commercial kitchens often use specialized stainless steel prep tables designed for specific tasks. These units streamline workflow and come in several varieties.
- Standard Stainless Steel Tables: These are the versatile workhorses of any kitchen. They typically feature a flat, durable top with an open base or an undershelf, making them ideal for sliding one or more undercounter refrigerators beneath. This setup provides a customizable station with immediate access to cold storage.
- Sandwich and Salad Prep Tables: These are all-in-one stations built for speed and efficiency. They combine a refrigerated base with a work surface and a refrigerated rail on top that holds pans of ingredients like chopped vegetables, cheeses, and meats. This keeps everything chilled and within arm's reach for rapid assembly.
- Pizza Prep Tables: Similar to sandwich tables, these units also feature a refrigerated base and ingredient rails. However, they are specifically designed for pizzerias, with a wider, deeper work surface—often made of marble or another cold-retaining material—that provides ample space for stretching dough and adding toppings.
The right setup doesn't just make things faster; it improves food safety and keeps everything organized. In fact, the market for commercial undercounter and worktop refrigeration is expected to grow from USD 12.16 million in 2025 to about USD 16.19 million by 2035. This trend is all about driving efficiency in kitchens worldwide. You can read more about this growing market on Future Market Insights.
Knowing these different configurations helps you get the most out of your kitchen space. If you want to dive deeper into these specialized units, check out our guide on commercial refrigerated prep tables. It breaks down the different models and how they can benefit a professional kitchen.
A Look at ADA-Compliant Refrigerator Dimensions
When you're designing an accessible kitchen, you have to follow some very specific guidelines. This is particularly true when it comes to the dimensions for an under-the-counter refrigerator. The Americans with Disabilities Act (ADA) has clear standards in place to make sure appliances can be used by everyone, which directly shapes how they’re designed and sized.
The biggest ADA rule to know is that countertops can't be higher than 34 inches from the floor. That’s a full two inches shorter than the standard 36-inch counter height you see in most kitchens. To accommodate this, ADA-compliant undercounter refrigerators are built shorter, usually measuring between 32 to 32.5 inches high, so they can slide comfortably under these accessible counters.
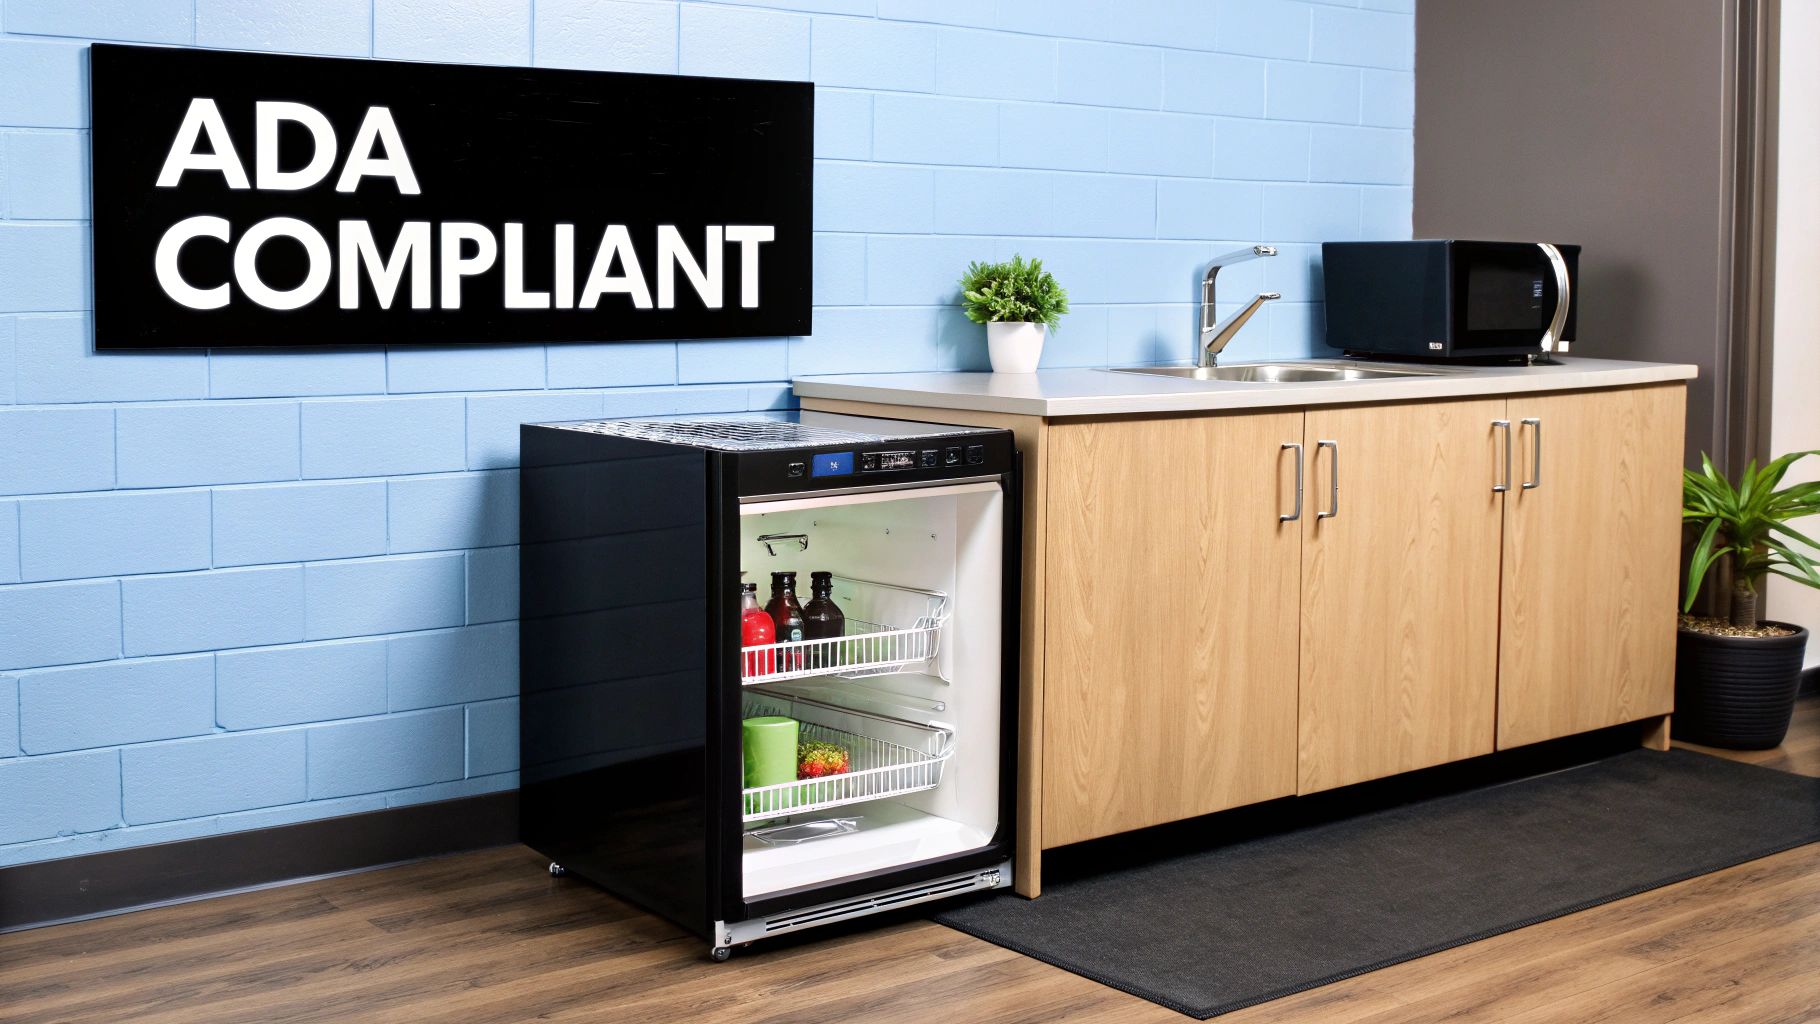
This reduced height is critical. It makes sure that someone using a wheelchair can easily see what’s inside the fridge and reach everything without difficulty.
Key Features You'll Find in ADA-Compliant Models
It's not just about the height, though. ADA standards also get into the nitty-gritty of reach and ease of use, which has a big impact on how these units are put together. These details are what make a unit truly accessible.
- Forward-Reach Accessibility: All the controls and anything you need to operate the fridge must be reachable with a single forward motion. This means no tight grasping, pinching, or twisting your wrist. You’ll often find the controls right up front, either on the bottom grille or just inside the door.
- Operating Force: It shouldn’t take a lot of muscle to use the controls. The force needed to push a button or turn a dial must be less than five pounds.
- Storage Access: At least 50% of the freezer space and 100% of the fresh food section has to be below 54 inches from the floor. This is a non-issue for undercounter models, as they easily meet this requirement by design.
"Designing spaces that are inclusive from the start is not just a matter of compliance, but a commitment to better, more functional environments for all users."
If you’re really focused on ADA compliance, it's worth taking a look at the broader principles of designing for accessibility and inclusivity to get the full picture. Following these rules ensures your undercounter refrigerator isn't just a convenient appliance, but one that’s genuinely usable for everyone, whether it’s in a home or a commercial kitchen.
More Than Just a Box: Exploring Different Undercounter Refrigerator Types
It’s easy to think of an undercounter fridge as just a smaller version of its full-sized cousin, but that’s selling it short. The market is full of specialized models, each designed to solve a specific problem or fit a particular look. The best choice for you really boils down to what you'll be doing with it—chilling drinks for a home bar, keeping snacks handy for the kids, or carefully preserving a wine collection.
Think about it: a refrigerator with drawers offers a totally different experience than one with a glass door. Drawers give you a top-down view of everything inside, so no more digging around for that last can of soda. Glass doors, on the other hand, turn your beverage collection into a display piece. These designs aren't just gimmicks; they're smart responses to how people actually use these appliances.
Specialized Models for Every Nook and Cranny
To nail down the right fit for your space, let’s break down some of the most common designs you'll run into. Each one brings something unique to the table.
- Drawer Refrigerators: Instead of a single door, these units have two or more stacked drawers. They are fantastic for ergonomic access, letting you see and grab produce, snacks, and drinks without bending over. This makes them a huge hit in kitchens, especially for families.
- Glass Door Beverage Centers: Built to show off what’s inside, these models are the go-to for home bars and entertainment rooms. They usually have adjustable shelves to perfectly fit different-sized cans and bottles, adding a real touch of class to your hosting space.
- Wine Coolers: These aren’t just cold boxes; they’re engineered from the ground up to protect wine. You get precise temperature controls and technology that dampens vibrations, which can ruin a good vintage. The racks are also specifically shaped to cradle wine bottles.
When you look at what people are actually buying, a few key sizes pop up again and again. For residential units in the US, the most common widths are 15 inches, 24 inches, and 34 inches, each designed to slot into different undercounter layouts. Capacity-wise, they tend to fall under 100 liters or in the 101 to 200-liter range. If you're curious about the numbers, you can dig deeper into these market trends over at Data Bridge Market Research.
Frequently Asked Questions
When it comes to under the counter refrigerator dimensions, a few common questions always seem to pop up. Getting straight answers is the key to making sure your new unit fits like a glove and works perfectly from the get-go. Let's tackle the most frequent points of confusion.
What Is the Standard Height of an Undercounter Refrigerator?
Most undercounter refrigerators have a standard height between 34 and 35 inches. This range isn't random; it’s specifically designed so the unit can slide right under a standard 36-inch high countertop, leaving just enough breathing room for proper installation and airflow.
The main exception you'll see are ADA-compliant models. These are built a bit shorter, usually around 32 inches high, so they can fit comfortably under a 34-inch accessible counter.
Can You Put a Regular Mini-Fridge Under a Counter?
I’d strongly advise against trying to install a regular mini-fridge inside cabinetry. The reason is simple: most freestanding mini-fridges have their cooling coils on the back or sides, and they need several inches of open air to get rid of heat.
If you box one in, it can't breathe. This leads to overheating, making it run constantly and inefficiently, which will drastically shorten its life. For this kind of setup, you absolutely need a model that is specifically labeled as 'built-in' or 'undercounter,' because they have front-facing vents designed precisely for these tight spaces.
How Much Clearance Does a Built-In Model Need?
This is where true built-in models really shine. Since they vent out the front, they need very little clearance. Manufacturers typically suggest just 1/8 to 1/4 inch of space on the sides and top.
That tiny gap is all that's needed to slide the unit into place for installation or pull it out for servicing. The back can often sit almost completely flush against the wall. That said, you should always double-check the installation manual for your specific model to be certain.
For professional-grade stainless steel prep tables, commercial refrigeration, and cooking equipment designed for durability and efficiency, explore the full collection at PrepTables.com. Find the perfect equipment to optimize your kitchen's workflow today at https://preptables.com.