

Ice Maker Leaking Water? Tips to Fix & Prevent It
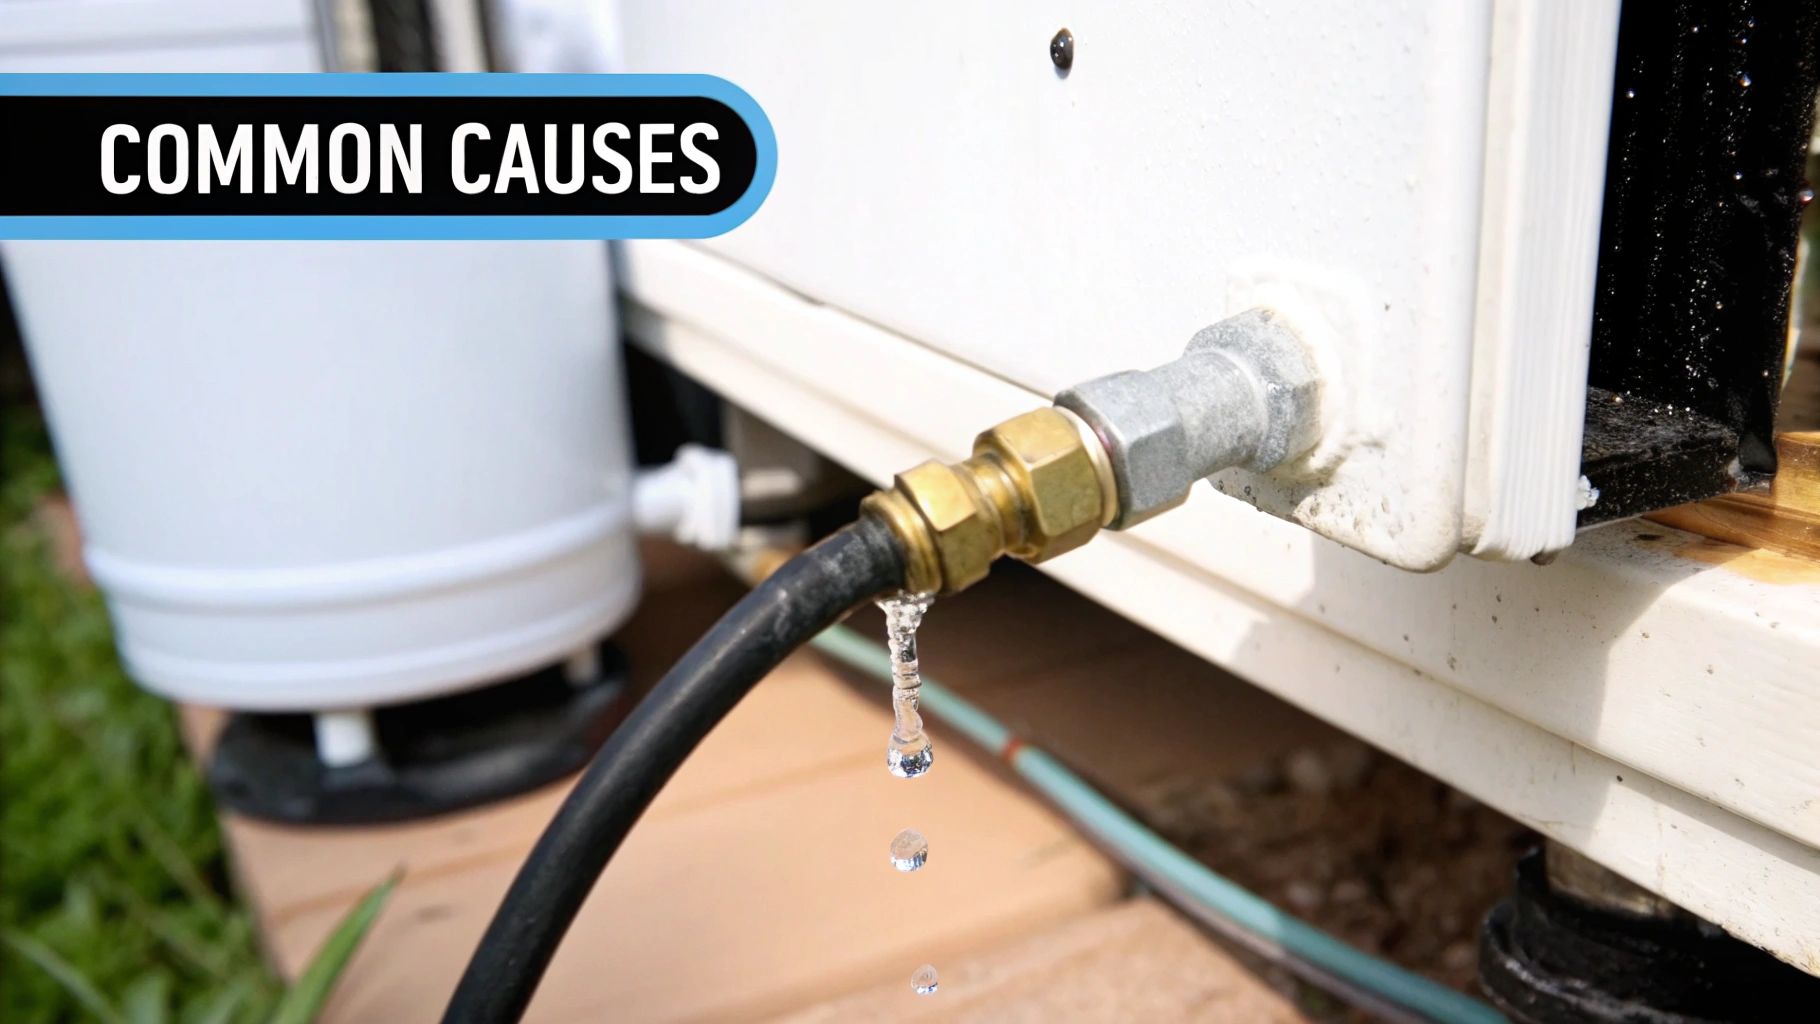
A puddle of water spreading from your ice machine is an unwelcome sight, but don't panic. Most of the time, an ice maker leak comes down to one of a few common culprits: a frozen fill tube, a cracked water supply line, or a bad inlet valve.
Before you touch anything, the first and most important step is always to unplug the appliance. Safety first. Once that's done, your real job begins: playing detective. Where the water ends up is your biggest clue.
Your First Steps to Diagnosing the Leak
Finding that puddle is alarming, but the key is to avoid jumping to conclusions. A methodical approach will save you a ton of time and frustration. The location of the water tells a story.
A leak inside the freezer itself? That almost always points to an issue with the ice maker assembly, like a fill tube that's iced over. But if the water is pooling behind or underneath the unit, your prime suspect is the water supply line that connects the machine to your building's plumbing.
Pinpoint the Problem Area
Start with simple observation. Is it a slow, constant drip, or does the puddle only seem to show up every once in a while? A persistent leak might be a cracked drain pan or a failing valve that just won't close. An intermittent one, on the other hand, is probably tied to the ice-making cycle itself.
This initial assessment helps narrow things down fast. For instance, a leak that only appears after the machine cycles is almost certainly linked to the water fill process.
This visual guide can help you think through the process based on how often the leak appears.
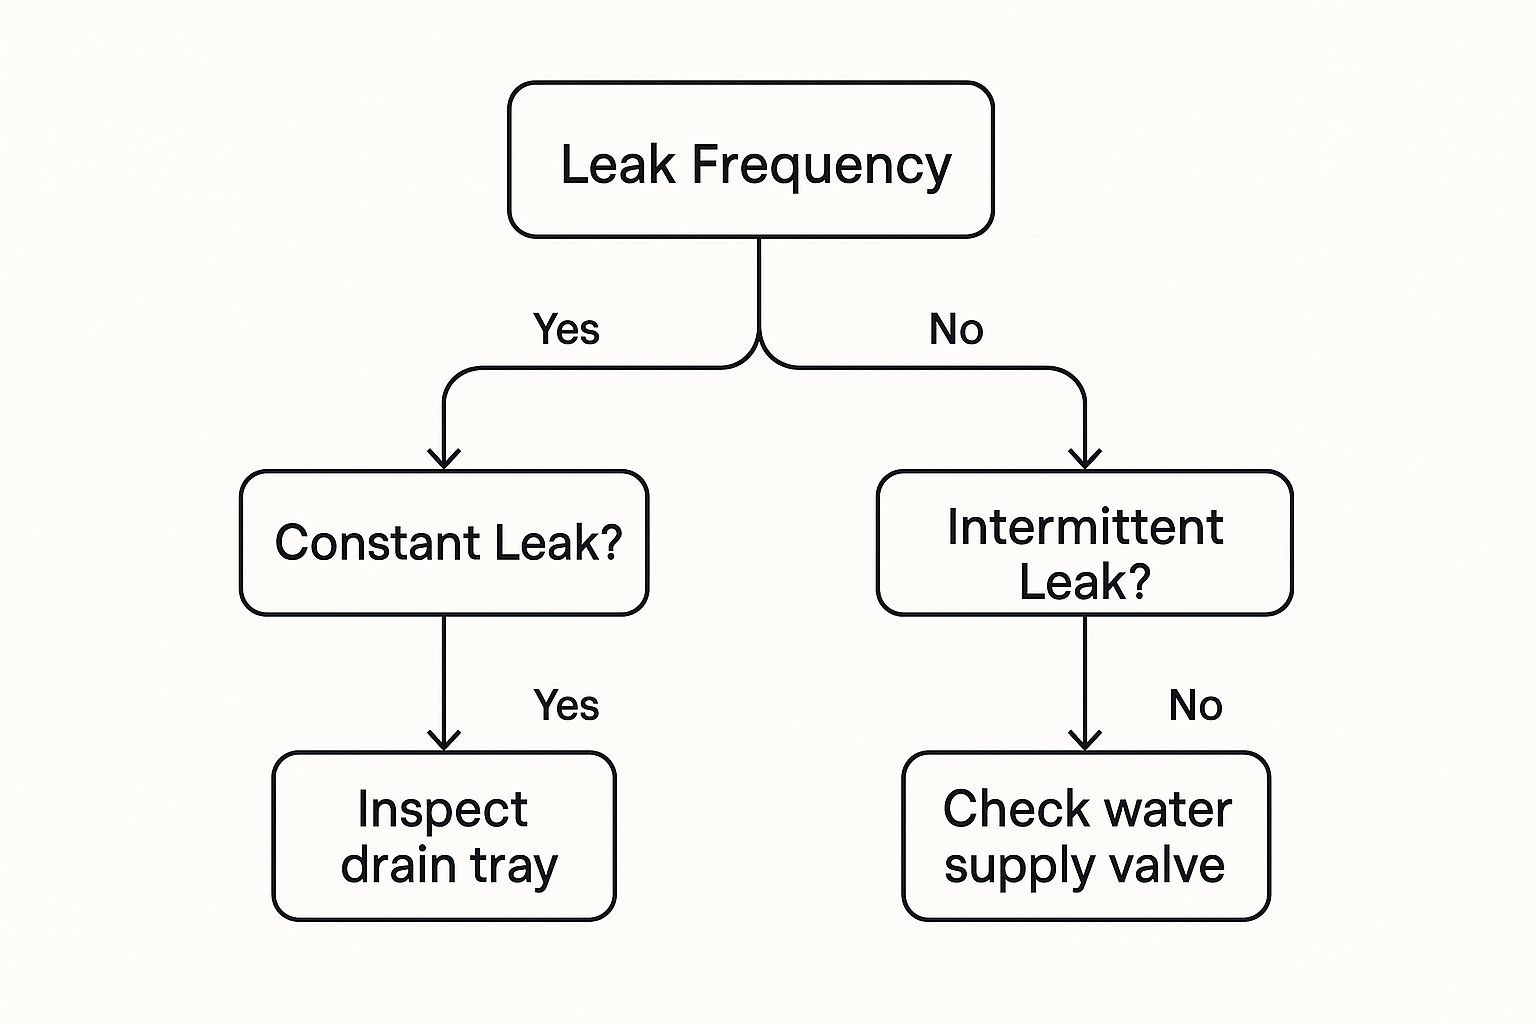
As you can see, a constant leak means you should immediately check the drain system. But if it comes and goes, your focus should shift to the water supply components.
To make this even easier, here’s a quick reference table. Just find where the water is pooling and it’ll point you in the right direction.
Quick Leak Diagnosis Guide
Use this table to quickly match the water's location to the most probable cause and your first action.
| Leak Location | Most Likely Cause | What to Check First |
|---|---|---|
| Inside the freezer | Frozen fill tube or overfilling mold | The fill tube for ice blockage and the water level in the ice tray. |
| Directly behind the unit | Loose or damaged water supply line | The connection at the inlet valve and the entire length of the line for cracks. |
| Underneath the unit | Cracked drain pan or clogged defrost drain | The drain pan for damage and the defrost drain tube for obstructions. |
This table covers the most common scenarios I see in the field and should get you started on the right track without taking anything apart just yet.
Initial Diagnostic Checklist
Before you grab your tools, run through a quick mental checklist. It’ll help you focus your efforts and might even solve the problem right then and there. Ask yourself these questions:
- Is the machine level? If the unit is tilted, water can easily spill from the drain pan or cause the ice maker mold to fill unevenly and overflow. You want the front to be just a tiny bit higher than the back—about a quarter-inch difference usually does the trick.
- When was the water filter last changed? An old, clogged filter can cause pressure to build up, leading to leaks around the filter housing. An improperly installed one will definitely leak.
- Are there any obvious cracks or kinks in the water line? Carefully pull the machine away from the wall and give that thin plastic or copper tube a good look. A sharp kink or a visible crack is a dead giveaway.
A systematic approach is crucial. I've seen many people assume the worst and call for expensive repairs when the actual problem was as simple as a loose connection on the water line that took two minutes to tighten.
While we're talking about residential-style units here, the same core principles apply to larger systems. If you're managing professional kitchen equipment, it's worth taking the time to learn more about the inner workings of a commercial ice machine. Understanding how all the parts work together makes troubleshooting any issue that much easier.
How to Inspect the Water Supply Line
When you find a puddle forming behind your commercial ice machine, the water supply line is almost always the prime suspect. This thin tube, often made of plastic or copper, is the lifeline that feeds water to your machine, and it's surprisingly vulnerable to damage over time. A careful, end-to-end inspection is your next move.
First things first, you'll need to carefully pull the unit away from the wall. Give yourself enough room to work safely. Grab a flashlight and trace the line from where it connects at the wall valve all the way to the water inlet valve on the back of the ice maker. You’re hunting for the subtle signs of trouble that cause these frustrating leaks.
What to Look For During Inspection
Your visual check needs to be thorough. Don't just glance at the line; run your fingers along its entire length to feel for any imperfections you might not be able to see.
Pay close attention to these specific issues:
- Tiny Cracks: Plastic lines can get brittle with age and develop hairline fractures. These cracks often only leak under pressure, making them very easy to miss.
- Kinks and Bends: A sharp kink not only restricts water flow but also creates a weak point in the line that can eventually split open.
- Loose Fittings: Check the compression nuts at both the wall valve and the machine's inlet valve. Even a slightly loose connection can cause a slow, persistent drip.
- Signs of Wear: Look for any discoloration, bulging, or areas where the line looks stretched or stressed. The connection points are common culprits here.
A very common reason for an ice maker leaking is simply a loose or poorly connected supply line. Most machines use a 1/4-inch tube, and if that connection is loose at either end, water will find its way out. Checking and securing these connections is a simple fix that often solves the problem. You can find more helpful tips on this common issue in Whirlpool’s guide.
Tightening Connections the Right Way
If you find a loose fitting, the fix is usually straightforward. Using two wrenches—one to hold the valve steady and one to turn the compression nut—give the nut a gentle quarter-turn clockwise. The key here is to be firm, but whatever you do, don't overtighten. Cranking down too hard can crack the fitting or strip the threads, creating a much bigger headache.
Never use just one wrench to tighten a fitting on the inlet valve. Without bracing the valve body itself, you risk twisting and breaking the entire component. That turns a minor repair into a major replacement project.
If tightening the connection doesn't stop the leak, or if you found the line is cracked or brittle, it’s time for a replacement.
Choosing and Installing a Replacement Line
Don't just replace a failed plastic line with another one. For a more durable, long-lasting solution, upgrade to a braided stainless steel supply line. These are far more resistant to kinks, cracks, and punctures, giving you much better peace of mind. You can find them at any home improvement store in various lengths.
When you install the new line, make sure to leave a gentle loop of slack behind the ice maker. This little trick prevents the line from being pulled too tight or kinked when you push the unit back into place, ensuring a secure and leak-free connection for years to come.
Alright, if you've already checked the main water line and everything looks good, it's time to move your investigation inside the freezer itself. A leak that's dripping directly into the ice bin or onto the freezer floor often points to one of two usual suspects: a frozen fill tube or a cracked ice mold.
The Frozen Fill Tube Problem
Let's start with the fill tube. This is just a small pipe that carries water from the inlet valve over to the ice mold. Because it lives in that sub-zero environment, it’s a prime spot for ice blockages. This happens a lot when water pressure is on the low side or if the freezer is set just a bit too cold.
When that tube gets clogged with ice, the next batch of water has nowhere to go. It just backs up and spills over, leaving you with a puddle inside the freezer.
How to Safely Thaw It Out
First things first, shut the ice maker off. You don't want it calling for more water while you're working. You can typically do this by lifting the metal feeler arm or finding a dedicated on/off switch.
Once it’s off, you can gently melt the ice clog.
-
The Warm Water Trick: Grab a turkey baster or even a small squeeze bottle and fill it with warm water. Don't use hot water! Carefully squirt the warm water into the fill tube opening to melt the blockage. It’s a good idea to have a towel handy to soak up any drips.
-
A Word of Caution on Hairdryers: It might seem like a quick fix, but never use a hairdryer. The high heat can easily warp or melt the plastic parts of the fill tube and the rest of the ice maker assembly. That little shortcut can turn into a much bigger, more expensive repair in a heartbeat.
After you've cleared the ice, turn the ice maker back on. If you find it freezes up again down the road, try raising your freezer's temperature by a degree or two. Sometimes, that's all it takes.
If you have a fill tube that just keeps freezing up, it might be a symptom of a bigger problem. Often, it means the water inlet valve isn't closing completely. A tiny, slow trickle of water seeps into the tube between cycles, freezing layer by layer until it forms a solid block.
Inspecting the Ice Mold for Cracks
If the fill tube is clear, the next thing to check is the ice mold—the tray where the cubes are actually formed. Over time, the constant cycle of freezing and thawing, plus the twisting action from the ejector arms, can cause tiny hairline cracks in the mold's coating or plastic.
You might not even see these tiny fractures at first glance, but they're a classic source of slow leaks. As the mold fills, a little bit of water seeps through the cracks and drips down into the ice bin before it gets a chance to freeze.
To get a good look, turn off the ice maker and pull out the ice bin completely. Use a flashlight to carefully scan the entire surface of the mold, especially the corners and the bottom. A pro tip is to run a dry paper towel along the underside of the mold—any dampness will immediately pinpoint a hidden leak.
If you do find a crack, the best fix is to replace the entire ice maker assembly. Trying to patch a cracked mold just isn't a reliable long-term solution.
Alright, so you’ve checked the supply line and the fill tube, and they look solid. The next place to point your flashlight is at the components that actually tell the water when to start and stop flowing. This brings us to the water inlet valve, a notorious troublemaker when it comes to leaks.

Think of this valve as the gatekeeper for your ice machine. It's a small, electrically-controlled part that opens just long enough to let the right amount of water into the fill tube before snapping shut. But over time, hard water minerals can build up inside, preventing it from sealing completely. When that happens, you get a slow, constant trickle that either freezes up the fill tube or overflows the ice mold.
Locating and Testing the Inlet Valve
You'll usually find the water inlet valve on the back of the ice maker, right near the bottom where the main water line hooks up. It’s a small solenoid with a couple of plastic tubes connected to it.
First things first: unplug the unit. Never work on an appliance with the power on.
Sometimes a quick visual inspection is all you need. Look for any tell-tale signs of trouble like corrosion, chalky mineral buildup, or obvious drips around the connections.
If it looks okay but you're still suspicious, a multimeter can give you a definitive answer. Test the valve for continuity. If it fails the test or has visible damage, just replace the whole thing. Trust me, trying to clean out a failing valve is almost always a temporary fix at best.
I’ve lost count of how many times a faulty water inlet valve was the real culprit behind a mysterious leak. You'll see one stuck just slightly ajar, letting a tiny amount of water seep through—not enough to notice right away, but enough to cause a persistent puddle over time.
Why Your Water Filter Might Be the Culprit
This one catches a lot of people by surprise. An old, clogged, or improperly installed water filter can absolutely cause your ice maker to leak. When a filter is past its replacement date, it can restrict water flow and cause pressure to spike throughout the system.
That extra pressure looks for a weak spot, and it often finds one in the filter housing or other connections, leading to drips. An even more direct cause is a filter that isn't seated correctly. If those O-rings don't create a perfect seal, water is going to find its way out.
Best Practices for Filter Replacement
A few simple habits during filter changes can save you a world of hurt later on.
- Seat It Properly: Make sure the new filter is pushed or twisted all the way in until you hear and feel it click. It should feel locked in and secure.
- Lube the O-Rings: A tiny dab of food-grade silicone grease on the O-rings works wonders. It helps create a tighter seal and makes the filter much easier to remove next time.
- Flush the System: This is the step everyone skips. After installing a new filter, you must run several gallons of water through the dispenser. This purges trapped air that can cause sputtering, pressure spikes, and leaks. It also flushes out any harmless (but unsightly) carbon dust from the new filter.
Proper filtration is non-negotiable for both ice quality and the long-term health of your machine, especially in a busy commercial kitchen. If you're looking to upgrade or install a new system, our guide to choosing a water filtration system for restaurants is a great place to start.
Understanding Commercial Prep Tables and Leak Risks
While an ice maker leaking water is a common household headache, similar issues happen in commercial kitchens on a much larger scale. This is especially true with specialized equipment like stainless steel prep tables, which are the backbone of any professional food service operation. Understanding these pieces of equipment helps put appliance maintenance into a broader context.
The world of stainless steel prep tables is diverse. The most basic type is a simple, non-refrigerated work surface prized for its durability and ease of sanitation. But when refrigeration is integrated, as with pizza and sandwich prep tables, you introduce complex systems where water-related problems, much like with an ice maker, can arise.
Specialized Refrigerated Prep Tables
For kitchens focused on efficiency and food safety, refrigerated prep tables are essential. They keep ingredients chilled at the point of use, but their cooling systems and drain lines create potential failure points.
-
Sandwich Prep Tables: These units are designed for quick assembly. They feature a refrigerated top rail with multiple food pans for meats, cheeses, and vegetables, with a reach-in cabinet below for backup storage. Condensation and defrost cycles are managed by internal drains, which can clog and cause leaks.
-
Pizza Prep Tables: Built to handle the demands of a pizzeria, these tables have a wider, deeper refrigerated rail to accommodate large pans of sauce, cheese, and toppings. They also feature a large cutting board surface for dough preparation. Like sandwich tables, they rely on complex refrigeration and drainage systems that require proper maintenance to prevent water from pooling or leaking onto the floor.
In both cases, a puddle on the floor could indicate a clogged defrost drain or a failing condenser—problems far more complex than a simple ice maker leak at home.
A leak under a commercial pizza prep table is more than a slip hazard; it's a symptom that could point to a serious malfunction. It requires immediate attention from a professional to prevent inventory loss and significant downtime, underscoring the importance of recognizing when a repair is beyond a simple DIY fix.
Knowing When to Call a Professional
While you might fix your home ice maker yourself, commercial refrigerated equipment is a different animal. The plumbing, electrical, and cooling systems in sandwich and pizza prep tables are intricate and operate under constant, heavy use.
If you are facing a water leak from one of these commercial units, the stakes are much higher. You risk food spoilage and business interruption. Attempting a DIY repair is a gamble. This is where a qualified technician becomes essential. They have the specialized knowledge to diagnose the root cause within these complex systems and perform a safe, effective repair, protecting your investment and your business.
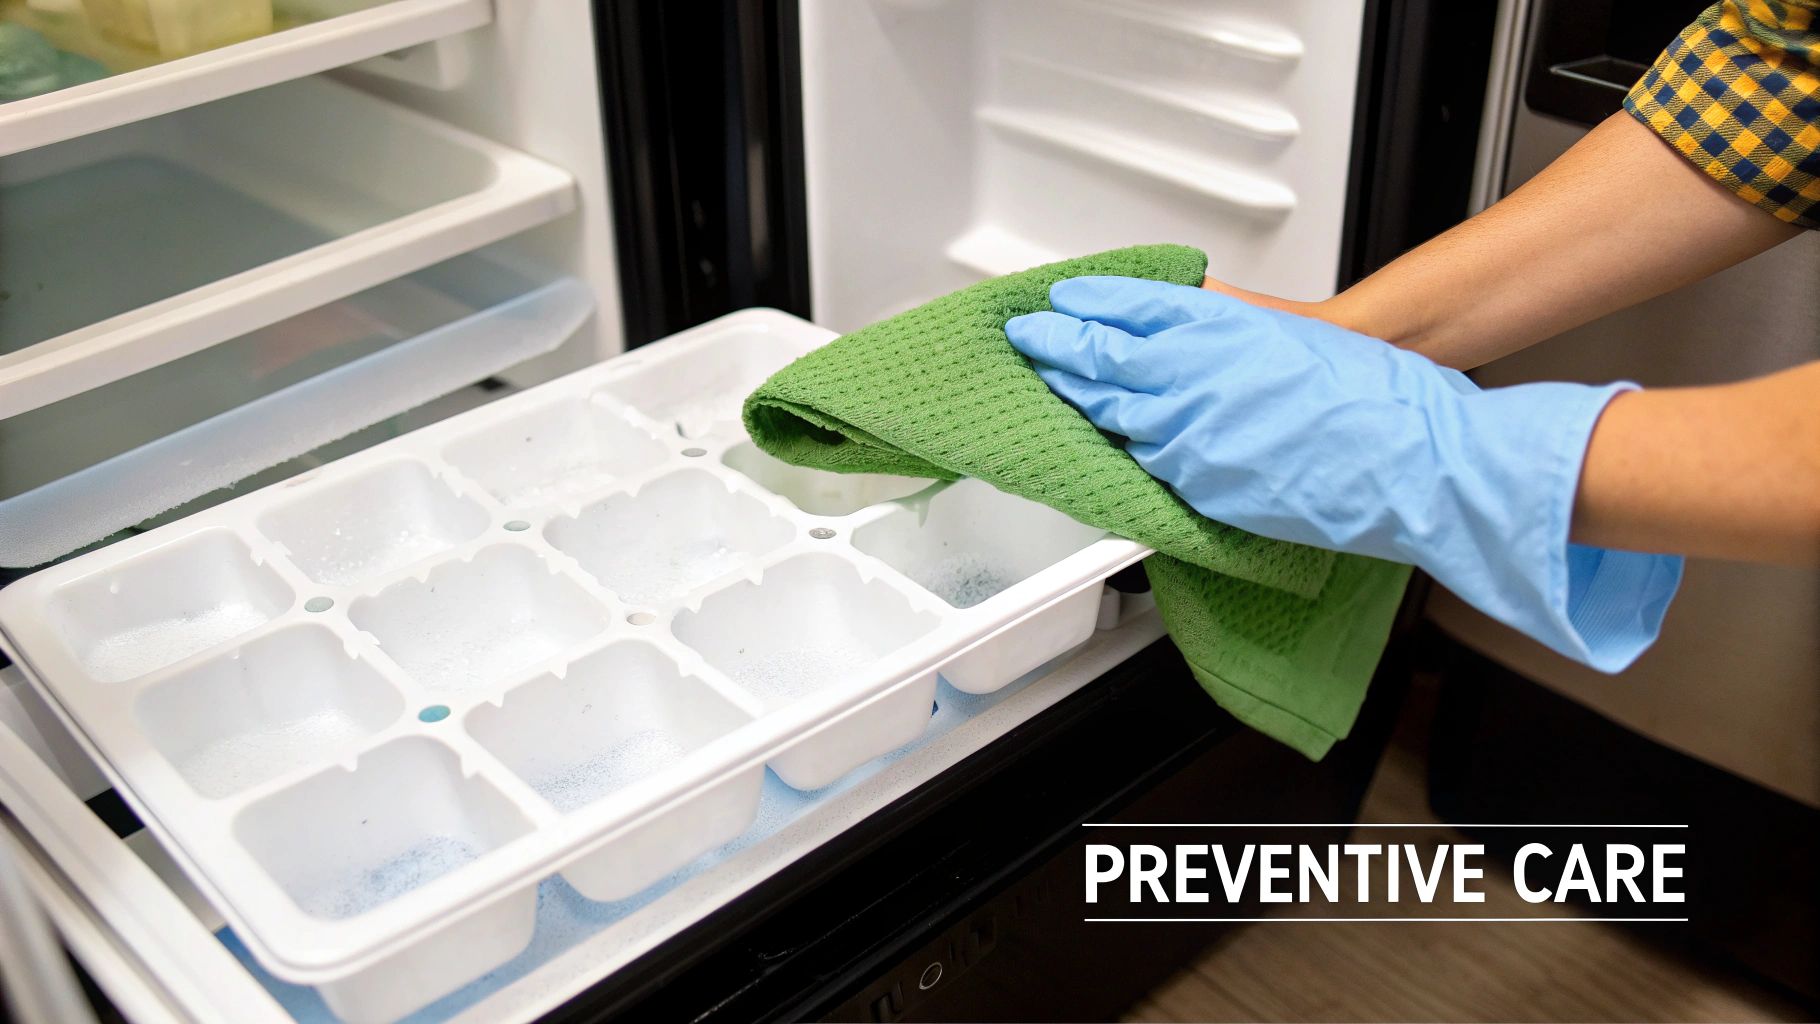
Simple Maintenance to Prevent Future Leaks
You’ve just fixed your leaky ice maker, and the last thing you want is a repeat performance. The good news? Preventing future puddles isn't about complicated, time-consuming repairs. It’s really just about building a few simple, consistent habits into your routine.
A few quick checks every couple of months can make a massive difference in keeping your ice maker humming along and your floors bone-dry. These steps are all about catching the small stuff before it snowballs into a big, watery mess. For example, plastic water lines get brittle over time, but a quick visual check can spot trouble brewing.
Your Proactive Maintenance Checklist
The most effective strategy is simply weaving a few key tasks into your regular cleaning schedule. This isn't a major overhaul; it’s a series of five-minute checks that stop an ice maker leaking water in its tracks.
Here’s a practical list to get you started:
- Inspect the Water Line: Every few months, carefully pull the unit out and take a close look at the water supply line. Feel for any stiff or brittle spots, and keep an eye out for tiny cracks or kinks. If it’s showing its age, think about swapping it for a durable braided steel line.
- Replace the Water Filter on Schedule: A clogged filter can mess with the water pressure and trigger leaks. Most manufacturers recommend a fresh one every six months. Just remember to flush a few gallons of water through a new filter to push any trapped air out of the system.
- Confirm the Machine is Level: Grab a level and check that your unit is stable. It should be perfectly level from side to side, but the front should be just a bit higher than the back—about a quarter-inch is perfect. This slight tilt makes sure water flows correctly to the defrost drain and keeps the ice mold from overfilling.
A common mistake is thinking maintenance is only for when something breaks. In reality, 90% of appliance longevity comes down to proactive care. Taking a few minutes for these simple checks is the best insurance you can get against future leaks.
Keep It Clean for Peak Performance
Finally, don't underestimate the power of basic cleanliness. Spills and mineral buildup inside the ice maker assembly can jam up its moving parts and throw off the sensors. A clean machine is a happy machine.
For a deeper dive, our guide on proper ice machine cleaning lays out detailed steps that work for both residential and commercial units, ensuring your gear stays in top shape. By adding these quick checks to your routine, you can drastically cut the odds of finding another unexpected puddle on your floor.
Your Questions About Leaking Ice Makers, Answered
When you’ve got a puddle forming around your ice machine, a lot of questions pop into your head. We hear them all the time. Here are some quick, no-nonsense answers to the most common ones we get, designed to help you figure out what’s going on and get it fixed.
Why Is My Ice Machine Leaking Inside the Freezer?
If you're finding water or a sheet of ice inside the freezer or the ice bin itself, the problem is almost always tied to the ice-making cycle. In my experience, it usually boils down to one of two things: a frozen fill tube or a cracked ice mold.
A frozen fill tube is exactly what it sounds like—it gets choked with ice. When the machine calls for more water, it has nowhere to go but back out, spilling over everything. A cracked mold is a bit sneakier. It lets water weep out before it can freeze solid, causing a constant, slow drip that builds up over time.
How Do I Stop the Leak Right Now?
First things first, you need to stop the flow of water. Look for the water line running to the back of your ice maker and trace it to its shutoff valve. It's usually a small saddle valve clamped onto the main water pipe.
Give that valve a turn clockwise until it's snug. This cuts off the water supply to the machine, buying you precious time to find the real source of the leak without making the mess worse.
Can a Clogged Water Filter Really Cause a Leak?
You bet it can. This is one of those things that catches people by surprise, but it's a very common culprit. When a filter gets old and clogged, or isn't seated just right, it can mess with the water pressure. That pressure has to go somewhere, and it often finds a weak spot to spring a leak, usually right around the filter housing.
It’s critical to replace your water filter on the schedule your manufacturer recommends, which is typically every six months. Pro tip: After you pop in a new one, run a few gallons of water through it. This purges any trapped air that can cause its own pressure problems and lead to—you guessed it—more leaks.
When Is It Time to Call a Pro?
Look, a lot of these fixes are simple enough to handle yourself. But there are definitely times when picking up the phone is the smartest, and ultimately cheapest, decision.
- You've gone through the checklist—supply line, fill tube, filter—and you're still staring at a puddle.
- The water seems to be coming from behind a sealed panel or somewhere near the compressor. Don't go exploring in there.
- You’ve pinpointed the problem to an internal part like the water inlet valve but don't feel comfortable tackling that kind of repair.
A good technician has the tools and know-how to safely diagnose those tricky electrical or sealed-system issues. Trust me, paying for a service call is a lot less painful than paying to replace a fried machine or water-damaged floors.
Whether you're troubleshooting a small leak or outfitting an entire commercial kitchen, PrepTables.com has the dependable, high-quality equipment you need. Check out our complete lineup of commercial refrigeration and stainless steel prep tables to keep your business running without a hitch at https://preptables.com.