

Acid Rust Removal for Commercial Kitchens
When you hear "acid rust removal," it's easy to picture harsh chemicals eating away at metal. But in reality, it's a controlled chemical process. We're using a solution, typically with phosphoric acid, to dissolve iron oxide (that's the rust) and convert it into a more stable compound that can be painted or sealed.
This technique is incredibly effective for commercial kitchen gear. It gets deep into the steel's pores to pull out corrosion without relying on aggressive, damaging scrubbing. For any restaurant operator, this is a must-know method for keeping your valuable stainless steel assets hygienic and in service for the long haul.
Why Your Stainless Steel Kitchen Equipment Is Rusting

It's a sight that makes any kitchen manager cringe: those tell-tale reddish-brown specks on a prep table that’s supposed to be gleaming. The name "stainless" suggests it's invincible, but a busy commercial kitchen tells a different story. Seeing rust on your equipment isn't a sign you bought low-quality gear; it's just the result of your environment.
Even top-tier steel used in pizza prep tables and sandwich stations can start to show rust. It all comes down to understanding the culprits, which are usually just part of the daily grind. The biggest one? Lingering moisture. Water left to sit in crevices or under equipment is a primary cause. This can lead to pitting corrosion, where tiny holes form on the surface, giving rust a perfect place to settle in.
The Hidden Causes of Corrosion
Harsh cleaners are another frequent offender. A lot of aggressive sanitizers and degreasers contain chlorides, and chlorides are the enemy of stainless steel's protective layer. They break down the passive chromium oxide barrier that keeps the steel safe. Once that shield is gone, the iron in the steel is exposed to oxygen and moisture, and oxidation—rust—is inevitable.
Here are a few all-too-common scenarios I see leading to rust in kitchens:
- Lingering Moisture: Water left standing overnight on a work surface or a slow drip from a faucet creates constant exposure.
- Abrasive Cleaning: Using steel wool or metal scrapers is a huge no-no. They create tiny scratches that destroy the protective layer and give rust a foothold.
- Chemical Exposure: High-chloride sanitizers are bad enough, but even acidic foods like tomato sauce or citrus juice left sitting too long can eat away at the steel's finish.
- Contact with Other Metals: Leaving carbon steel items—think cans, certain knives, or cast-iron pans—on a stainless surface can cause galvanic corrosion. Essentially, the rust "jumps" from one metal to the other.
The grade of your stainless steel makes a big difference, too. Most commercial kitchen equipment is either 304 or 430 grade. Type 304 has more nickel, giving it far better corrosion resistance than the more budget-friendly Type 430.
Figuring out these root causes is the first step. When a simple wipe-down isn't cutting it for stubborn rust spots, you need to bring in something stronger. This is where a targeted acid rust removal process becomes one of your most valuable maintenance tools. By dissolving the iron oxide chemically, it brings back the steel's original look and helps you keep your kitchen looking professional and up to health code.
For a deeper dive, learning more about how stainless steel grades explained in our guide can really impact your equipment's lifespan.
Choosing The Right Rust Removal Method
Before you grab the strongest chemical you can find, stop and take a look at the rust itself. Not every spot of corrosion calls for a full-scale acid assault. The smart approach is to start with the mildest method and only escalate if you have to. This protects your stainless steel and saves you a lot of unnecessary work.
Think of it like treating a stain on a chef's jacket. You wouldn't use bleach for a tiny drip of sauce when a little soap and water would do the job. The same logic applies to your expensive kitchen equipment.
Starting With The Mildest Options
For those light, fresh surface stains—that faint orange film that shows up after a damp night—a simple, non-chemical fix is always your best first move. These methods are safe, cheap, and surprisingly good at handling minor rust.
A paste made from baking soda and water is a classic for a reason. Its light abrasive action can lift superficial rust without scratching the steel. A mix of lemon juice and salt can also work wonders on faint discoloration. These are perfect for a quick fix on a prep table that had a spill left on it overnight.
Just remember, these DIY tricks have their limits. They won’t do much for rust that’s been setting in for weeks or months.
When to Use Non-Acidic Commercial Cleaners
When your home remedies aren't cutting it but the rust hasn't started to pit the surface, it's time to step up to a commercial non-acidic rust cleaner. These products use chelating agents that latch onto the iron oxide, making it water-soluble so you can just wipe it away.
They’re a fantastic middle-ground solution. You get more muscle than baking soda without needing the full safety gear and ventilation that acids demand.
Reach for these when you're dealing with:
- Moderate surface rust: Widespread discoloration that still feels smooth to the touch.
- Transferred rust stains: Marks left behind by carbon steel cans, knives, or other kitchen tools.
- Routine deep cleaning: Using them as part of your regular maintenance can stop small rust spots from becoming big problems.
While this guide is focused on acid treatments, it's worth exploring general rust removal methods to understand the full toolkit. Non-acidic cleaners are a key part of that.
Pinpointing When Acid Rust Removal Is Necessary
So, when is it time to bring out the big guns? You should only reach for an acid-based remover when the corrosion has gone beyond the surface and milder methods have failed completely. The chemical reaction is specifically designed to dissolve stubborn iron oxide that has bonded tightly with the steel.
Acid-based formulas aren't a last resort; they are a targeted tool for specific, severe problems. Their power is why they're so common in industrial settings.
This approach dominates the market for a good reason. Acid-based rust removers hold a massive 54.45% share of the global market, a number that speaks to how fast and effective they are at dissolving tough corrosion.
You should switch to an acid treatment in these specific scenarios:
- Deep-Seated Corrosion: The rust has been there a while and the steel now has a rough, gritty texture.
- Pitting Corrosion: You can see or feel small pits or holes in the surface. This is really common on pizza prep tables that are constantly exposed to moisture and acidic toppings like tomato sauce.
- Heavy Staining: Dark, widespread rust that covers a large area and just laughs at your non-acidic cleaners and elbow grease.
To make the decision easier, here’s a quick comparison of your options.
Comparing Rust Removal Methods For Stainless Steel
Choosing the right tool for the job is crucial. This table breaks down the most common methods to help you match the treatment to the severity of the rust on your commercial kitchen equipment.
| Method | Effectiveness | Safety Level | Best For |
|---|---|---|---|
| Baking Soda Paste | Low | Very High | Light, fresh surface stains and minor discoloration. |
| Non-Acidic Cleaner | Medium | High | Moderate, widespread surface rust and routine maintenance. |
| Acid Rust Removal | High | Low (Requires PPE) | Deep-seated corrosion, pitting, and stubborn, heavy stains. |
Making the right choice from the start not only saves you time but also protects the finish and longevity of your valuable stainless steel surfaces.
Preparing for a Safe Acid Treatment
Jumping into an acid rust removal without the proper prep is like a chef starting service without their mise en place—it’s a recipe for disaster. When you're working with acidic solutions, even the milder ones like phosphoric acid, safety has to be your number one priority. This isn’t about just ticking boxes on a list; it's about understanding why each step is so critical for protecting yourself, your team, and your entire kitchen.
Before a single drop of acid even gets near your stainless steel, the first thing you need to do is secure and prep your workspace. Start by isolating the area completely. Get all food products, utensils, and cutting boards far away from the treatment zone to kill any chance of cross-contamination.
Assembling Your Personal Protective Equipment
Your Personal Protective Equipment (PPE) is the non-negotiable first line of defense. Standard kitchen gloves and a simple apron are not going to cut it here. You need gear specifically rated for handling chemicals to prevent serious skin burns and eye damage.
Your essential PPE kit has to include:
- Chemical-Resistant Gloves: Nitrile or neoprene gloves are a must. Unlike latex or vinyl, which can break down when they touch certain chemicals, nitrile gives you far better resistance and protection from splashes.
- Splash-Proof Goggles: Regular safety glasses just don't offer enough coverage, leaving gaps on the sides. You need goggles that create a seal around your eyes to protect them from accidental splashes coming from any direction.
- Protective Clothing: A rubber apron or a long-sleeved, chemical-resistant smock should be worn over your regular clothes. It’s your shield against any drips and spills.
Think of this gear like your chef's coat, but for a chemical job. It's the uniform that keeps you safe while you work, so don't ever think about skipping it.
Creating a Safe Work Environment
Proper ventilation is just as crucial as the gear you wear, especially in the often-enclosed spaces of a commercial kitchen. Acidic fumes can really irritate the respiratory system, so getting enough airflow is key. If your kitchen has a powerful HVAC system, crank it up. The best time to do this work is after hours when the system can run at full blast without bothering service.
If that's not an option, you can create a good cross-breeze by opening doors and placing fans strategically to push fumes away from you and out of the building. Never, ever attempt an acid rust removal in a small, stagnant space like a walk-in or a cramped storage closet.
The goal is simple: keep fresh air flowing in and contaminated air flowing out. A well-ventilated space prevents the buildup of potentially harmful vapors, making the entire process safer for everyone involved.
Preparing for Spills and Emergencies
Even with the most careful prep, accidents can happen. Having a neutralization agent ready before you start is absolutely non-negotiable. A simple slurry made of baking soda (sodium bicarbonate) and water is a cheap and effective way to neutralize acidic spills. Keep a container of it right within arm's reach.
If a spill does happen, you can pour the baking soda mix right on it to stop the chemical reaction, which makes cleanup much safer and easier. Also, make sure the floor drains in your work area are clear and easy to get to. This will help you manage the large amounts of water you'll need for rinsing later on and helps contain any neutralized spills.
Taking these prep steps is fundamental to keeping a safe workspace, which is a core principle of kitchen hygiene. For more on this, our guide on food safety and sanitation guidelines offers valuable insights that pair perfectly with this process.
The Acid Application and Removal Process
With your workspace prepped and safety gear on, you're ready to tackle the rust itself. This part is all about being methodical. Patience and proper technique are everything here. If you rush through these steps, you’ll either get spotty results or, even worse, end up damaging your expensive stainless steel equipment.
The whole point is to get the acid in direct contact with the rust (iron oxide). For that to happen, the surface has to be completely clean and free of grease. It's like trying to paint an oily wall—the paint just won't stick. In the same way, acid can't do its job if it has to fight through a layer of kitchen grime first.
Starting With Thorough Surface Preparation
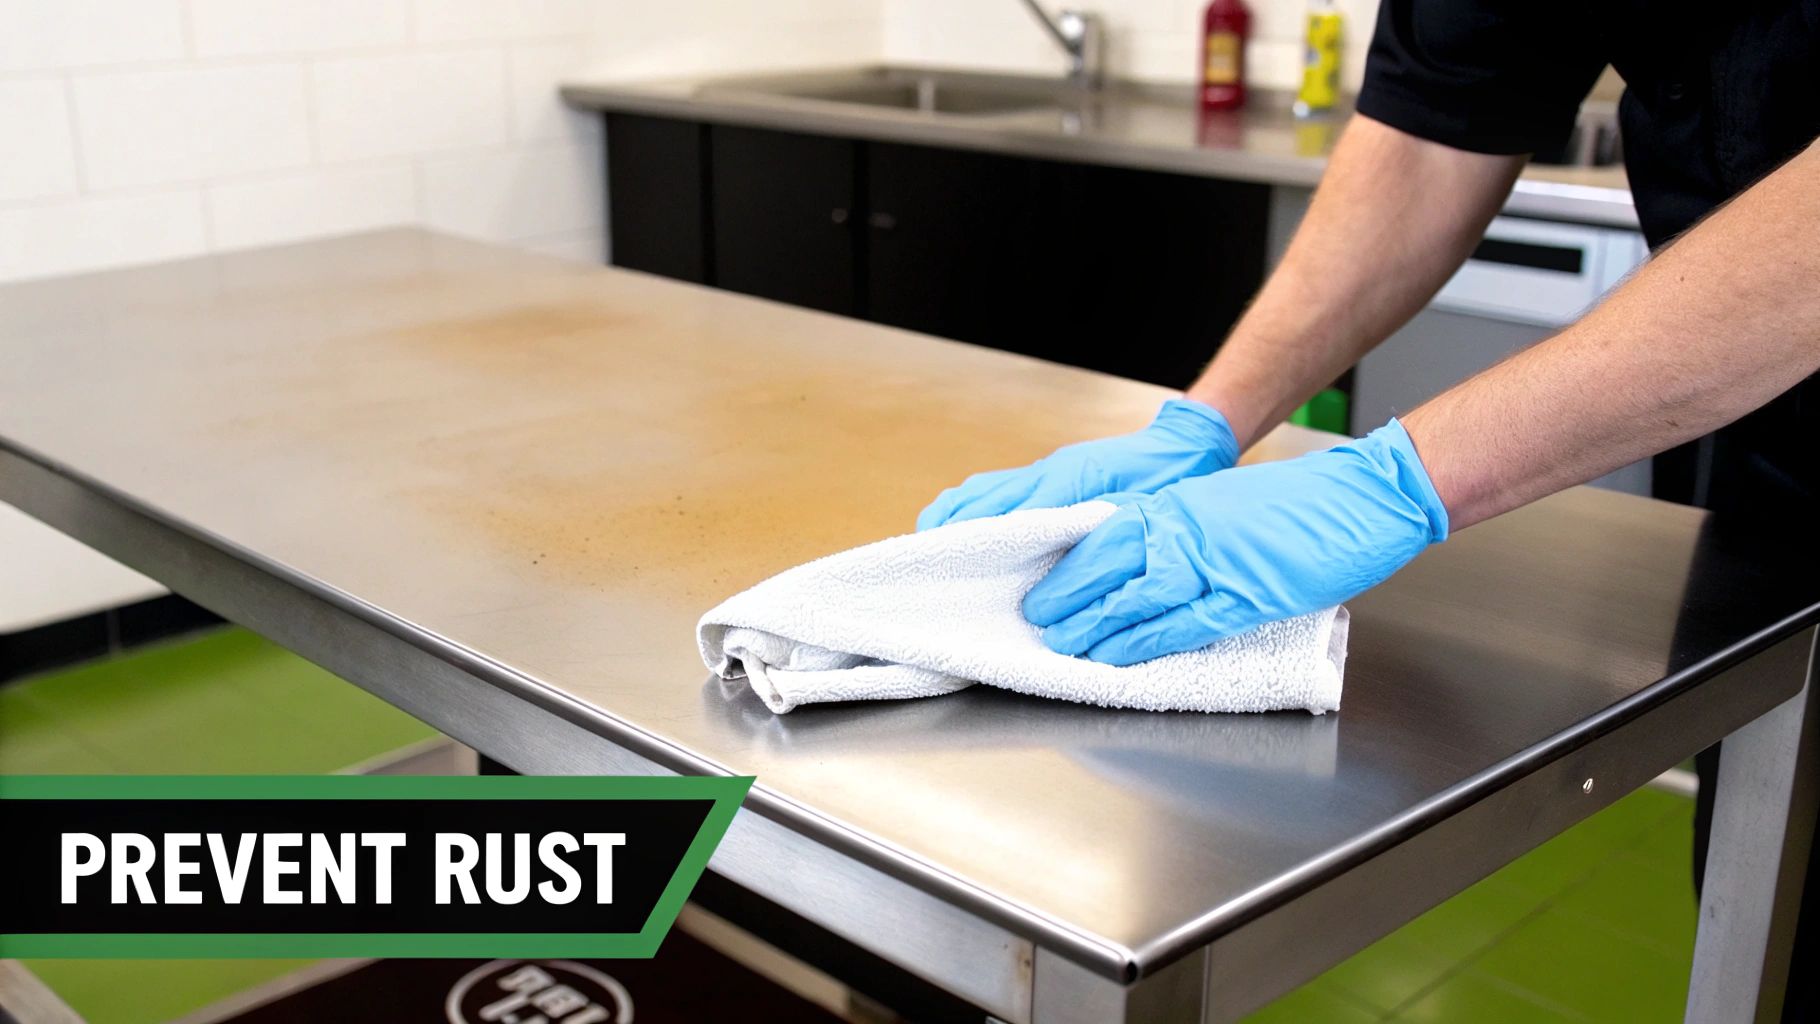
First things first, give that prep table a serious cleaning. Grab a commercial-grade degreaser and a non-abrasive scrub pad to get rid of every bit of grease, food residue, and any loose, flaky rust. Make sure you get into the corners, welds, and any little crevices where gunk loves to hide.
Once you’re done degreasing, rinse the entire surface with clean water and then dry it completely with a lint-free cloth. Any water left behind will dilute the acid, making it less effective and leaving you with an uneven finish. You're aiming for a perfectly clean, bone-dry surface before you bring in the chemicals.
Controlled Application and Dwell Time
Alright, this is the main event: applying the acid. Use an acid-resistant brush (never a metal one, as it will react with the acid) and apply a thin, even layer of the rust remover directly onto the rusted spots. The goal is to cover the rust completely without letting the solution pool or drip all over the place.
Now comes the most critical part: dwell time. This is how long you let the acid sit and work its magic. For most phosphoric acid products, this is usually somewhere between 15 to 30 minutes, but you absolutely must follow the instructions on the bottle.
A very common and costly mistake is leaving the acid on for too long. It needs time to dissolve the rust, but letting it sit past the recommended time can etch the stainless steel. That causes permanent damage that looks a lot worse than the rust you started with.
As the acid works, you might see the rust change color, often to a dark gray or black. That’s a good sign! It means the acid is converting the iron oxide into a stable compound, which is exactly what you want.
Gentle Agitation to Lift Corrosion
While the acid is doing its thing, you can help it along. Take a non-abrasive pad, like a nylon scriber, and gently scrub the rusted areas in a circular motion. This helps lift the dissolved rust particles away from the steel and lets the acid get to any corrosion hiding underneath.
You don't need to use a lot of muscle here. The chemicals are doing the heavy lifting; you're just assisting. After a few minutes of light scrubbing, you should find that the rust starts wiping away easily, revealing clean steel.
This infographic breaks down the essential safety flow for any acid-based treatment.
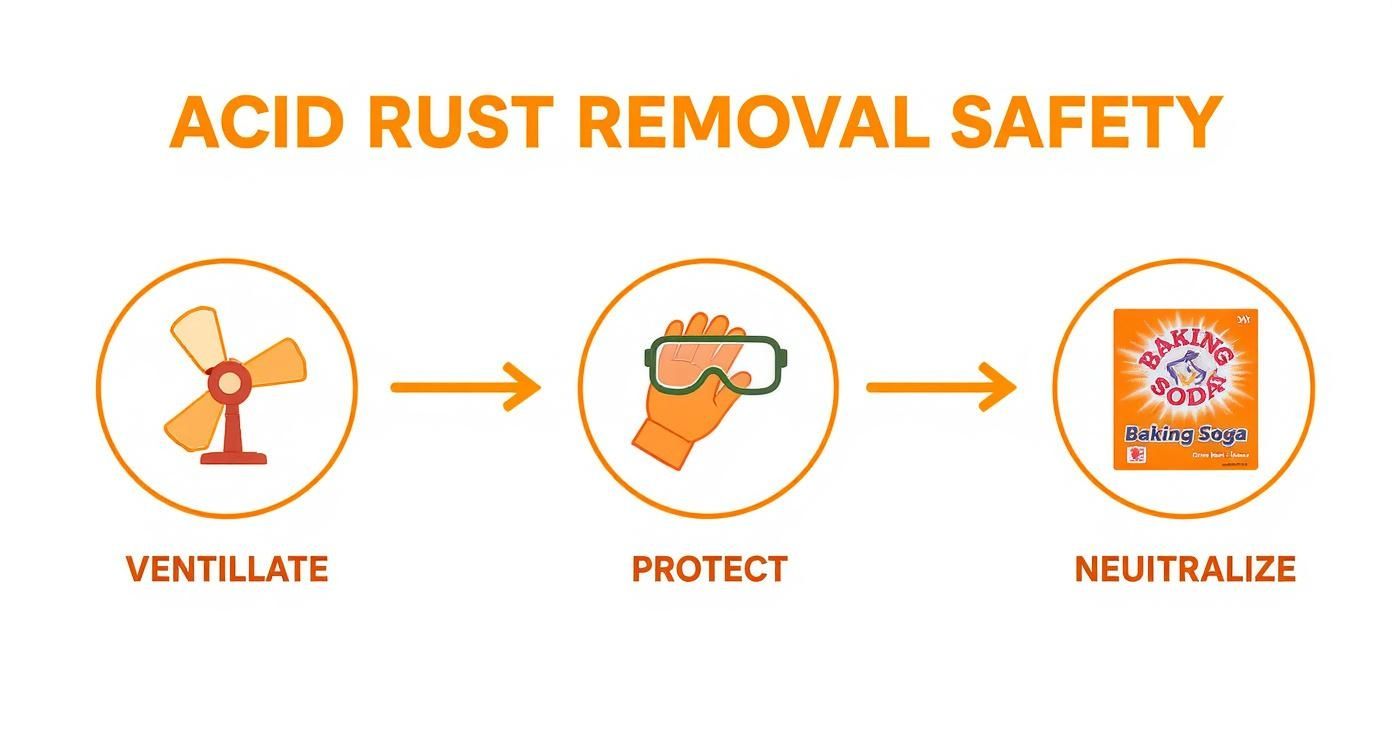
As you can see, protection and neutralization are just as critical as the application itself. It's a complete cycle.
The Crucial Final Step: Neutralization and Rinsing
This is the step where most people go wrong. Just rinsing with water isn't enough. Any leftover acid will immediately cause "flash rusting," and you'll be right back where you started. You have to kill the chemical reaction by neutralizing the acid with an alkaline solution.
Mix up a slurry of baking soda and water—about one cup of baking soda per gallon of water works well. Spread it generously over all the treated areas. You’ll see it start to fizz, which tells you it’s working and neutralizing the acid.
Once the fizzing stops, rinse the surface thoroughly with plenty of clean, warm water. Make sure every bit of the acid and baking soda residue is gone. Finally, dry the equipment completely with a clean cloth or an air blower. This final, thorough drying is your best defense against moisture bringing the rust right back. The demand for products that work is why the global rust remover market is expected to hit USD 713.72 million by 2029. You can read the full research about these market trends to see just how vital proper rust treatment is for countless industries.
How to Prevent Future Rust on Your Equipment
Getting that shine back after an acid rust removal treatment feels great, but the job isn't quite done. The real win is making sure that rust never comes back. Shifting to a proactive maintenance mindset is the single best way to protect your investment and keep those stainless steel prep tables looking brand new for years.
Prevention really boils down to simple, consistent habits. When your whole team is on board, these small daily actions make a huge difference in fighting off corrosion. The goal is to get rid of the two things rust loves most: moisture and contaminants.
Establishing Daily Prevention Habits
If there's one habit to drill into your team, it's this: every stainless steel surface must be wiped completely dry at the end of every shift. Water left to sit overnight is rust's best friend. I've seen tables develop significant staining by morning just from a damp towel or sponge left behind, trapping moisture right against the steel.
Another classic mistake is leaving things like metal cans or carbon steel tools sitting on a stainless surface. This can trigger galvanic corrosion, where rust seems to "jump" from the other metal right onto your table. It's crucial to train staff to put these items away and never use a prep table as a permanent storage shelf.
Here are the key daily moves to make:
- Wipe Down and Dry Thoroughly: At closing time, clean every surface with mild detergent and water, give it a good rinse, and then dry it completely with a clean, soft cloth. Microfiber cloths are perfect for this—they soak up every bit of moisture without leaving lint.
- Remove All Metal Objects: Do a final check to make sure no metal food cans, cast iron pans, or carbon steel knives are touching the stainless steel overnight.
- Clean Spills Immediately: Acidic foods like tomato sauce, citrus juices, and vinegar need to be wiped up right away. If they sit for too long, they can start to etch the steel's surface, making it an easy target for future rust.
Training Your Team on Proper Care
Your staff is your front line in the war against rust. Teaching them what not to do is just as important as showing them the right way to clean. The absolute biggest mistake I see is people grabbing abrasive tools that shred the steel's protective layer.
Never, ever use steel wool, metal scrapers, or those super-abrasive scouring pads on stainless steel. These tools create thousands of tiny scratches that destroy the surface's passive layer, giving rust the perfect place to take hold.
Once that invisible protective layer is compromised, the iron inside the steel is exposed to oxygen and moisture, and rust is practically guaranteed. Make sure everyone knows to use soft cloths, nylon scrubbers, or plastic scrapers for any gunk that's stuck on.
The Importance of Passivation After Acid Treatment
After a deep acid rust removal treatment, you’ve essentially stripped the steel down, rust and all. Now, you need to help it rebuild its natural defense. This process is called passivation.
Stainless steel naturally creates a super-thin, invisible shield of chromium oxide that protects it from corrosion. A strong acid wash can take that shield away along with the rust.
Passivation is just the process of helping that protective layer reform quickly and strongly. The good news is you don't need fancy equipment. After you’ve neutralized and thoroughly rinsed the table post-treatment, a final wipe-down with a passivating solution does the trick. A food-safe citric acid solution works well and is a safe choice for any kitchen.
For more tips on good cleaning protocols, check out our guide on how to clean stainless steel, which pairs perfectly with these preventative steps.
To take it a step further, consider incorporating broader eco-friendly deep cleaning methods into your routine. By making these strategies part of your daily and deep-cleaning checklists, you move from reacting to problems to preventing them, which saves you a ton of time, labor, and money in the long run.
Common Questions About Acid Rust Removal
When you're looking at using an acid treatment on your stainless steel for the first time, a lot of questions come up. I get it. Kitchen managers are right to worry about accidentally damaging expensive equipment, whether something simple from the pantry will work, and what mistakes to watch out for. Getting straight answers is the only way to tackle the job with confidence.
Let's cut through the noise and address the most common concerns I hear from folks in the industry. The goal here is direct, no-nonsense advice to help you get it right on the first try.
Can I Use Vinegar or Lemon Juice on a Commercial Prep Table?
This is probably the number one question people ask. It makes sense—vinegar and lemon juice are cheap, readily available, and feel safer than a chemical cleaner. And honestly, for a tiny spot of surface rust on your toaster at home, they might do the trick.
But in a commercial kitchen? They just don't have the muscle. The corrosion you find on a heavily used pizza or sandwich prep table that's seen a few years of service is usually pretty stubborn. A dedicated phosphoric or citric acid-based cleaner is formulated to hit rust hard and fast, giving you consistent results. Weaker household acids often lead to uneven etching and a lot of wasted time.
What Is the Biggest Mistake to Avoid?
If you take only one thing away from this guide, let it be this: failing to properly neutralize the acid after you're done. This is the single most critical error you can make. So many people think a good rinse with water is enough to stop the reaction, but it absolutely isn't.
Even tiny traces of leftover acid will cause the newly exposed steel to "flash rust" almost immediately. It's incredibly frustrating to see. To stop this, you must use an alkaline solution—a simple mix of baking soda and water works perfectly—to kill the chemical reaction completely. After that, you can do your final, thorough rinse. This step isn't optional; it's what saves your steel and prevents the rust from coming right back.
Proper neutralization isn't just a suggestion; it's the defining step that separates a successful restoration from a failed attempt that makes the problem worse. It ensures the long-term integrity of your equipment.
Will Acid Damage My Stainless Steel Equipment?
As long as you use the right product and follow the instructions to the letter, a proper acid treatment will not harm your stainless steel. Commercial-grade rust removers are almost always made with buffered phosphoric or citric acid. These are designed to go after iron oxide (the rust itself) while leaving the underlying steel untouched.
The real danger comes from grabbing the wrong kind of acid, like muriatic acid, or getting distracted and leaving the product on for too long. Any acid left on past its recommended dwell time can cause permanent chemical burns or etching. This is exactly why doing a small test spot in a hidden area is a non-negotiable first step.
What Are the Different Types of Stainless Steel Prep Tables?
Understanding the equipment you're cleaning is key. Commercial prep tables are designed for specific kitchen workflows, and their construction often influences where rust might appear. Here are the main types you'll encounter:
- Standard Work Tables: These are the all-purpose workhorses of the kitchen. Available with flat tops, undershelves for storage, or backsplashes to protect walls, they provide a simple, durable surface for general prep. They are typically made from either economical 430-grade or more corrosion-resistant 304-grade stainless steel.
- Sandwich Prep Tables: These specialized units combine a refrigerated base with a top rail to hold cold food pans (for toppings, sauces, and meats) and a cutting board work surface. Given their constant exposure to moisture and acidic ingredients like vinaigrettes, they are almost always made from durable, rust-resistant 304-grade steel.
- Pizza Prep Tables: Similar in concept to sandwich tables, these units feature a refrigerated rail for toppings and a wider work surface, often made of marble or stainless steel, designed for stretching dough. Because they are constantly in contact with acidic tomato sauce and moisture, high-quality 304-grade stainless steel is the industry standard to prevent rust and ensure longevity.
- Equipment Stands: Built to hold heavy appliances like mixers or griddles, these tables are constructed for strength and stability. They often feature a lower undershelf and are made from robust stainless steel to withstand the weight and heat of the equipment.
Knowing whether you have a basic work table or a refrigerated unit helps you identify potential rust hot spots, like the seams and corners of a refrigerated rail, where moisture and food acids can collect.
At PrepTables.com, we provide the professional-grade equipment that kitchens rely on, from durable work tables to specialized refrigerated prep stations. Find the perfect, long-lasting solution for your workspace by exploring our extensive collection at https://preptables.com.