

A Practical Guide to 4 Inch Casters Wheels
Imagine your kitchen running like a well-oiled machine, where heavy prep tables glide out of the way for cleaning or a quick layout change. That’s the magic of a good set of 4-inch caster wheels. They turn your static, heavy equipment into mobile, flexible assets. It’s a lot like picking the right tires for a truck—the right casters give you the perfect blend of height, stability, and movement.
Why 4-Inch Casters Are a Must-Have for Commercial Kitchens
In a busy commercial kitchen, you have to be able to adapt. Stainless steel work tables, refrigerated sandwich stations, and loaded pizza prep tables can easily weigh hundreds of pounds. Without wheels, moving them for a deep clean or to rearrange your workspace is a huge, and often dangerous, chore.
This is where 4-inch caster wheels prove their worth. They aren't just wheels; they're essential tools for making your kitchen safer, cleaner, and more efficient. By making your equipment mobile, your staff can adjust the layout on the fly, respond to a sudden catering order, and create a workflow that actually makes sense.
The Standard for Mobility and Health Codes
The 4-inch size has become the go-to standard in the industry for a few very important reasons. It lifts your equipment just high enough off the ground to meet most health code requirements, which often demand a 6-inch gap between the floor and the equipment's base. This clearance is non-negotiable for proper cleaning and preventing pests, which is something every health inspector looks for.
On top of that, these casters are built to handle the serious weight of commercial equipment. A standard stainless steel prep table can top 200 pounds before you even put a single ingredient or appliance on it. A solid set of 4-inch casters turns that immovable object into a strategic piece of your kitchen's daily puzzle.
The market numbers back this up. The global caster wheel market hit USD 8.30 billion in 2023 and is expected to reach USD 12.04 billion by 2029, with the food service industry being a huge part of that growth. You can see more on this trend over at Arizton.com.
Supercharging Your Workflow and Kitchen Efficiency
Just think about the daily grind. During the lunch rush, maybe you need to slide a sandwich prep table closer to the service line. Or perhaps you need to shift a large work table to make space for a big catering job. Without wheels, these simple adjustments are basically impossible.
With the right casters, those moves take just a few seconds. This kind of mobility brings some serious benefits:
- Better Sanitation: You can easily roll heavy tables out of the way to sweep and mop underneath, getting rid of those hard-to-reach spots where grime and bacteria love to hide.
- Flexible Layouts: Quickly change up your kitchen's configuration to make the best use of your space, whether it's for daily prep or a special event.
- Improved Safety: Staff can move heavy equipment without back-breaking lifting, which means fewer workplace injuries.
Adding casters to your stationary equipment is an investment in a more productive and adaptable kitchen. You can check out our guide on stainless steel tables with wheels to see just how much of a difference this simple upgrade can make. At the end of the day, 4-inch casters are a small part that delivers a massive return on your kitchen’s performance.
How to Decode Caster Specifications
Picking out the right 4-inch caster wheels is about more than just finding something that fits. You have to look at the specs, just like you would for a new oven or mixer. Getting the details right is the difference between a smooth-rolling kitchen and one full of headaches.
This simple decision tree helps visualize when casters become a necessary upgrade for your kitchen equipment.
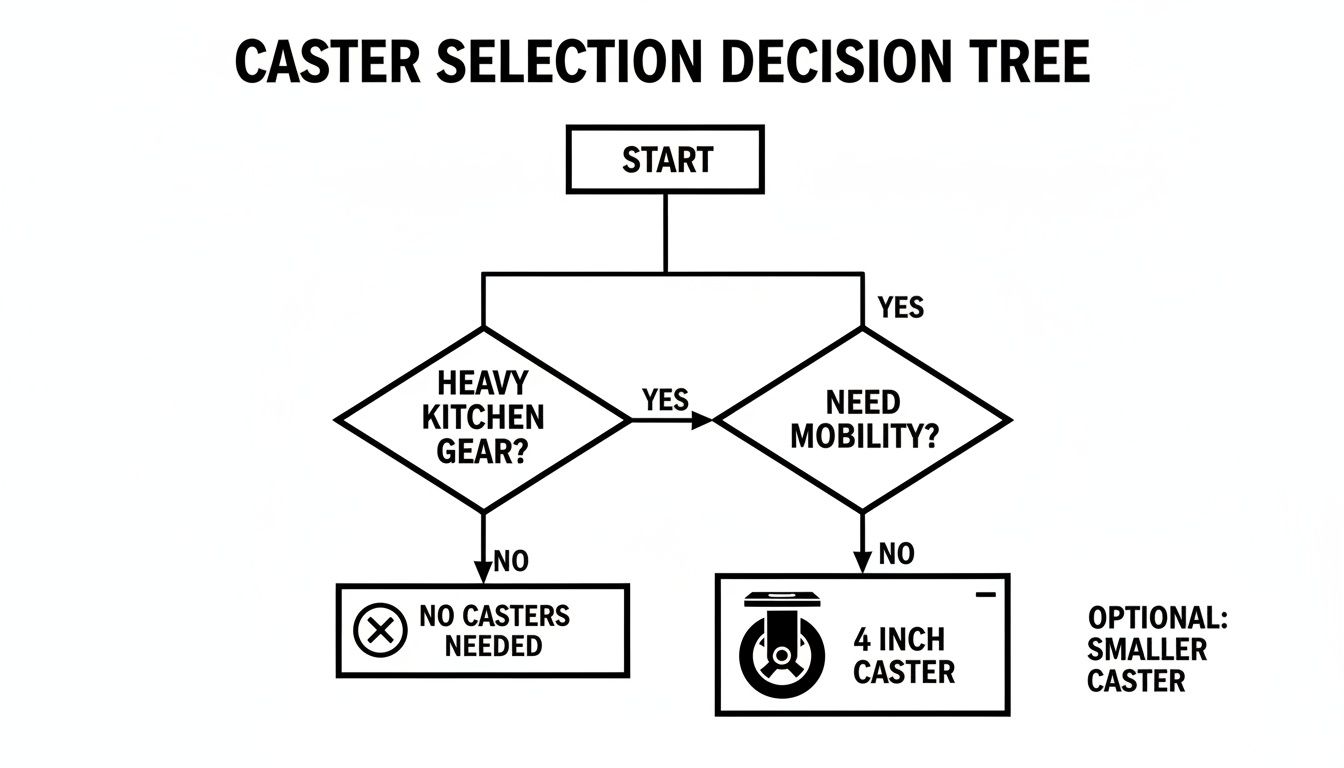
As the chart shows, if you have heavy equipment that needs to move, a 4-inch caster is the most logical choice. It’s a simple way for busy kitchen managers to streamline their decision-making.
Understanding Load Capacity
First thing's first: load capacity. This number tells you the maximum weight a single caster can handle without failing. But it's not just one number—there are two you need to know:
- Static Load Capacity: This is the weight a caster can support when the table is just sitting there. It’s the absolute max the wheel can bear without deforming while standing completely still.
- Dynamic Load Capacity: This is the one you really need to pay attention to. It’s the weight a caster can hold up while it's rolling. This number is always lower because motion adds stress, friction, and shock from bumpy floors.
To figure out what you need, add up the weight of your prep table, everything on it (like a mixer or griddle), plus the heaviest batch of ingredients you'll ever put on it. Then, divide that total by three—not four. This little trick gives you a critical safety buffer, making sure the remaining three wheels can handle the full load if one temporarily lifts off an uneven floor.
Choosing the Right Wheel Material
The material of the wheel itself is a huge deal. It affects how quietly it rolls, how well it protects your floors, and how it performs day-to-day. You wouldn't use a paring knife to chop bones, and you shouldn't use the same wheel for every type of floor.
The statistics on heavy-duty 4-inch caster wheels show just how vital they are in professional kitchens. From 2020 to 2025, casters capable of supporting up to 1,200 lbs on a standard prep table saw a 22% jump in usage across the North American foodservice industry. This demand reflects a need for the proven, NSF-certified durability we see in PrepTables.com products.
In a 2024 survey of 500 chefs, 91% expressed satisfaction with polyurethane wheels on heavy equipment. They even reported that the increased mobility helped boost their kitchen hygiene scores by an average of 25 points. For more on these trends, you can check out recent industrial caster wheel research.
Choosing the right material for your specific floor is key to getting that kind of performance.
Matching Wheel Material to Your Kitchen Floor
| Wheel Material | Best For Floor Type | Pros | Cons |
|---|---|---|---|
| Polyurethane | Tile, Sealed Concrete, Epoxy | Quiet roll, non-marking, resists chemicals & oil | Can be more expensive than other options |
| Rubber | Uneven Concrete, Quarry Tile | Excellent shock absorption, great grip | Can leave marks, may degrade with grease exposure |
| Polypropylene | Smooth Concrete, Linoleum | Very durable, water-resistant, rolls easily | Noisy, can damage softer floors like vinyl |
Ultimately, the goal is to match the wheel to the surface for the best results and longest life for both your casters and your floors.
Why Bearing Types Matter
The last piece of the puzzle is the bearing. It’s the hidden part inside the wheel's hub that lets it spin, and it's basically the engine of your caster. The type of bearing has a direct impact on how easily the wheel rolls and how long it lasts, especially with heavy loads.
Ball bearings are the top-tier choice for any commercial kitchen. They use small steel balls to slash friction, which makes rolling a fully loaded prep table feel almost effortless. Cheaper casters might use basic sleeve bearings, which create more drag, demand more muscle to push, and wear out much faster. Investing in quality bearings means less work for your staff and a much longer life for your casters.
Selecting the Right Mounting and Braking Systems
Mobility is only useful when you can control it. Once you’ve figured out the load capacity and wheel material you need for your 4 inch casters wheels, the next step is choosing the right way to mount them and stop them. These two pieces are what let your equipment glide when you need it to and stay put when you don't.
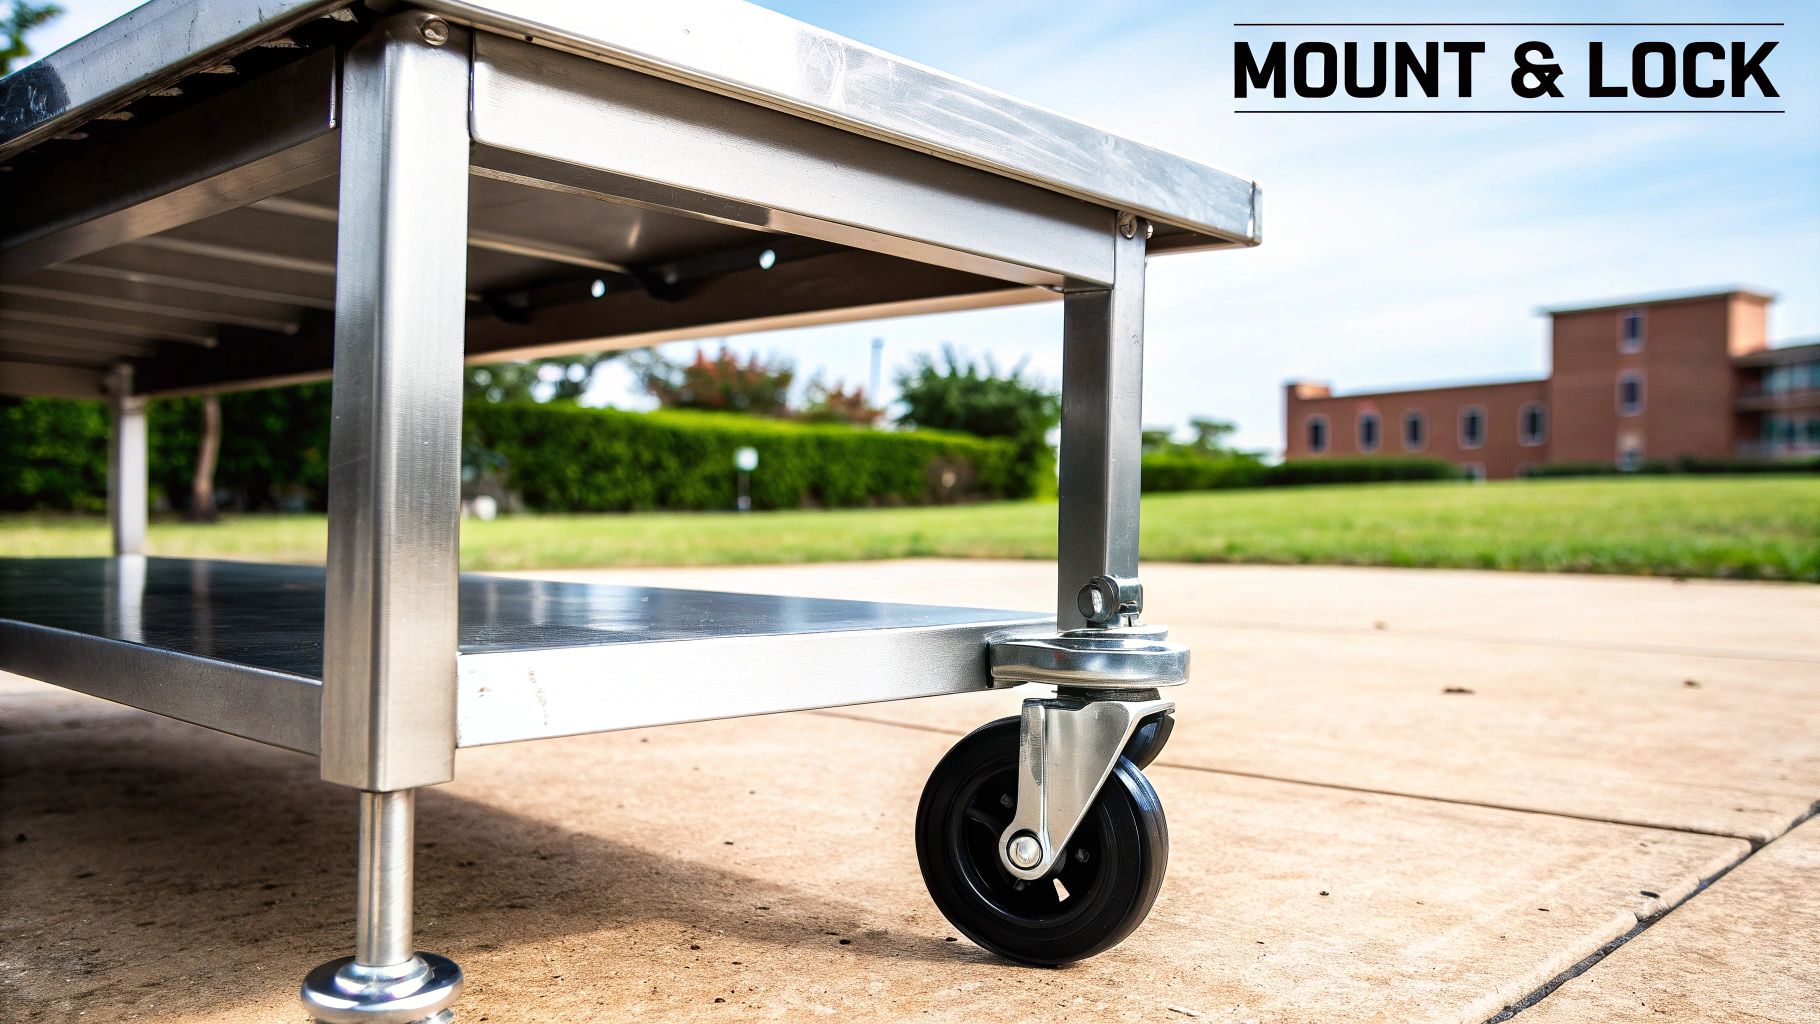
Think of the mount as the foundation—the part that connects the wheel to your table. The brake is your safety switch, providing stability. Getting both right is crucial for keeping a fast-paced kitchen safe and running smoothly.
Plate vs. Stem: The Two Main Mounting Styles
Choosing a mounting style isn't really a matter of preference; it's all about what your equipment is built for. The legs on your prep table are designed to accept one of two main types of casters.
Plate Casters have a flat, square metal plate with four bolt holes. This plate bolts directly onto a flat surface, like the bottom of a table leg. This design is great because it spreads the table's weight over a wider area, making it perfect for heavier equipment. Most standard stainless steel work tables are designed for plate casters.
Stem Casters, on the other hand, use a single metal post—the "stem"—that slides into a hollow table leg or a special receiver. Stems come in a few different styles (threaded, grip ring, square), so you have to make sure you get the exact type that matches your table. You'll often find these on lighter-duty gear and some specialized units.
Before you buy anything, take a quick look at your table's legs. Do they have a flat bottom with pre-drilled holes? Or are they hollow, waiting for a post to be inserted? That simple check will tell you everything you need to know.
The Right Mount for Different Stainless Steel Prep Tables
The type of prep table you're outfitting plays a huge role in choosing the right mount. While they all benefit from mobility, their designs and weights vary significantly, impacting caster choice.
- Standard Work Tables: These are the all-purpose workhorses of the kitchen. Available with flat tops, undershelves, or backsplashes, their weight is relatively evenly distributed. Depending on size and load, they can often use either plate or stem casters, though plate mounts offer superior stability for heavier-duty models.
- Sandwich Prep Tables: These are specialized units with refrigerated compartments and ingredient wells. Their weight is concentrated at the base, making them very heavy and often top-heavy. They almost always require heavy-duty plate mount casters to provide a secure, stable footing that can handle the uneven load safely.
- Pizza Prep Tables: Often the heaviest tables in a kitchen, these feature large refrigerated bases and may have heavy marble or steel tops for dough work. The immense and unevenly distributed weight means they absolutely demand robust plate casters with a high load capacity to ensure stability and safety.
Using the wrong mount, especially on a specialized table, isn’t just inconvenient—it's a serious safety risk that could lead to a wobbly station or total equipment failure.
Choosing the Right Brake for Kitchen Safety
Once your table can roll, you need a bulletproof way to stop it. Caster brakes aren't just for convenience—they're a critical safety feature in any commercial kitchen. Imagine a prep table loaded with sharp knives or hot pans that starts rolling on its own. That's a disaster waiting to happen.
There are a couple of common brake types, each offering a different level of security.
- Top-Lock Brakes: These have a simple pedal or lever that you press down to create friction on the top of the wheel. It stops the wheel from rolling, but it doesn't do anything to stop the caster from swiveling around.
- Total-Lock Brakes: This is the best choice for almost any kitchen situation. A total-lock brake locks both the wheel's roll and the caster's 360-degree swivel at the same time. This means the table can't roll or pivot, turning it into a completely stable workstation.
Picture this: It's the middle of a busy service, and a chef is quickly putting together sandwiches. A simple top-lock brake might keep the table from rolling away, but it could still pivot side-to-side, sending ingredients or tools flying. A total-lock brake freezes the entire unit in place, giving you that rock-solid stability you need to work safely and efficiently.
For heavy equipment you use all the time, like a fully stocked pizza prep station, a total-locking brake isn't just a suggestion—it's a must-have. It's the only way to be certain your mobile equipment becomes a secure, stationary asset right when you need it most.
Understanding NSF Certification and Kitchen Sanitation
In any commercial kitchen, cleanliness isn't just a suggestion—it's a non-negotiable part of the job. This is where NSF certification becomes a huge deal, even for something as simple as the 4-inch caster wheels on your prep table. Seeing that NSF mark means the product has been rigorously tested to meet strict public health and safety standards.
When you see that certification on a caster, it's a guarantee that the wheel is built for the demanding, sanitation-first world of a professional kitchen. It’s peace of mind, knowing the materials and design won't stand in the way of keeping your workspace clean.
Key Caster Features for Kitchen Hygiene
Not all casters are built for the kitchen, especially when food safety is on the line. NSF-certified wheels have specific features baked into their design that make it easier to maintain a clean environment, meet health codes, and prevent contamination.
These are the details that matter:
- Non-Marking Treads: Wheels made from materials like polyurethane are designed to glide across your floors without leaving ugly black scuffs. This keeps the kitchen looking sharp and cuts down on the need for extra cleaning.
- Sealed Bearings: The bearings are fully enclosed to keep out grease, water, and food grime. This is crucial for preventing gunk buildup where bacteria love to hide, and it keeps the wheels rolling smoothly for years.
- Corrosion-Resistant Finishes: The metal frame holding the wheel (often called the rig or yoke) usually has a protective finish like zinc plating. This stops rust and corrosion from setting in after countless wash-downs with cleaning agents.
These features all work together to give you a caster that’s simple to clean and maintain, which directly translates to a safer kitchen. Of course, keeping a kitchen sanitary means looking at the big picture, including how to prevent mold and ensure food safety across every piece of equipment.
Meeting the Critical 6-Inch Floor Clearance
One of the most important health code rules you'll encounter is the 6-inch clearance requirement. This means there needs to be a 6-inch gap between the floor and the bottom of your heavy equipment. It’s not an arbitrary number; that space is essential for staff to properly clean underneath prep tables and refrigerators where pests and bacteria can gather.
This is where the humble 4-inch caster becomes a hero. Once you install a 4-inch caster, the total height added by the wheel, its mounting plate, and the metal rig easily lifts the equipment to meet or even exceed that 6-inch standard. A simple component like this can be the difference between passing and failing a health inspection.
How Caster Selection Impacts Different Prep Tables
The kind of prep table you have changes your cleaning routine and, by extension, what you need from your casters. A simple work table has different sanitation challenges than a complex pizza prep station.
- Standard Work Tables: These are the most basic, with a simple flat top. NSF-certified casters make it a breeze to roll them aside for daily floor mopping.
- Sandwich Prep Tables: With refrigerated wells and built-in cutting boards, these tables have more nooks and crannies where food can get stuck. Being able to move them easily is a must for deep cleaning.
- Pizza Prep Tables: These are often the heaviest and most complex tables, with refrigerated rails and a large base. For these units, mobility isn't a luxury—it's essential for proper sanitation.
Choosing the right NSF-certified 4-inch casters means you're doing more than just buying wheels. You're making a smart investment in your kitchen's safety and compliance, ensuring every piece of mobile equipment helps you maintain the highest standards of hygiene.
Want to get a better handle on what the certification involves and why it matters? You can learn more about NSF certification in our complete guide.
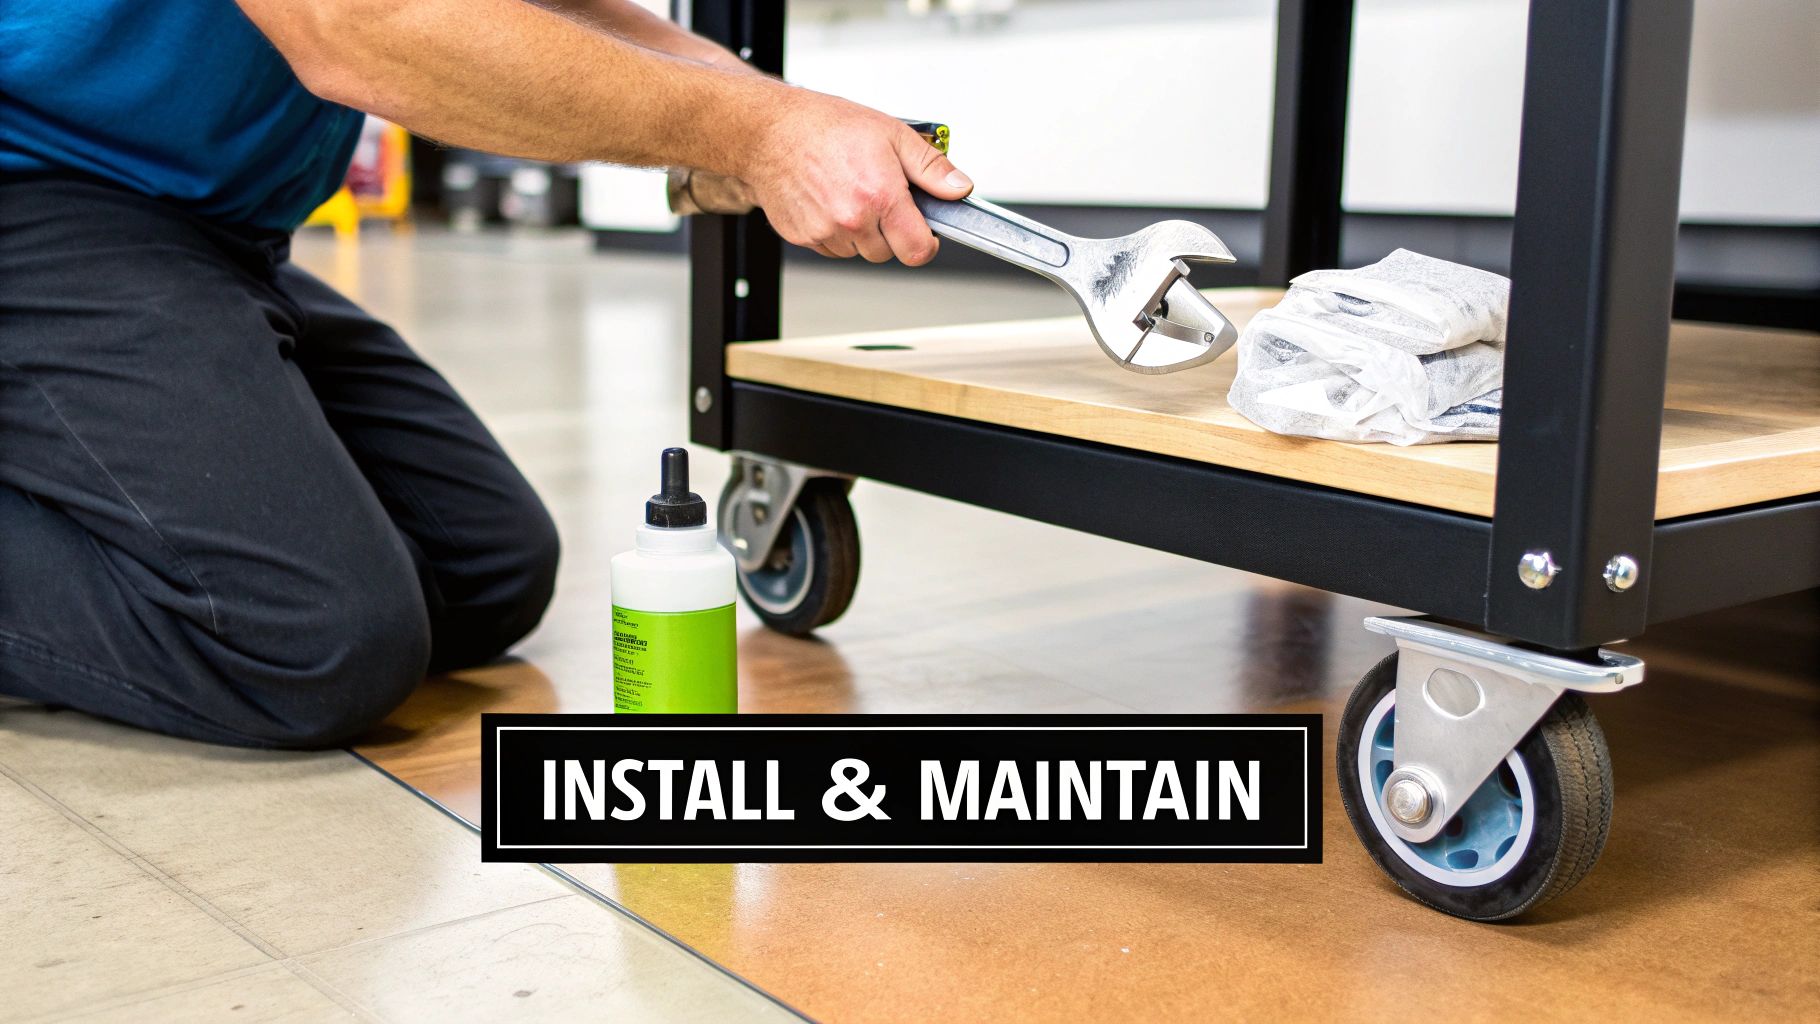
Proper Installation and Maintenance for Lasting Performance
Your new 4 inch casters wheels are a fantastic investment, but they'll only perform their best if they’re installed correctly and get a little TLC. Think of them like any other critical tool in your kitchen—a bit of attention goes a long way. Proper setup and regular checks ensure your prep tables glide smoothly and safely, protecting your staff, your floors, and your equipment for years.
Don't worry, this isn't a complicated process. But getting it right from the get-go is the key to performance and a long lifespan. A proactive approach to maintenance is what separates a caster that lasts for years from one that fails at the worst possible moment.
A Step-by-Step Installation Guide
Getting your new casters on is a straightforward job, though the exact steps will vary slightly between plate and stem mounts. Before you start, always get some help to carefully tip the prep table on its side. It's best to rest the top on a soft blanket or cardboard to avoid any scratches.
For Plate Casters:
- Line It Up: Place the caster's flat mounting plate over the pre-drilled holes at the bottom of the table leg.
- Add the Hardware: Slip a washer onto each bolt, then push them through the plate and the leg.
- Get it Snug: Thread a nut onto each bolt and tighten them by hand to start.
- Lock It Down: Grab a wrench and tighten each nut securely. Use a star pattern—like you would on a car tire—to apply even pressure and prevent warping.
For Stem Casters:
- Check the Fit: Make sure the table leg has the correct insert or threaded socket for the stem. It should be a snug fit.
- Push It In: Firmly push the caster stem into the opening until it clicks or seats all the way in.
- Tighten (If Needed): For threaded stems, use a small wrench on the nut right at the base of the stem. Crank it down until it’s completely secure and doesn't wobble.
Once all four casters are on, carefully stand the table back up. Grab a level and check the surface. If it’s a little off, some casters have adjustable features to help you get it perfectly even.
Your Simple Maintenance Checklist
A simple, consistent maintenance routine is the secret to getting the most life out of your casters. In fact, a well-cared-for wheel can last up to three times longer than one that's ignored. You don't need a complex schedule; just a few quick checks every month can make a world of difference.
Not sure where to start? A good first step is understanding the difference between being proactive versus just fixing things when they break. This guide on Preventive Maintenance vs. Corrective Maintenance offers some great insights for all your kitchen equipment.
Here is a simple checklist you can follow:
- Clean Them Regularly: Kitchens get messy. Wipe down the wheels and the metal housing (the rig) with a damp cloth to get rid of grease, food bits, and grime. Buildup is the number one cause of sticky, hard-to-roll wheels.
- Check for Wear and Tear: Give the wheel treads a quick look. Are there any flat spots, cracks, or little bits of debris stuck in the material? Uneven wear is a sign of a problem and can make rolling a chore.
- Lubricate the Swivel: Every few months, add a dab of food-safe lubricant to the swivel bearings (the raceway). This is what keeps the caster turning on a dime, smoothly and quietly.
- Test the Brakes: Don't forget the brakes! Push the lever to engage each one, then try to move the table. It should lock firmly. Then, make sure it releases just as cleanly. A faulty brake isn't just an annoyance; it's a major safety hazard.
A proactive maintenance plan is fundamental to a well-run kitchen. Catching a wobbly wheel or a sticky brake early prevents a sudden failure during a busy service, saving you from downtime and potential accidents.
Following these simple installation and maintenance steps will keep your equipment mobile, safe, and ready for action. For a deeper dive into keeping your whole kitchen in top shape, check out our guide to commercial kitchen equipment maintenance.
Your Quick Guide to Ordering the Right Casters
You've got the essentials down, and now you’re ready to make a confident purchase. Ordering the perfect 4-inch caster wheels is surprisingly simple once you know what you’re looking for. Think of this final checklist as your roadmap, pulling all the key decision points from this guide into one easy spot.
Before you add anything to your cart, just run through these quick confirmations. It’s a small step that ensures the casters you choose will fit your equipment, perform on your floors, and keep your kitchen running smoothly and safely from day one. A little prep work here prevents big headaches later.
Your Pre-Purchase Caster Checklist
Use this table as your final check. Answering these questions guarantees you’ll get the ideal casters for your specific needs, whether you're outfitting a standard work table, a sandwich prep station, or a heavy-duty pizza prep table.
| Checklist Item | Your Requirement | Why It Matters |
|---|---|---|
| Calculate Load Capacity | What is the total weight (table + gear + ingredients)? | This prevents caster failure by making sure each wheel can handle the dynamic load. Always divide your total weight by three to build in a solid safety margin. |
| Identify Floor Type | Do you have tile, concrete, or another surface? | This determines the best wheel material (like polyurethane for tile) to protect your floors, cut down on noise, and guarantee a smooth roll. |
| Confirm Mounting Style | Does your table need a plate mount or a stem mount? | This guarantees the casters will actually attach to your equipment. Check your table's legs for either pre-drilled holes (plate) or a hollow receiver (stem). |
| Select Brake Type | Do you need a top-lock or a total-lock brake? | This is all about the safety and stability of your workstation. A total-lock brake, which stops both the wheel and the swivel, is the safest bet for almost any kitchen. |
Taking a moment to confirm these four points means you’re not just buying a set of wheels—you're making a calculated upgrade to your kitchen's workflow. The right casters give you the mobility, stability, and safety you need to handle the pressures of a busy commercial environment.
This simple process streamlines your purchase from PrepTables.com, giving you the confidence that your new 4-inch caster wheels are the perfect match for your operation.
Common Questions About 4-Inch Casters
It's completely normal to have a few lingering questions when you're getting down to the nitty-gritty of caster specs. Let's clear up some of the most common ones so you can feel confident in your choice.
Can I Put 4-Inch Caster Wheels on Any Prep Table?
For the most part, yes. Most commercial prep tables are built with casters in mind, but the key is matching the mounting type. Before you buy, take a quick look under your table—do the legs have pre-drilled holes for a plate mount, or are there threaded inserts for a stem mount?
If you're using equipment from PrepTables.com, the product specs will tell you exactly what you need. It's also smart to make sure the table's frame is sturdy enough to handle the stress of rolling around when it's fully loaded.
What’s the Difference Between a Swivel and a Rigid Caster?
The main difference is all about movement. A swivel caster is the acrobat of the two, able to spin a full 360 degrees. This makes it a lifesaver for navigating tight corners and shuffling equipment around in a busy kitchen.
A rigid or fixed caster, on the other hand, is a straight-shooter. It only rolls forward and backward, which gives you much better stability and control over long distances.
A popular and highly effective setup for larger tables is putting two swivel casters with brakes at one end and two rigid casters at the other. It's the perfect combo: you get the steering from the swivels and the steadiness from the rigids.
How Do I Figure Out the Right Load Capacity Per Caster?
Getting this right is absolutely crucial for safety. First, add up the total weight: the table itself plus the absolute heaviest load it will ever carry (think appliances, containers, and all your ingredients). Then, divide that total by the number of casters you're using.
Here's a pro tip for an essential safety margin: divide the total weight by three, not four. This simple adjustment ensures that if one wheel lifts off the ground on an uneven floor—which happens all the time—the other three can safely handle the entire load without buckling under the pressure.
Aren't All Stainless Steel Prep Tables Pretty Much the Same?
Not at all. While often made from similar materials, stainless steel prep tables are designed for very different tasks, which affects their construction, weight, and caster requirements.
- Standard Work Tables: These are the versatile foundation of a kitchen, used for everything from chopping vegetables to plating dishes. They typically feature a flat top and may include an undershelf for storage or a backsplash to protect walls. Their design focuses on providing a simple, sturdy surface.
- Sandwich Prep Tables: These are specialized stations that combine a work surface with refrigerated compartments below and chilled wells on top for holding ingredients. This integration makes them significantly heavier and more complex than standard tables, requiring casters that can handle a substantial, unevenly distributed load.
- Pizza Prep Tables: Built for the unique demands of pizza making, these units are often the heaviest in a commercial kitchen. They typically feature a large refrigerated base, a raised rail for toppings, and sometimes a thick, heavy marble or granite top ideal for working with dough. Their immense weight and specialized function demand the most robust casters and braking systems available.
Each type of table serves a unique role, and recognizing these differences is key to choosing the right 4-inch caster wheels to support them safely and effectively.
Ready to make your kitchen more mobile and efficient? Check out the complete collection of NSF-certified casters and professional kitchen gear at PrepTables.com. Find the perfect set for your tables by visiting our online store today.