

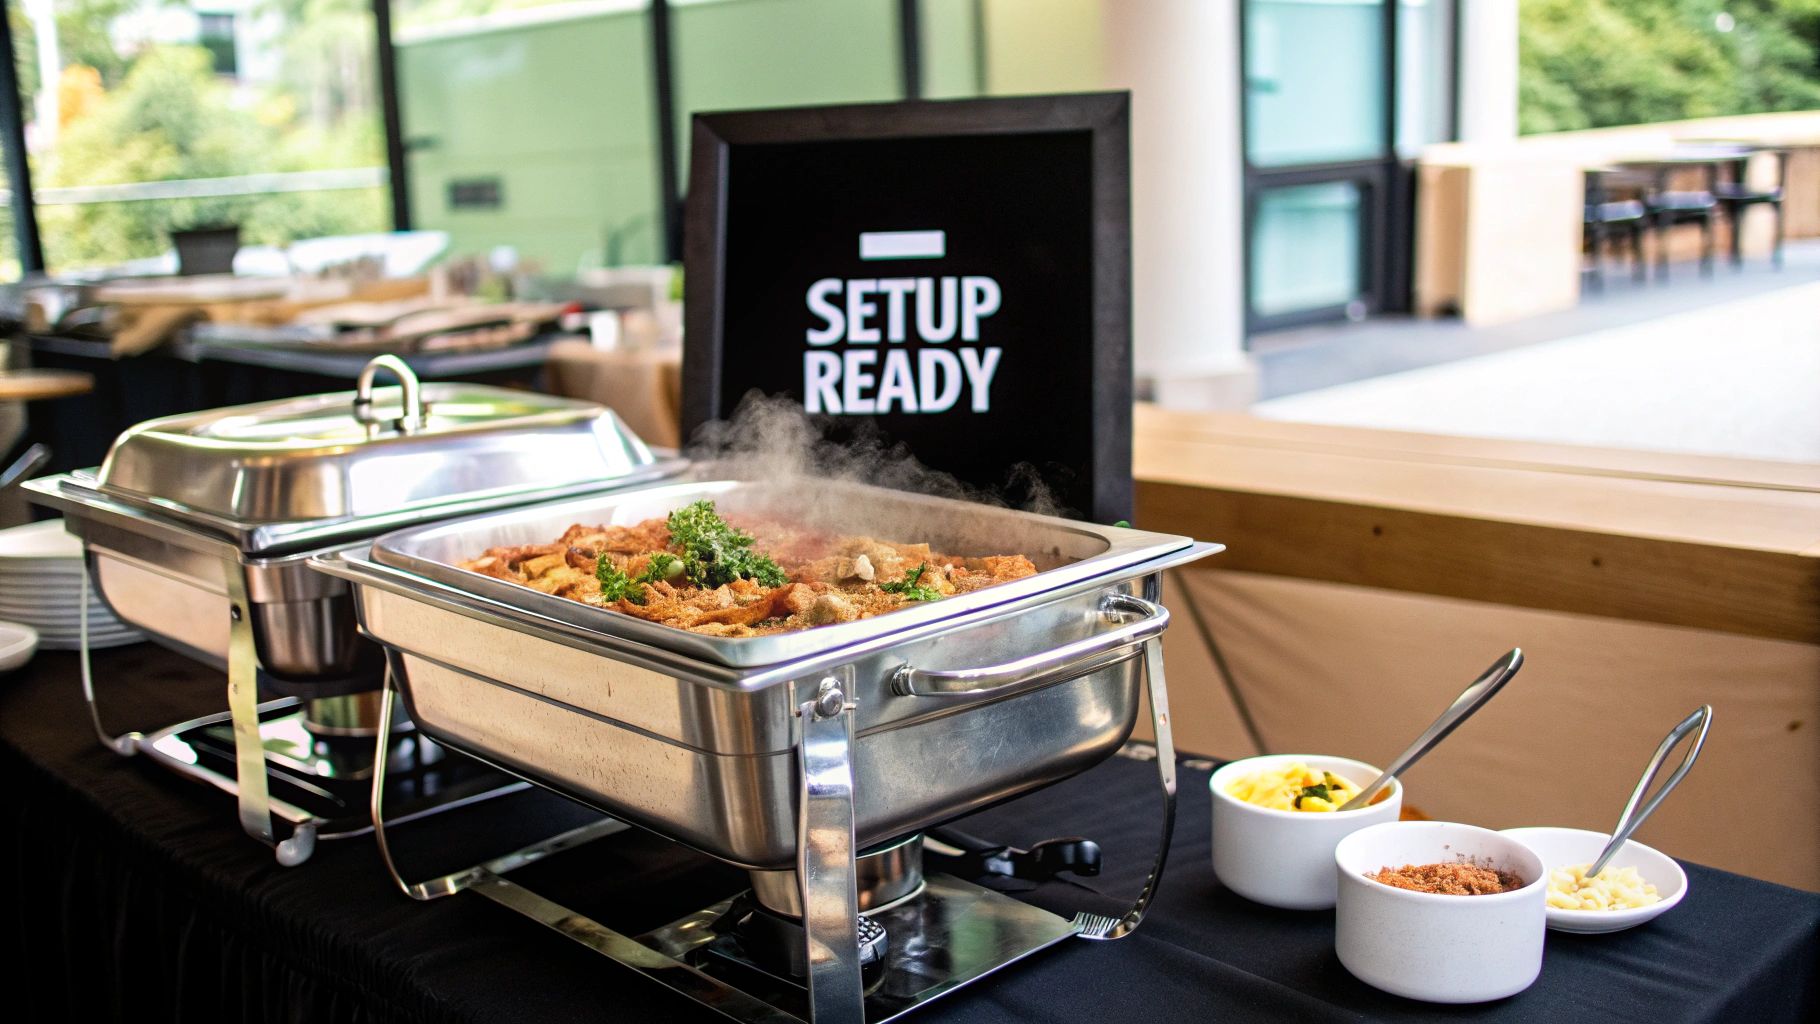
How Do You Use a Chafing Dish? Tips for Beginners
Think of a chafing dish as your own portable steam table. Its whole purpose is to keep hot food hot. You're not cooking with it, just maintaining that perfect, food-safe temperature for the duration of your event. The setup is straightforward: add hot water to the main pan, set your pan of fully cooked food on top, and light a fuel source underneath.
Understanding Your Chafing Dish
Ever been to a buffet and wondered how they keep everything perfectly warm for hours on end? The secret weapon is almost always the chafing dish. It uses gentle, indirect heat from a steam bath to hold food at a consistent temperature. This is the key to preventing food from scorching or drying out, making sure the last person in line gets a meal that's just as good as the first.
This isn't a new concept, either. The name actually comes from the old French word 'chauffer,' which simply means 'to make warm.' Early versions dating back to the 15th century were little more than grates heated by charcoal. By the 18th century, however, you'd see elegant silver models in wealthy homes for tableside warming. You can even read up on the evolution of this catering staple on Wikipedia.
The Core Components
To really get the hang of using a chafing dish, you need to know its four main parts. I like to think of them as a team working together. Each piece has a specific job, and they all need to be in place for the system to work safely and effectively.
Here’s a breakdown of what you'll be working with:
- The Frame or Stand: This is the base of the whole operation. It’s a sturdy frame that holds everything up and keeps the heat source safely off your tabletop.
- The Water Pan: This is the deeper of the two pans. It sits directly on the frame, right over the fuel, and holds the hot water that creates the steam. This pan is what provides that gentle heat buffer.
- The Food Pan: This is the shallower pan that nests right inside the water pan. It holds your delicious food and should never touch the water directly.
- The Fuel Source and Lid: This covers the fuel holders and the actual fuel canisters (usually a gel or wick type). The lid is just as important, as it traps the steam and moisture to keep food from drying out.
Once you get how these simple parts work together, you're on your way to running a buffet line that not only looks professional but also keeps your food safe and delicious from start to finish.
Perfecting Your Chafing Dish Setup
A truly successful event is all in the details, and that starts long before the first guest even thinks about arriving. Nailing your chafing dish setup isn't just about keeping food delicious—it's a matter of safety and professionalism. The process itself is pretty straightforward, but a little bit of know-how is what separates an okay buffet from an unforgettable one.
First things first: location. You need to find a stable, heat-resistant surface for your chafing dish. Keep it well away from high-traffic zones to avoid any accidental bumps or spills. And it goes without saying, but make sure it’s clear of flammable materials like paper decorations or curtains. Getting this right from the start is the bedrock of a safe serving station.
Assembling Your Chafing Dish
Once you've picked your spot, it's assembly time. The secret to that gentle, even heat is the water pan—the deeper of the two pans. Go ahead and pour in about one inch of hot water. Using hot water gives you a massive head start, meaning your fuel won't have to work overtime just to get things up to temperature.
Now, set the food pan right on top. It should nestle snugly inside the water pan, but it's critical that it doesn't actually touch the water below. You need that air gap. It allows steam to form and circulate, which is what creates the gentle heat that warms your food without scorching it.
The whole point is to create a steam bath, not to boil the food pan. If the food pan sits directly in the water, you'll get nasty hot spots that can burn the very dish you worked so hard to prepare.
Lighting the Fuel Safely
With the pans set, the last piece of the puzzle is the heat source. The fuel canisters are the engine of your chafing dish, and handling them correctly ensures that consistent, reliable warmth.
- Open Carefully: Twist or pry the cap off the fuel canister. Take your time to avoid spilling any of the gel or liquid fuel.
- Place in Holders: Set the open canister into its designated fuel holder on the chafing dish frame.
- Light with Caution: This is a big one. Use a long-stemmed lighter or match to ignite the fuel after it's in place. Never, ever light a canister and then try to move it.
The image below shows you exactly what this looks like when done right.
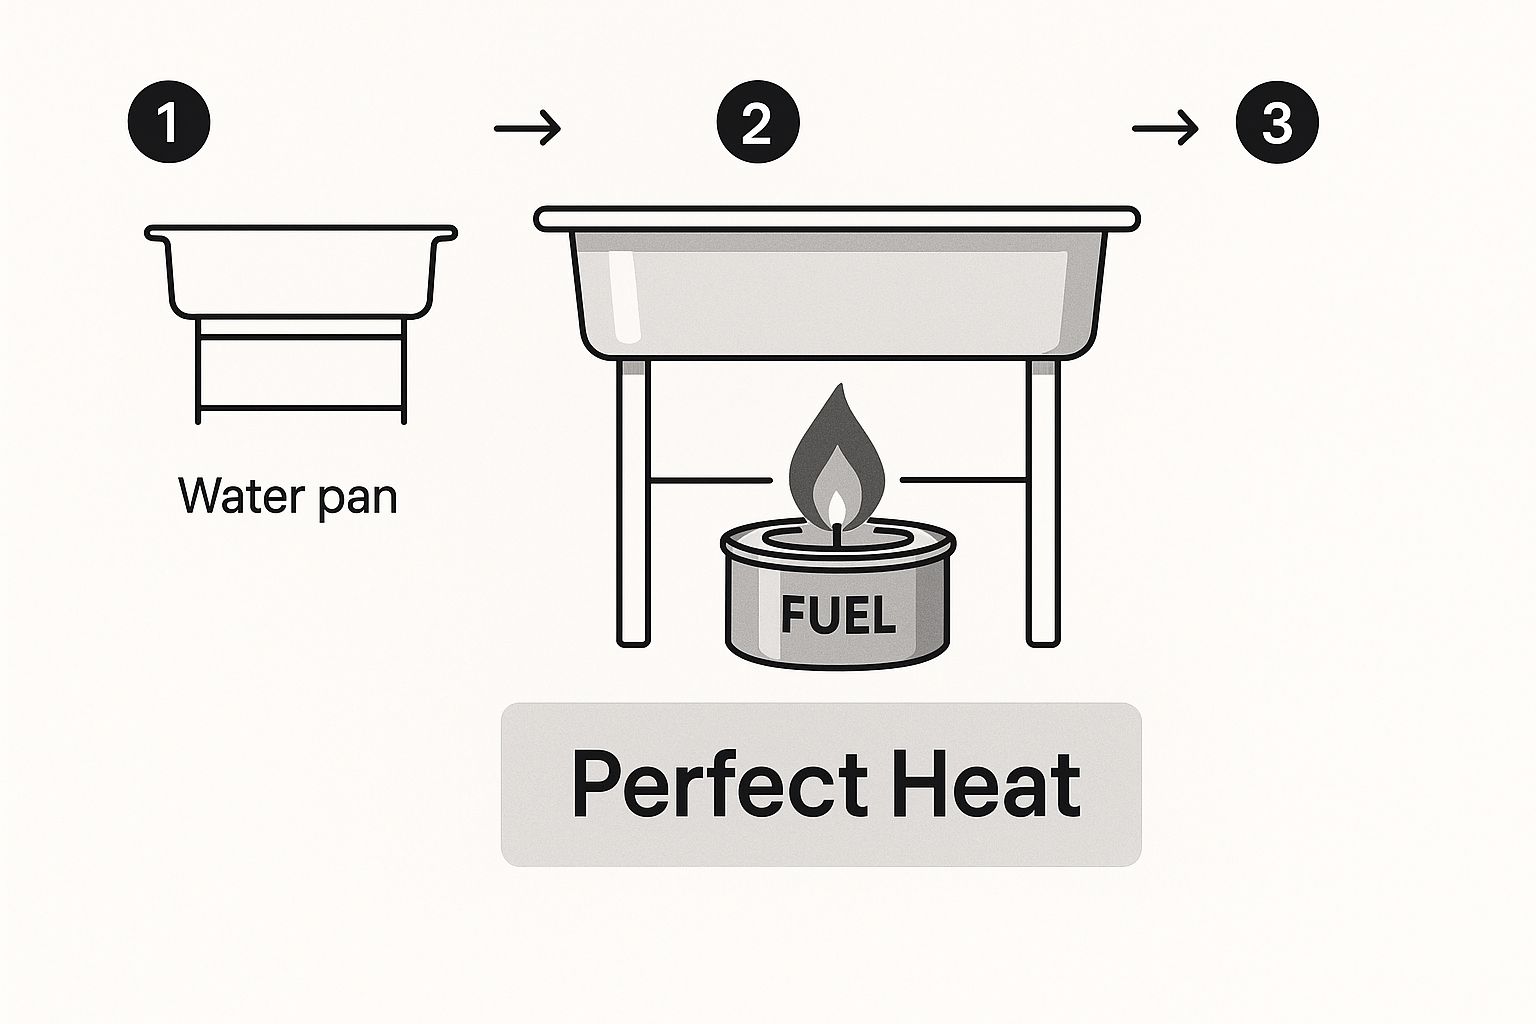
As you can see, the lit fuel creates a steady flame that heats the water pan from underneath, kicking off that all-important steam process. By focusing on these small but critical steps, you're setting yourself up for a buffet line that runs smoothly, safely, and successfully from start to finish.
Mastering Heat and Food Safety

This is where your skill as a host really comes into play. A chafing dish has one primary job: keeping food safe. Its whole purpose is to hold food above the dreaded temperature "danger zone"—that's between 40°F and 140°F (or 4°C and 60°C)—where bacteria can throw a party you definitely didn't invite.
Getting this right is the foundation of food safety. The gentle, consistent steam heat a chafer provides is perfect for the task. In fact, that’s all they were ever meant to do. Historical studies on early Byzantine models found they were designed to maintain warmth, never reaching a full cooking temperature.
Choosing Your Heat Source
The type of fuel you choose will make a big difference in both performance and convenience. Each one has its place, so think about what your event needs.
The fuel source you choose will directly impact how your chafing dish performs. Each option has its own strengths, making it better suited for certain events and venues. To help you decide, here’s a quick comparison of the three most common heat sources.
Chafing Fuel Type Comparison
| Fuel Type | Average Burn Time | Heat Output | Best For |
|---|---|---|---|
| Wick Fuel | 4-6 hours | Steady, consistent | Long events like wedding receptions or all-day buffets. |
| Gel Fuel | 2-3 hours | Hot, fast | Shorter gatherings or getting dishes up to temp quickly. |
| Electric Warmer | Indefinite (plugged in) | Precise, adjustable | Indoor venues with flame restrictions or when you need exact temperature control. |
Each type gets the job done, but picking the right one simplifies your event management. For a long, drawn-out service, wick fuel is a set-it-and-forget-it solution, while electric warmers offer total peace of mind indoors.
No matter which heat source you use, the goal is always the same: create a stable steam bath that keeps your food delicious and, most importantly, safe for every single guest.
Practical Tips for Perfect Temperature
Just lighting the fuel and walking away isn't quite enough. A few extra steps will guarantee your food stays perfect from the first serving to the last.
Always, always start with hot food. A chafing dish is for holding temperature, not for heating cold food. Give it a head start by filling the water pan with hot water, too. This gets things steamy right away and ensures you're maintaining a safe temperature from the moment guests arrive.
You’ll also want to use the lid strategically. Keeping it on traps heat and moisture, which is ideal for preventing dishes like pulled pork or mac and cheese from drying out. But for something you want to stay crisp, like fried chicken, you can leave the lid slightly ajar to let some of that steam escape.
For a deeper dive into best practices, our guide on food safety and sanitation guidelines can help keep your entire operation up to standard.
Choosing The Right Chafing Dish
The chafing dish you choose does more than just keep your food warm; it’s a huge part of your presentation and can set the whole tone for your event. Picking the right one really comes down to your menu, the venue, and the style you're going for. Figuring out exactly how you'll use it is the first real step in making the perfect choice.
Standard rectangular stainless steel chafers are the absolute workhorses of the catering world. You just can't beat their versatility. They're perfect for holding everything from a main course like roasted chicken to all your popular side dishes. If you're aiming for a more sophisticated look, an elegant roll-top chafing dish is a fantastic option. The design lets guests serve themselves with one hand, which adds a subtle touch of class to any buffet line.
Matching Shape To Function
You’ll want to match the shape of your chafing dish to the food you're serving. While the classic rectangular models can handle most jobs, sometimes a specialized shape just works better.
- Round or Oval Dishes: These are your best friends for anything liquid-based. Think hearty soups, rich sauces, or classic meatballs in marinara. Their depth and shape simply make serving easier and a lot less messy.
- Square Dishes: A great modern alternative. Square chafers can create a really interesting visual on a buffet, especially when you mix them in with other shapes for a more dynamic layout.
At the end of the day, the goal is a seamless experience for your guests. For bigger events with long serving lines, a dedicated food warmer table can be a lifesaver. It gives you a stable, organized foundation for multiple chafers, making your whole setup look professional and run smoothly.
Fuel vs Electric Chafers
The choice between a traditional fuel chafer and a modern electric one is a big deal. The classic fuel-powered dishes offer amazing portability, which is perfect for outdoor events or venues where you can't just plug something in. They have a timeless appeal that a lot of hosts and caterers really appreciate.
On the other hand, electric models give you incredible temperature precision. They're also often a requirement for indoor venues that have strict rules against open flames. The convenience and safety of electric warmers are why they’re becoming so popular in the hospitality world. In fact, the electric chafing dish market was valued at USD 153.96 million in 2024, and it's growing fast as caterers put a premium on precise control and energy efficiency. You can dig deeper into these market trends on Global Growth Insights.
Essential Cleanup and Storage Tips
Proper after-care is what separates a one-time-use tool from a long-term catering investment. Taking a few minutes to shut down, clean, and store your chafing dish correctly not only extends its life but also ensures it’s gleaming and ready for your next event.
The first move is a safe shutdown. Once service is over, always use a snuffer cap to extinguish the fuel flames—whatever you do, don't blow them out. Let every single component, especially the water pan and the frame, cool down completely before you even think about handling them. This simple step prevents nasty burns and makes the entire process a whole lot safer.
Cleaning and Polishing
Once everything is cool to the touch, it's time to get cleaning. Make it a rule to always hand-wash the food pan, water pan, and lid. Stay away from the dishwasher; harsh detergents can really do a number on the finish over time. A soft sponge and some non-abrasive soap are all you need to gently scrub away any food residue.
For those stubborn, caked-on food spots or to bring back that brilliant shine on stainless steel, a little extra care goes a long way. I’ve found that creating a simple paste of baking soda and water can help lift tough stains without scratching the surface. For a deeper dive into maintaining that mirror finish, our guide on how to clean stainless steel has some fantastic expert tips.
Proper storage is the final piece of the puzzle. Ensuring every component is bone-dry before storing is critical to preventing rust and water spots that can permanently mar the finish.
Finally, nest the clean, dry components together. I like to place the food pan right inside the water pan and then set them both in the frame. This trick not only saves a ton of valuable storage space but also protects each piece from getting dented and scratched, keeping your set in pristine condition for years to come.
Your Chafing Dish's Best Friend: The Right Prep Table
Knowing how to use a chafing dish is half the battle, but where you do your prep work makes all the difference. A solid, clean surface isn't just a nice-to-have; it's the foundation of any professional-level service. This is exactly where stainless steel prep tables come into play—they are the true workhorses of any commercial kitchen or catering operation.
The most common setup involves a simple, flat-top stainless steel prep table. They come in all sorts of sizes and give you a reliable, corrosion-resistant space for everything from plating appetizers to assembling main courses. Some models include an undershelf for extra storage or a backsplash to protect walls and make cleanup easier. Their no-fuss design makes them a breeze to sanitize at the end of an event.
Specialized Tables for a Faster Workflow
When your menu gets more complex, specialized prep tables can be a game-changer for your workflow. These units are designed to keep your ingredients organized, properly chilled, and right where you need them, which is a huge boost for both speed and food safety.
- Sandwich Prep Tables: Think of these as your all-in-one station for building sandwiches, salads, or wraps. They have a refrigerated rail right on top, perfect for holding pans of sliced meats, cheeses, and veggies. Underneath, a refrigerated cabinet provides extra storage, keeping everything at a safe, cool temperature.
- Pizza Prep Tables: These are similar to sandwich tables but built on a bigger scale to handle a high-volume pizza operation. The refrigerated rail is wider and deeper to accommodate larger containers for sauce, cheese, and all your toppings. The work surface itself is often made from marble or another material that stays cold, which is ideal for working with pizza dough.
A good prep table isn't just another piece of equipment. It's the command center for an organized, efficient, and safe kitchen, ensuring every dish is perfect before it ever sees the inside of a chafer.
At PrepTables.com, we provide the durable, NSF-certified stainless steel prep tables that professionals trust to build their culinary success. Find the perfect foundation for your kitchen workflow today!