

A Pro's Guide to Fridge Condenser Cleaner in Commercial Kitchens
A clogged condenser coil is more than just another item on your cleaning checklist; it's a direct threat to your kitchen's efficiency and your bottom line. When this critical component is neglected, it sets off a chain reaction: higher energy bills, unexpected equipment failure, and even potential food safety violations. Suddenly, a simple maintenance task spirals into a costly operational crisis.
The Hidden Cost of a Dirty Condenser
That steady, low hum from your refrigeration unit is the sound of your commercial kitchen’s heart beating. But when that hum turns into a constant, strained roar, it's a clear signal that trouble is brewing inside the equipment. This isn't just about noise; it's about the very real, and often steep, financial consequences of a neglected condenser coil.
The smartest operators I know don't see condenser maintenance as a chore. They see it as a critical business strategy—the first line of defense in protecting their profit margin.

From Minor Dust to Major Disruption
Picture this: It’s a Friday night, right in the middle of the dinner rush. The kitchen is humming, orders are flying, and your team is in the zone. Then, out of nowhere, the pizza prep table—the command center of your busiest night—stops cooling. The compressor is hot to the touch, and the internal temperature is slowly creeping into the danger zone.
This isn't some random mechanical failure. It's the predictable outcome of a condenser coil slowly suffocating under layers of grease, flour, and dust. When those coils get clogged, they simply can't release heat effectively, forcing the compressor to work overtime and guzzle electricity just to keep things cool.
A dirty condenser coil essentially wraps your refrigeration system in an insulating blanket. It traps heat, forcing the unit to fight against itself. This not only spikes your energy consumption but puts immense strain on the compressor—the most expensive part to replace.
This inefficiency is a silent profit killer in any kitchen. Dirty condensers can slash a unit's efficiency by up to 30%, forcing compressors to run non-stop and sending your electricity bills through the roof. Whether you're running a food truck or a massive restaurant, investing in a proper fridge condenser cleaner is non-negotiable for protecting crucial equipment like undercounter refrigerators and pizza prep units.
The Domino Effect on Operations
When that pizza prep table goes down, the problem doesn't stop there. The consequences ripple through your entire operation, hitting everything from food safety to your reputation.
- Skyrocketing Energy Bills: This is the first and most obvious hit. A struggling compressor can easily become one of the biggest energy hogs in your entire kitchen.
- Premature Equipment Failure: Constant overwork drastically shortens a compressor's lifespan. A simple cleaning issue can quickly morph into a repair bill that costs hundreds, if not thousands, of dollars.
- Food Spoilage and Safety Risks: If a unit can't hold its temperature, you're not just losing valuable inventory—you're creating a serious food safety hazard that could harm your customers and damage your business.
- Lost Revenue: Equipment failure during peak hours means lost sales, unhappy customers, and a completely frazzled team. The cost of that downtime often dwarfs the actual cost of the repair.
While regular cleaning with a quality fridge condenser cleaner is your best defense, it's smart to know what you might be up against if a coil is damaged beyond repair. Getting a handle on understanding the costs associated with replacing a condenser coil can put things in perspective. A little proactive maintenance goes a long way in ensuring your stainless steel prep tables, walk-in coolers, and sandwich prep stations are running at peak efficiency when you need them most.
Choosing The Right Condenser Cleaning Tools
Walking into a cleaning job without the right gear is just asking for a long, frustrating day and maybe even a damaged unit. To properly clean your refrigeration condensers—whether it’s the small one on a sandwich prep table or the big beast for your walk-in—you need a very specific set of tools. Having the right equipment makes all the difference, turning a dreaded chore into a quick, effective maintenance win.
This isn’t about just grabbing any old brush and a vacuum. It's about knowing why one tool is better than another for this particular job. Using the correct tools ensures you get rid of the maximum amount of grime without wrecking the delicate aluminum fins that do all the hard work of heat exchange.
Essential Hand Tools and Safety Gear
Before you even think about grabbing a can of fridge condenser cleaner, you've got to assemble your basic toolkit. The first goal is always to physically remove the loose layers of dust, flour, and other debris that have turned your coils into a fuzzy, insulating blanket. Getting this stuff out of the way first makes any chemical cleaner you use later vastly more effective.
Your go-to list should include:
- A Soft-Bristle Brush: Find a brush with long, flexible bristles. You'll use this to gently sweep away surface dust from the face of the coils without bending those fragile fins. A stiff brush is a one-way ticket to damage and an expensive repair call.
- A Condenser Fin Comb: This little tool is a lifesaver. You use it to gently straighten any bent fins you come across. Bent fins choke off airflow, which is the exact problem you’re trying to fix. A quick pass with one of these can restore efficiency in seconds.
- A Powerful Vacuum with Attachments: A shop-style vac is perfect, but any vacuum with a crevice tool and a soft brush attachment will do the trick. The crevice tool is great for getting into tight corners, and the brush attachment helps lift off that really stubborn dust.
- Safety Glasses and Gloves: Don't even start without these. Dust, caked-on grease, and cleaning chemicals have a nasty habit of getting where they shouldn't. Protect your eyes and skin—it’s non-negotiable.
Think of the fins on a condenser as tiny radiators. If they are bent or blocked, they can't release heat. A fin comb is like a specialized comb for your radiator, ensuring every fin is perfectly aligned to maximize airflow and cooling efficiency.
Selecting The Right Fridge Condenser Cleaner
Not all cleaners are the same, especially when you're up against the kind of heavy grease and grime that builds up in a commercial kitchen. The right cleaner really depends on the type of gunk you're dealing with and where the unit is located. If you're looking for a broader overview of cleaning products, our guide on essential cleaning supplies for restaurants is a great resource.
Here’s a quick rundown of the most common types of fridge condenser cleaner solutions:
Foaming Cleaners: These are your best bet for greasy kitchen environments, especially for units near fryers or griddles. The foam is fantastic because it clings to vertical surfaces, giving it enough time to break down that stubborn, caked-on grease. Many are also "self-rinsing," which means the normal condensation from the running unit will wash away the residue for you.
Solvent-Based Cleaners: When you're facing extremely heavy grease and oil, a solvent-based cleaner brings the power. Just be aware that they often have strong odors and require plenty of ventilation. Save these for well-aired spaces and always use the proper protective gear.
Eco-Friendly or "Green" Cleaners: These are usually biodegradable, non-toxic, and have low VOCs (volatile organic compounds). They might require a little more elbow grease with a brush, but they're an excellent choice for kitchens focused on environmental safety and minimizing harsh chemicals. They're especially great for cleaning condensers on equipment like a pizza prep table, which is often right in the middle of your main prep area.
Picking the right combination of tools and the correct cleaner makes sure your maintenance is not just effective, but also safe for your equipment and your staff.
Your Guide to Cleaning Commercial Condenser Coils
Alright, let's move past the theory and get our hands dirty. This is the practical, step-by-step guide to cleaning your commercial condenser coils. We're going beyond a simple checklist to give you the real-world advice you need to get the job done safely and effectively.
The whole process boils down to a few key actions: shutting down the power, getting to the coils, and then systematically clearing out all that grime. Get these steps right, and you'll protect your equipment and get it back to running at peak performance.
This simple workflow shows the core of what we're about to do, using a fridge condenser cleaner and some basic tools.
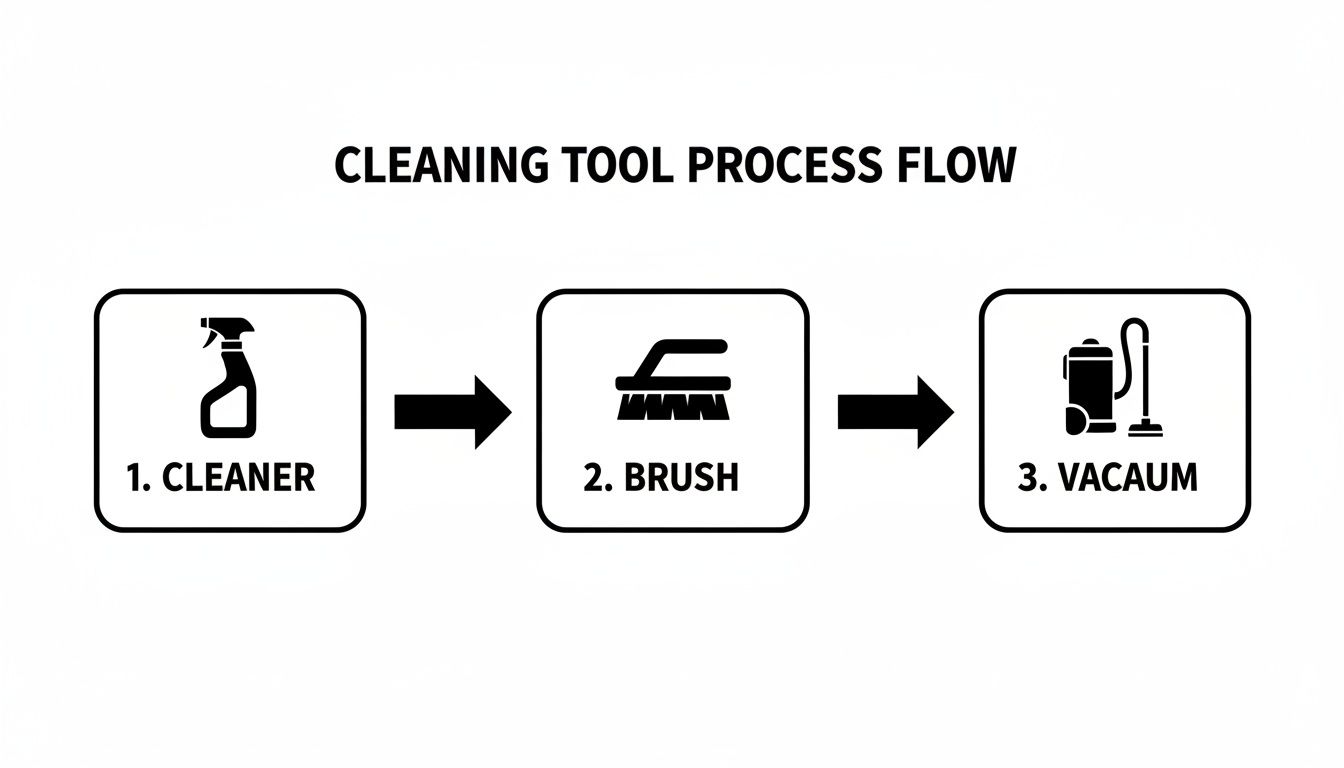
As you can see, it’s a logical sequence. We apply a cleaner, use a brush to get the stubborn stuff loose, and then vacuum everything up. This is the foundation of a truly thorough cleaning.
Safety and Shutdown First
Before you even think about picking up a tool, safety has to be your number one priority. The risk of electrical shock is real, and skipping the proper shutdown procedure just isn't worth it. Whether you're working on a small undercounter unit or a massive pizza prep table, you have to completely disconnect it from the power.
First, turn off the unit's power switch if there is one. Then, and this is the crucial part, physically unplug the equipment from the wall outlet. Don't ever rely on just a switch—pulling the plug is the only way to be 100% certain the power is cut and you're safe to work.
Locating and Accessing The Coils
Condenser coils are often tucked away out of sight, so just finding them can be half the battle. Their location really depends on the piece of equipment you're dealing with. Different types of stainless steel prep tables house their condensers in various spots, impacting how you access them.
- Standard Prep Tables: Many refrigerated worktop and undercounter units place the condenser on the back or bottom. You’ll likely need to pull the unit away from the wall to access a rear panel or remove a front grille near the floor.
- Pizza and Sandwich Prep Tables: These specialized tables are designed for rapid assembly lines. A pizza prep table usually features a raised, refrigerated rail for easy access to toppings, while a sandwich prep table has recessed cold wells and a cutting board. Both typically house the condenser on the side or bottom behind a louvered panel for efficient cooling right at the point of use.
- Walk-In Coolers/Freezers: On the big stuff, the condenser unit is almost always outside the building. Look for it on the roof or on a concrete slab behind the kitchen.
Once you’ve found the coils, go ahead and remove any protective grilles or panels. Pro tip: keep the screws in a magnetic tray or a small cup so they don't get lost. Now is also the perfect time to put on your safety glasses and gloves before the dust starts to fly.
The Core Cleaning Technique
With the coils exposed, it's time to get to work. I like to think of it as a three-part attack: vacuum the loose stuff, brush away the caked-on grime, and then let your fridge condenser cleaner dissolve whatever is left.
Start with your vacuum, using a soft brush attachment. Gently go over the entire surface of the coils, focusing on sucking up that thick, fuzzy blanket of dust, lint, and maybe even flour. Always move in the same direction as the fins (usually up and down) to avoid bending them. A crevice tool is great for getting into the tight spots around the fan.
Next, switch to your soft-bristle brush. This is for dislodging the debris that the vacuum couldn't quite grab. Again, be gentle and always brush with the grain of the fins, not against them. If you spot any bent fins, now’s your chance to use a fin comb to carefully straighten them out. This is critical for restoring proper airflow.
One of the biggest mistakes I see people make is grabbing a high-pressure air hose or a power washer. It seems like a quick fix, but it's a surefire way to bend those delicate aluminum fins. You'll end up restricting airflow and causing the very problem you were trying to solve. Stick to gentle brushing and vacuuming.
Now for the chemical assist. Grab your foaming fridge condenser cleaner and apply it generously. Start at the top and work your way down, making sure you get an even coat across the entire coil surface. The foam will expand and cling, giving it time to break down the greasy, sticky gunk that brushing alone can't handle. Let it sit for the time recommended on the can, which is typically 5-10 minutes.
Finishing The Job
If you're using a self-rinsing foaming cleaner, the hard part is over. The natural condensation that forms on the coils during operation will slowly rinse the dissolved grime and cleaner down into the condensate pan.
For cleaners that require rinsing, you'll need a spray bottle with clean water. Lightly mist the coils to wash away the cleaner, but be incredibly careful not to soak any nearby electrical components. A light mist is all you need; don't drench the unit.
Finally, give the area one last pass with the vacuum to suck up any remaining loose bits or cleaner residue from the bottom of the unit. Once you’re satisfied that you can see daylight through the fins, you’re ready to reassemble.
Screw any panels or grilles back on, slide the unit carefully back into place, plug it in, and switch it on. Don't be alarmed if it takes a while for the unit to get back down to its set temperature—that's completely normal. You've just given your equipment a new lease on life and restored its cooling power.
Diagnosing Common Condenser Problems
So, you’ve given the condenser a thorough cleaning with the best fridge condenser cleaner you have, but the unit is still acting up. This is where you switch gears from maintenance to diagnostics. Learning to spot the early warning signs of a failing condenser is a critical skill. It helps you tell the difference between a simple fix and a problem that needs a professional, potentially saving you from a costly emergency call down the road.
Think of it like being a detective for your kitchen equipment. Is the unit running nonstop? Are your sandwich prep table ingredients struggling to stay cold? Are there strange new noises coming from the back? Each symptom is a clue pointing to an issue that needs your attention.
When Your Unit Runs Constantly
One of the most common red flags is a compressor that just won't quit. You’ve already cleaned the coils, so you know a simple buildup of grime isn’t the issue. A unit that runs all day isn't just inflating your energy bill; it's also putting a ton of strain on the compressor, pushing it that much closer to a complete breakdown.
Before you hit the panic button, run through this quick checklist:
- Check the Door Gaskets: Take a close look at the rubber seals around the unit's doors. If they're torn, brittle, or just not creating a tight seal, warm kitchen air is constantly getting in. This forces the compressor to work overtime just to keep up.
- Verify the Thermostat Setting: It sounds simple, but make sure the thermostat hasn't been accidentally cranked down to its coldest setting. Sometimes, the real culprit is just an accidental bump of the dial.
- Assess Ambient Temperature: Where is the unit located? If it's right next to a fryer, griddle, or another hot piece of equipment, it’s going to struggle. An unusually hot environment will naturally make any refrigeration system work harder.
If you’ve gone through these steps and the problem is still there, you might be looking at something more serious, like a refrigerant leak or a compressor on its last legs. For a deeper dive into compressor health, check out our guide on how to check a refrigerator compressor for more detailed troubleshooting steps.
Inconsistent Cooling or Icing Up
Another incredibly frustrating symptom is when your prep table just can’t seem to hold its temperature, or even worse, it starts building up ice or frost inside. This is a huge deal for pizza prep tables where consistent temps are everything for food quality and safety.
When you notice things aren't cooling correctly, start investigating these potential causes:
- Airflow Obstruction: Open the unit and look inside. Are food containers or boxes blocking the air vents? Good internal airflow is non-negotiable for even temperature distribution.
- Overloading the Unit: Shoving a large batch of warm product into the fridge all at once can overwhelm the system. This shock can make it struggle to bring the temperature back down.
- Fan Malfunction: Listen for the internal evaporator fan. When the compressor kicks on, you should hear it running. If you hear silence, you've likely found your problem. A dead fan means cold air isn't being circulated.
If you're seeing ice, especially around the evaporator coils, it often points to a problem with the defrost cycle or, again, poor airflow that's trapping moisture and letting it freeze.
Unusual Noises and When to Call a Pro
Your refrigeration unit should settle into a consistent, low hum. When you start hearing new and alarming noises, that’s a clear signal something is mechanically wrong. Loud rattling, grinding, or high-pitched squealing are not normal and need to be looked at right away. These sounds often mean you have a failing compressor motor or a broken fan blade.
Dirty coils are a primary culprit in equipment failure, causing an estimated 40% of all refrigeration breakdowns in commercial kitchens. These incidents can cost a restaurant an average of $2,500 per breakdown in repairs and lost product. For high-volume businesses like delis and pizzerias that rely on equipment like refrigerated sandwich and pizza prep tables, such failures during peak hours can be financially devastating. Regular cleaning with a quality fridge condenser cleaner is one of the most effective preventative measures to avoid these costly and disruptive events.
At the end of the day, knowing when to throw in the towel and call a professional is just as important as knowing how to troubleshoot. If you've cleaned the coils and worked through these diagnostic steps with no luck, it’s time to bring in an expert. Pushing a faulty unit to keep running is just asking for a catastrophic failure and a much, much bigger repair bill.
Building a Proactive Maintenance Routine
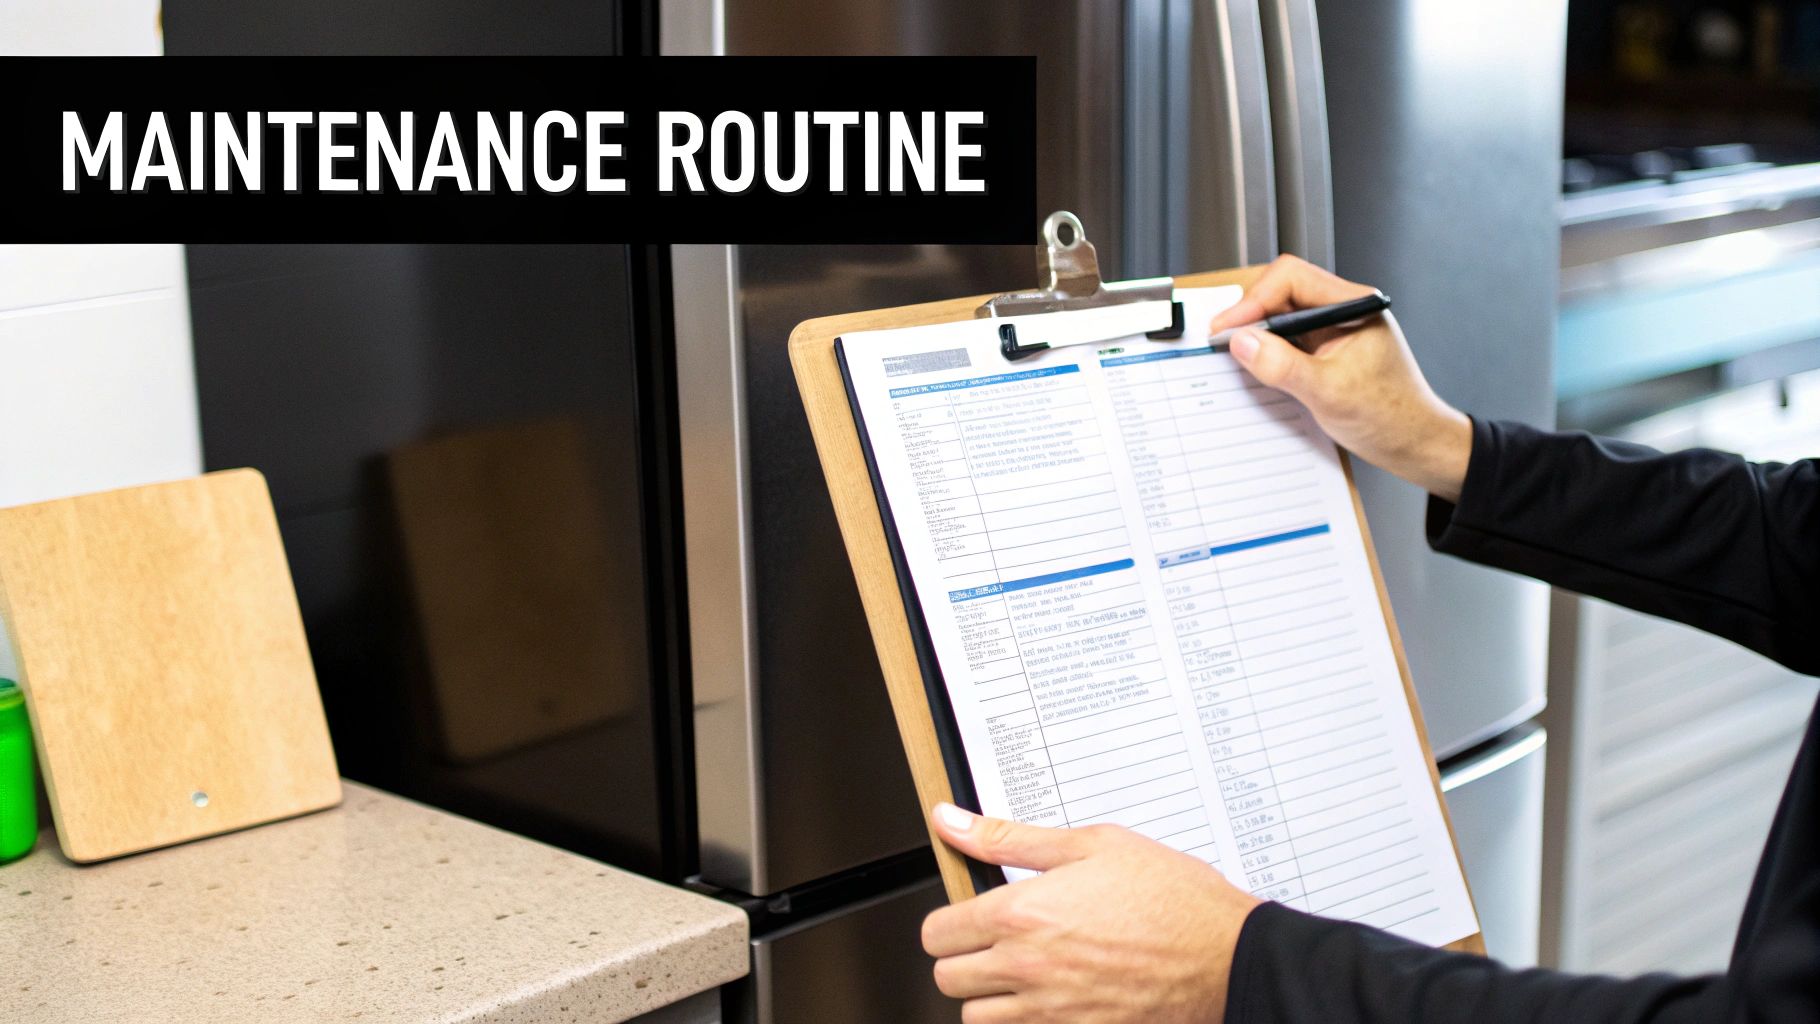
Let's shift condenser cleaning from a "fix-it-when-it's-broken" emergency to a smooth, predictable part of your kitchen's weekly rhythm. A proactive approach is the only way to protect your equipment and keep things running without a hitch, day in and day out. The goal is to build a simple, repeatable maintenance program that everyone on the team understands and follows.
This isn't about piling on another complex job. It’s about creating a system that turns condenser care into a powerful preventative habit. A clean condenser is the heart of reliable refrigeration for all your key equipment, from the undercounter fridges to those essential pizza and sandwich prep tables.
Creating Your Cleaning Schedule and Log
First things first: get it on paper. Moving from guesswork to a structured schedule is the most important step. A simple cleaning log is one of the best tools for accountability and consistency I've seen in any kitchen. It doesn't have to be fancy—a basic chart taped to the side of the unit or a shared digital spreadsheet works just fine.
If you want to get started quickly, using a pre-made preventive maintenance schedule template can help you organize tasks and track everything efficiently from day one.
Your log only needs a few key details for each piece of equipment:
- Equipment Name/ID: (e.g., "Pizza Prep Table 1," "Main Walk-In")
- Location: (e.g., "Pizza Line," "Back of House")
- Last Cleaning Date: The date the last maintenance was done.
- Next Due Date: When the next cleaning is scheduled.
- Cleaned By: The initials of the person who did the work.
This simple record-keeping kills any confusion about when a unit was last touched. It gives you a clear, at-a-glance history that keeps the team on track and ensures no piece of gear gets forgotten.
A maintenance log is more than just a piece of paper; it's a commitment to your equipment's health. It turns an abstract goal—"keep things clean"—into a concrete, trackable action that protects your most valuable assets.
Assigning Responsibility and Providing Training
A plan is useless without people to execute it. You need to clearly assign who is responsible for condenser cleaning. It could be a specific kitchen porter, a line cook in charge of a particular station, or a shift supervisor. Honestly, the who is less important than making sure the responsibility is defined and not just left up to chance.
Once you’ve assigned the roles, proper training is non-negotiable. Don't just hand someone a can of fridge condenser cleaner and a brush and hope for the best. Walk them through the whole process on different types of equipment, like the various stainless steel prep tables in your kitchen.
Your training needs to cover:
- Safety First: Hammer home the importance of unplugging the unit before they even think about starting.
- Tool Usage: Show them the right way to use the soft brush and fin comb to avoid bending the delicate fins.
- Cleaner Application: Demonstrate how to apply the foaming cleaner for maximum coverage and effectiveness.
- "What Clean Looks Like": Grab a flashlight and show them the difference. A truly clean coil has light passing through it freely.
Investing just 30 minutes in this kind of hands-on training empowers your staff to do the job right and do it safely. It prevents costly mistakes and makes sure the task is actually effective. For a deeper dive into overall upkeep, our guide on commercial kitchen equipment maintenance offers great insights that tie right into this routine.
Incorporating Cleaning Into Regular Duties
The final piece of the puzzle is making condenser cleaning a totally normal part of the weekly or monthly workflow. The easiest way to do this is to tie it to existing cleaning tasks. For example, if the pizza line gets a deep clean every Saturday, that's the perfect time to clean the condenser on the pizza prep table, too.
When you integrate this task into established routines, it stops feeling like a special project and just becomes another standard operational step. This systematic approach ensures that your refrigeration units—the absolute lifeblood of your kitchen—are always running at peak efficiency, ready for the busiest service you can throw at them.
Frequently Asked Questions
Even with a solid plan, you'll always have a few questions before diving into a new maintenance task. Let’s tackle some of the most common ones we hear so you can get started with confidence.
Can I Just Use a Household Cleaner on My Commercial Condenser?
That's a common question and, unfortunately, a common mistake. It's a hard no on this one. Household cleaners just don't have the muscle to cut through the thick, greasy grime that builds up in a commercial kitchen.
Using the wrong stuff is ineffective at best. At worst, it can actually corrode and damage the delicate aluminum fins on the condenser coils. Always reach for a specialized, non-corrosive commercial fridge condenser cleaner. A good foaming cleaner is usually your best bet—it clings to the vertical coils, giving it time to break down the gunk without a ton of scrubbing. Many are even self-rinsing, using the unit's own condensation to wash away the residue.
How Do I Know if The Condenser Coils Are Actually Clean?
Your eyes are the best tool for this job. Once you think you're done, grab a powerful flashlight and take a close look at the condenser coils. You need to inspect them from a few different angles.
The real test is seeing light clearly passing all the way through the fins. What you're looking for is clean metal, not a fuzzy grey blanket of dust and grease. If you see any packed-in debris or matted buildup still stuck in there, it’s time for another round with the brush, vacuum, or foaming cleaner.
Does My Pizza Prep Table Need Cleaning More Often Than My Walk-In?
Absolutely. The cleaning schedule isn't about the type of fridge; it’s all about the environment it lives in. A pizza prep station is constantly surrounded by airborne flour, semolina, and grease. That unit's condenser is going to get clogged up fast, likely needing a cleanup every 30-60 days.
Your walk-in freezer, on the other hand, might have its condenser in a cleaner part of the kitchen or even outside. It could easily go 90 days or more between cleanings.
The only way to know for sure is to check every unit monthly when you first start. This will help you figure out a baseline for your specific kitchen. A kitchen that does a lot of frying, baking, or charbroiling will put a heavy load on every single condenser, no exceptions.
When Should I Call a Technician Instead of Cleaning?
Cleaning the condenser solves a ton of common cooling problems, but it’s not a magic bullet. Some issues are clear signs you need to put down the tools and pick up the phone.
If you've given the coils a thorough cleaning and the unit still isn't cooling right, runs nonstop, or is making some new, scary grinding noises, it's time to call in a pro. Don't mess with it.
Other big red flags that require an expert are:
- Visible refrigerant leaks. This usually looks like an oily film around the coils or tubing.
- Electrical problems. Is the unit constantly tripping the breaker? Call for help.
- A hot compressor. If the compressor is hot to the touch but the box is warm, something is seriously wrong.
Trying to fix these yourself without the right training is not only dangerous but can lead to much more expensive repairs and could even void your warranty.
For a wide selection of durable and efficient commercial refrigeration, including pizza and sandwich prep tables designed for the busiest kitchens, trust the experts at PrepTables.com. Find the perfect equipment to optimize your workflow at https://preptables.com.